Paper plates disappear fast at a Thanksgiving table, but the stack in your pantry might be the best craft supply you already own. A round plate turns into a turkey body, a pilgrim’s face, an owl on a branch, or a wreath ring in about the time it takes to preheat the oven. Most of these need nothing more than paint, scissors, and whatever construction paper is left over from the pumpkin patch trip.
This list skips the same five turkey templates you’ve probably already pinned twice. There’s a rocking turkey that wobbles on the table, a pumpkin pie slice made from tissue paper, a woven gratitude placemat, and two games built entirely out of leftover plates. Some need paint and a drying window, others come together with just glue and scissors while the oven timer runs in the background.
Grab a stack of plates, cheap ones work fine here, and pick a few categories below based on how much mess (and time) you’re up for today.
Turkeys That Don’t All Look the Same
The turkey is the obvious starting point, so here are five that skip the identical fanned-feather template you’ve probably seen everywhere else.
1. The Rocking Turkey
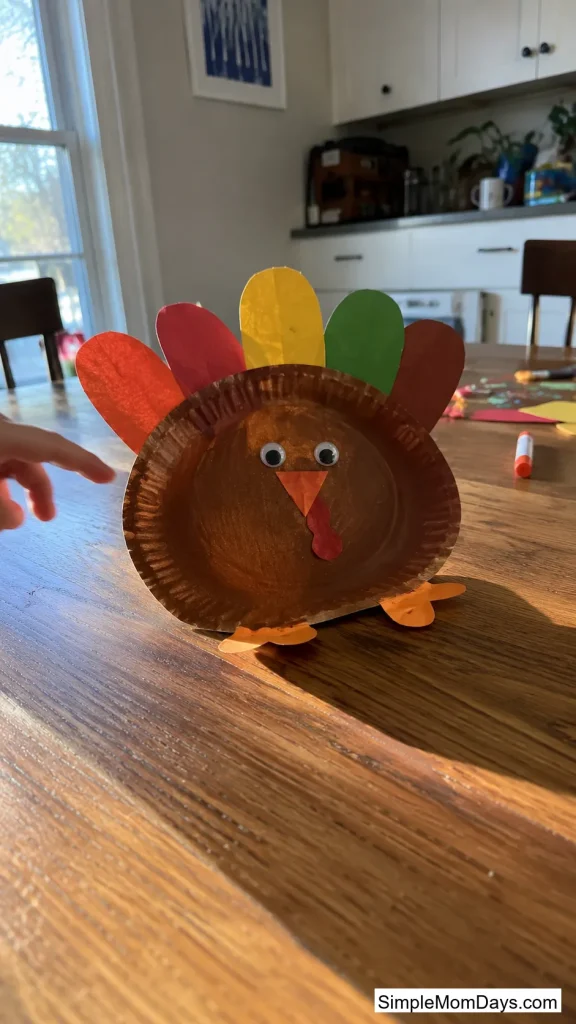
Glue a folded paper plate to the back of a painted turkey plate and it turns from a flat decoration into something that rocks side to side when nudged. Paint the front plate brown, then glue on a construction-paper head, feet, and a spread of feathers along the top rim.
The wobble is what makes this one stick with kids longer than a static turkey does; they’ll set it rocking over and over before it ever gets glued down for good. It also holds up better as a centerpiece since it doesn’t lie flat and get knocked around during dinner.
Dollar-store 9-inch plates work fine here. Let kids free-hand the feather shapes instead of using a template; uneven ones actually end up looking more like real feathers.
2. Fold-Up 3D Feathers
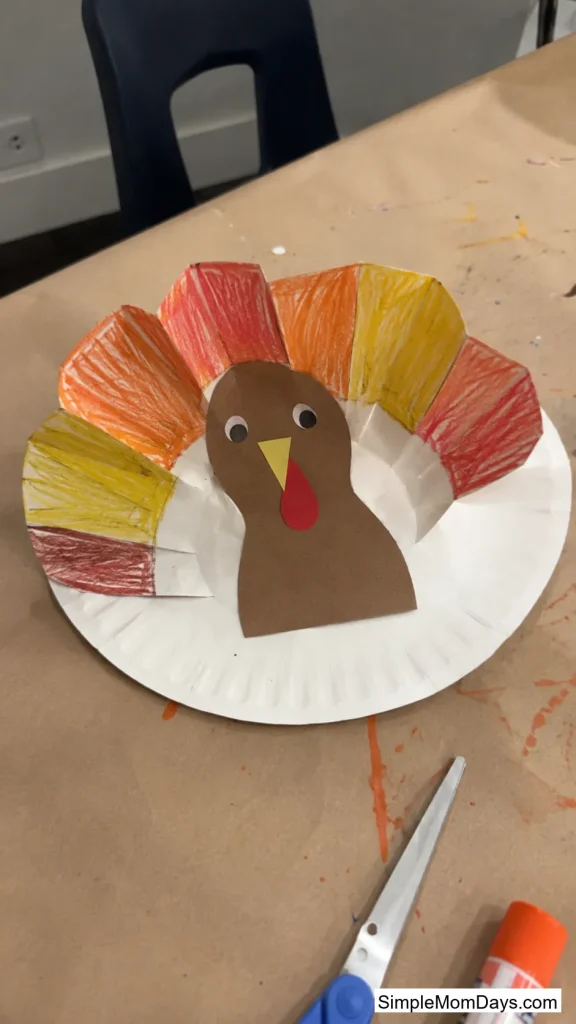
Instead of gluing paper feathers flat against the plate, cut a ring around the inside edge of a painted plate, then fold that inner section up and forward so it stands away from the surface. The fold gives the tail real depth instead of a flat painted outline.
This kind of cut-and-fold combo builds scissor skills without needing a printed template, and the finished turkey looks noticeably more three-dimensional sitting on a shelf than a plain painted circle does.
This one works best for kids who’ve had some practice with kid scissors already, since the cut has to stay close to the fold line to look right.
3. Rolled-Cone Feather Fan
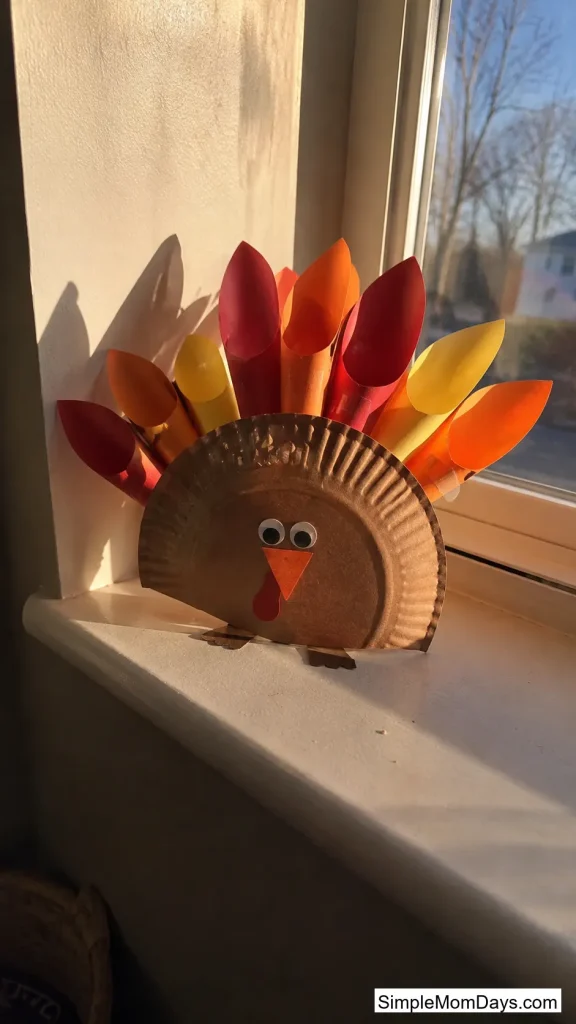
Paint small paper squares in warm fall colors, roll each one into a cone, and tape the seam shut. Once there’s a handful of cones, arrange them in a fan shape and staple the whole group to the back of a plain paper plate turkey body.
The rolling motion is a real departure from the usual glue-and-cut feather routine, and it gives every turkey a slightly different fan shape depending on how tight each kid happens to roll their cones.
Ten to twelve cones make a full-looking tail. Regular tape holds the rolled seam better than a glue stick does.
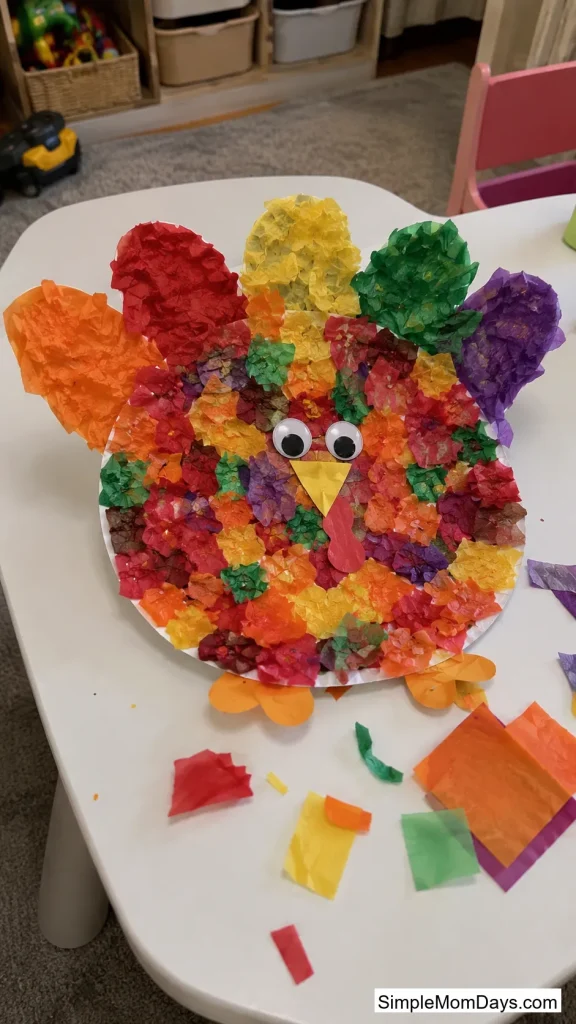
4. Tissue-Paper Fluff Turkey
Skip the paintbrush entirely and glue crumpled squares of tissue paper across the whole plate instead. The texture comes out puffy and soft-looking rather than flat, and there’s zero drying time to plan a craft session around.
This is the one to reach for with toddlers and younger preschoolers, since crumpling paper and dabbing on glue is an easier motion than painting inside the lines. Mixed tissue colors give it a natural, blended feather look without any actual color-mixing skill required.
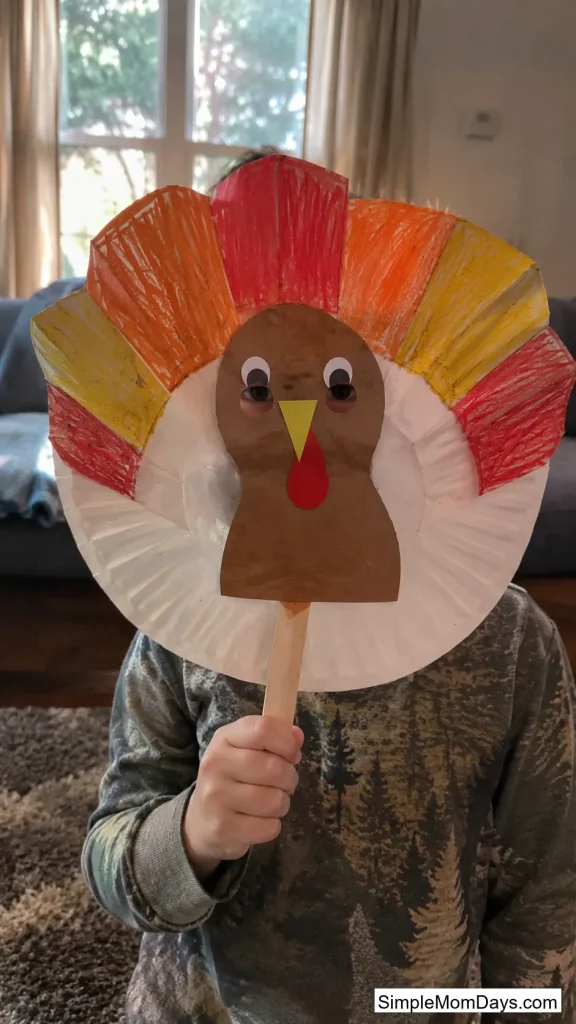
5. Wearable Turkey Mask
Cut two eye holes into the center of a painted plate, glue construction-paper feathers around the rim, and tape a craft stick or paint stirrer to the back as a handle. Held up to the face, it turns the craft into a few minutes of pretend play before it ever makes it to the fridge.
It’s a solid pick for keeping a group of kids busy at the same table on Thanksgiving Day itself, since it doubles as a prop for gobbling around the room once the glue has set.
Cut the eye holes before painting if a younger child is doing the assembly; wet paint around freshly cut edges tends to tear.
Pilgrims and the Mayflower Voyage
These bring a little history into craft time along with the glue and glitter.
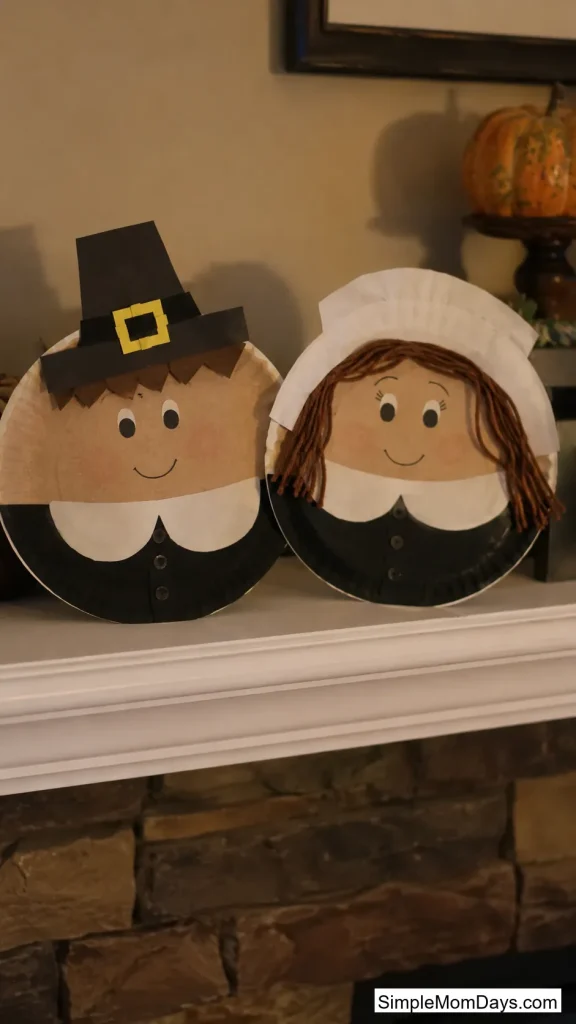
6. Pilgrim Boy and Girl Pair
Paint one plate a skin tone for the face, then build a boy with a black construction-paper hat and buckle, and a girl with a white bonnet and collar. Making the pair side by side gives kids a reason to compare outfits and ask questions about who wore what.
It turns into a small history lesson without ever feeling like one. A curious “why does he have that hat?” from a four-year-old opens the door to talking about who the Pilgrims actually were.
Yarn works well for hair on both plates, and a black marker handles the simple facial features faster than cutting tiny paper pieces.
7. The Sailing Mayflower
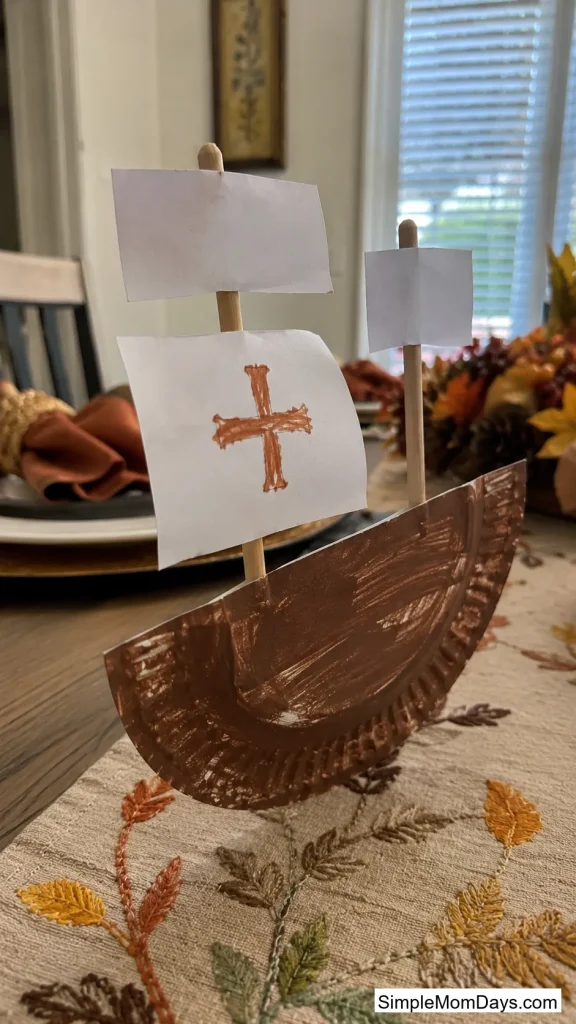
Cut a paper plate in half for the hull, paint it brown, and glue two craft sticks upright as masts. Cut paper triangles for sails, poke a small hole in each one, and thread them onto the sticks so they can be adjusted or swapped out later.
Kids get to talk through what the ship actually carried and how long the crossing took while they’re building it, which sticks in memory better than reading it off a page. The finished boat stands upright on its own hull, ready for a pretend voyage across the living room floor.
A hot glue gun, adult-handled, keeps the masts from tipping once the paint has dried; regular glue can take a while to hold at that angle.
8. Buckle Hat Headband
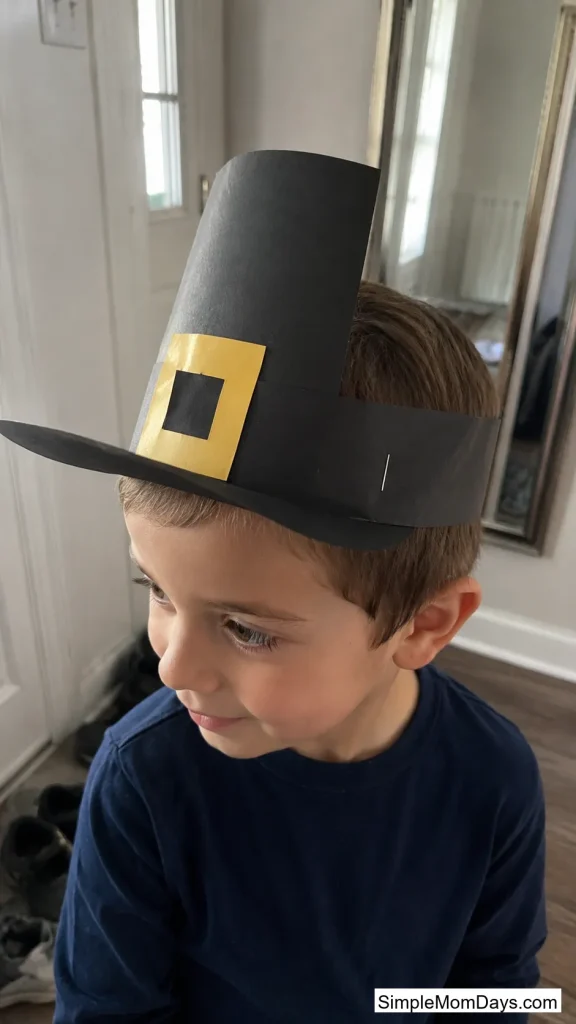
Cut the center out of a small paper plate to make a wide brim, then glue a tall black paper cone to the top for the crown and a yellow paper buckle to the front. Attach a strip of poster board sized to fit a child’s head, and the plate turns into a wearable pilgrim hat instead of a flat decoration.
Turning a paper plate into headgear rather than a tabletop piece keeps kids moving and gives them something to actually wear at the table, which holds their attention longer than most crafts that just sit and dry.
Measure the headband strip around the child’s head before stapling it closed; a hat that’s too snug won’t survive an excited kid running around before dinner.
9. Standing Pilgrim Place Cards
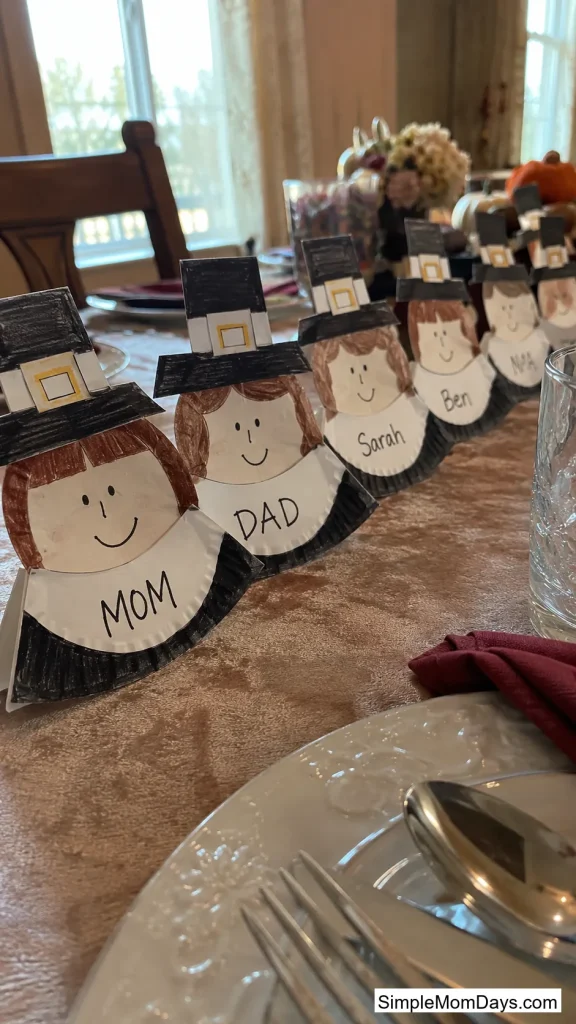
Fold a small paper plate in half, decorate the front half as a simple pilgrim face with a hat or bonnet, and it stands upright on the fold like a tent card. Write a guest’s name across the collar in marker and set it at their spot at the table.
This one does double duty as a craft and as actual table decor, worth the extra few minutes over a craft that just ends up on the fridge. Kids old enough to write can handle the names themselves as a bit of handwriting practice.
Make one per guest ahead of time and let kids assembly-line the faces; it goes faster than building them one at a time.
Wreaths From the Backyard and the Craft Drawer
All four of these start the same way, cutting the center out of a plate to make a ring, then head in completely different directions from there.
10. Real Fall Leaf Wreath
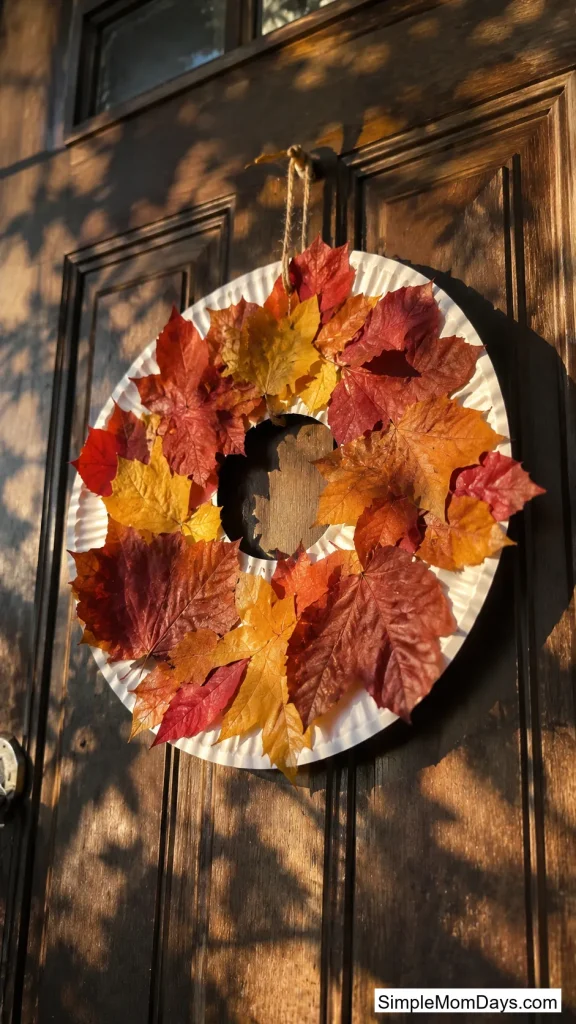
Send kids outside to collect a pile of leaves in as many colors and shapes as they can find, then cut the center out of a paper plate and glue the leaves around the ring, overlapping as they go. There’s no painting or template involved, just gluing and arranging.
Real leaves give the wreath a texture and smell construction paper can’t match, and the outdoor collecting turns into its own twenty minutes of activity before the gluing even starts.
Press extra leaves flat under a heavy book overnight first if they’re curling too much to lie flat against the ring.
11. Thankful Leaf Wreath
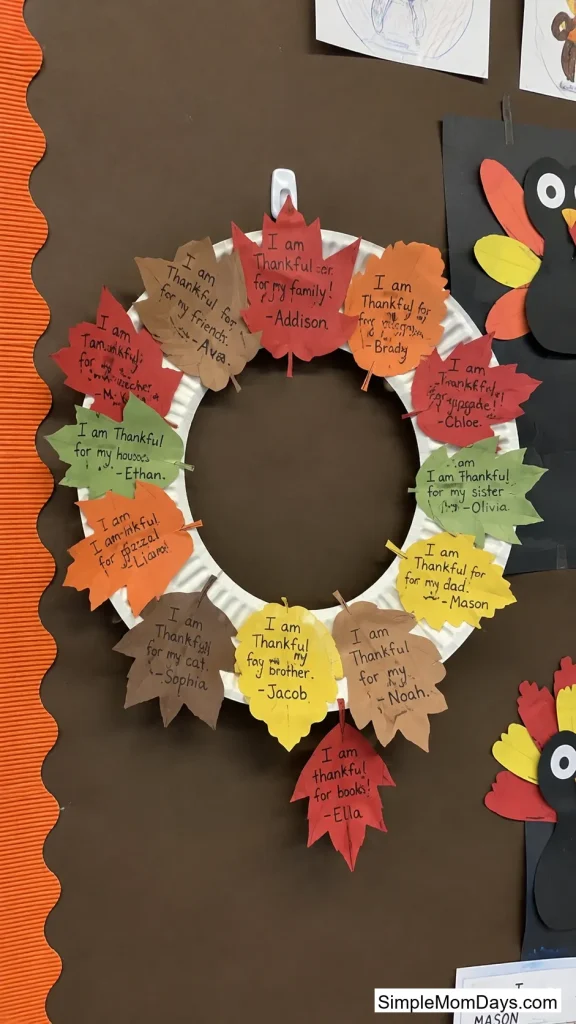
Use the same ring base, but glue on paper leaf cutouts instead of real ones, and have kids write something they’re grateful for on each leaf before it goes on the wreath. A blank banner glued across the center can hold a bigger message like “we are thankful.”
The writing step turns a fine-motor craft into a gratitude activity too, and it’s one families tend to want to keep year after year instead of tossing at the end of the season.
Eight to ten leaves cover a standard-size ring without leaving bare spots showing through.
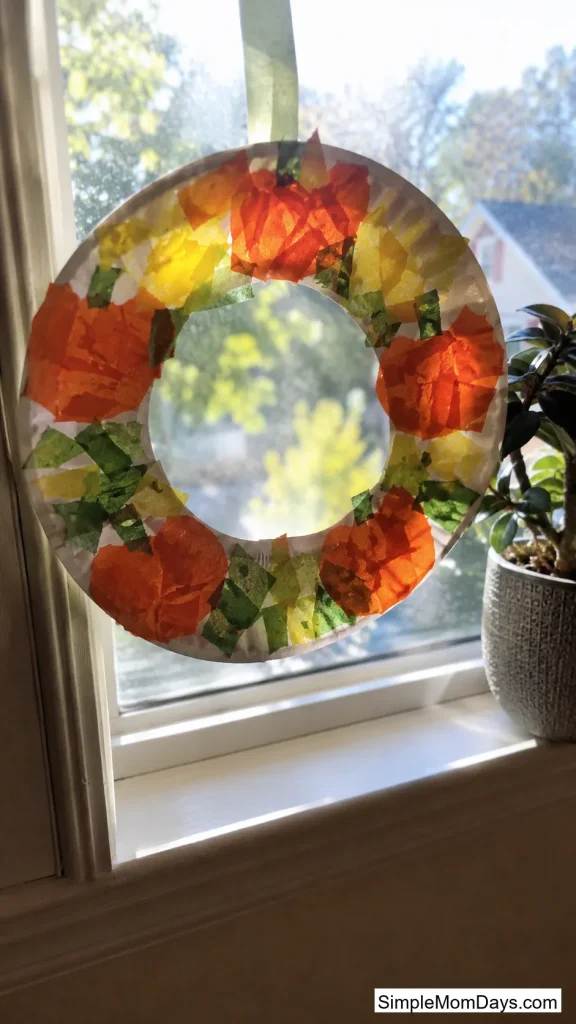
12. Torn-Paper Pumpkin Wreath
Tear, don’t cut, orange, yellow, and green paper into small irregular pieces, then glue them onto a plate ring in loose clusters shaped like little pumpkins with green paper leaves scattered between them.
Tearing paper is a fine-motor task even very young kids can manage without scissors, so this is the wreath to hand a toddler while older siblings tackle something with more steps.
A glue stick spread thick across small sections works better than trying to dot individual pieces with liquid glue.
13. Woven Corn-Husk Wreath
Cut evenly spaced slits around a paper plate ring, then weave narrow strips of yellow, orange, and cream paper (or ribbon) in and out through the slits all the way around, to mimic dried corn husks.
Weaving builds hand coordination in a way plain gluing doesn’t, and it leaves the wreath with real texture and pattern instead of a flat surface covered in glued-on pieces.
Cut the slits before handing the plate to a child; the weaving is the fun part, while slit-cutting is easier done as adult prep in advance.

Harvest Table Characters
These land somewhere between craft and decoration, the kind of thing that ends up as a centerpiece instead of stuck on the fridge.
14. Fingerprint Indian Corn
Paint the center of a plate yellow, then have kids dip a finger in orange, red, and brown paint to dab kernels across the surface in rows. Paint the outer rim green for the husk, or glue on green paper leaves once everything is dry.
Fingerprinting the kernels means there’s no fine detail work required, so it works even for kids too young to handle a paintbrush with much control, and every ear of corn comes out looking a little different.
Let each color dry for a minute before adding the next one, or the dots blend into a muddy brown instead of staying distinct.

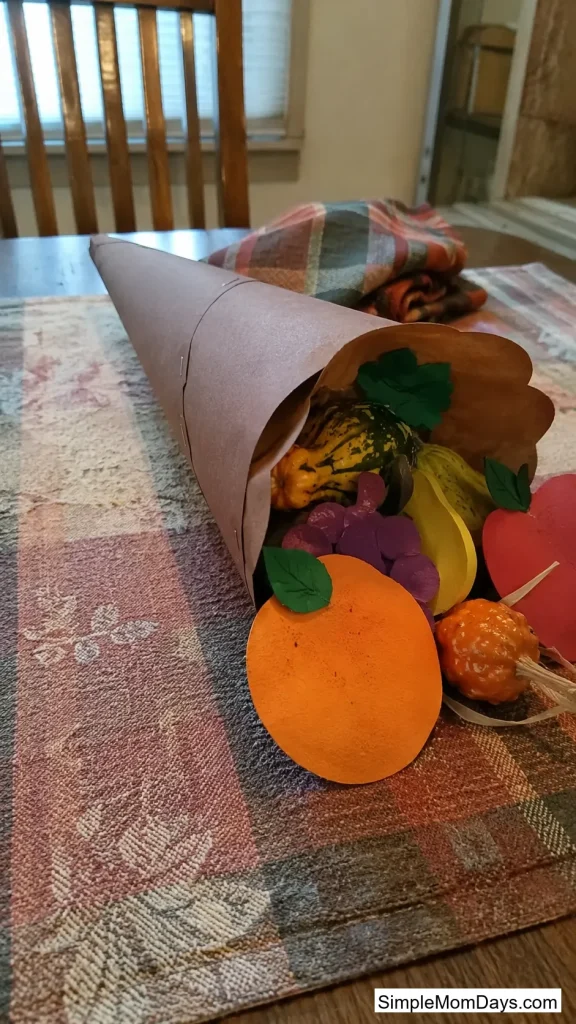
15. Rolled Cornucopia Basket
Paint a paper plate brown on both sides, let it dry completely, then roll it into a cone shape and staple the seam closed. Once it holds its shape, fill the open end with paper fruit and vegetable cutouts, or real mini gourds if it’s sturdy enough to hold the weight.
Watching a flat circle turn into a 3D basket is a small but genuinely satisfying transformation for kids, more so than a craft that just stays flat the whole way through.
Thicker paper plates roll and hold their shape better than the flimsiest dollar-store kind; a stapler works faster than glue for the seam.
16. Owl on a Branch
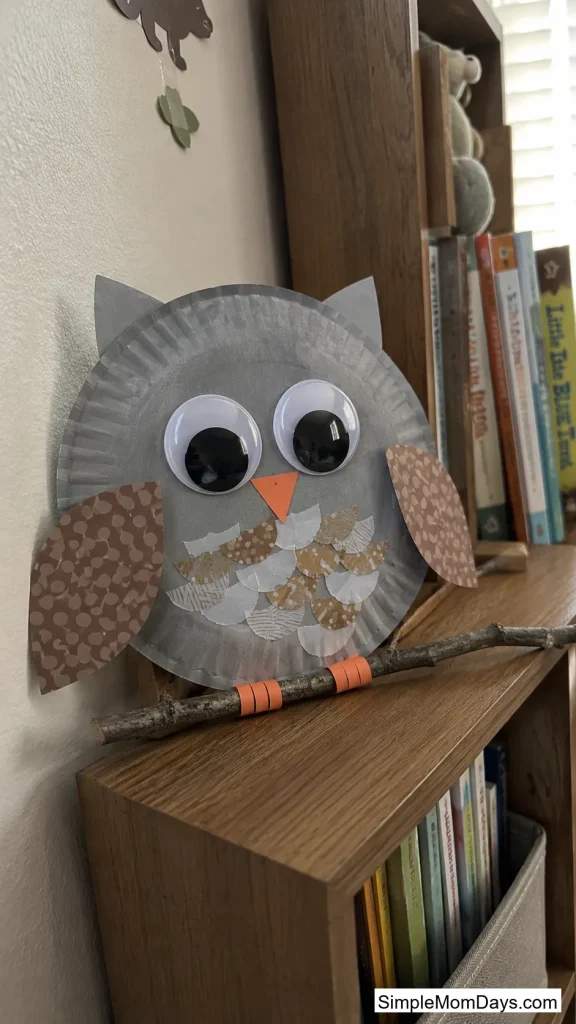
Paint a plate in warm browns or grays, then add two large circle eyes, a triangle beak, and paper wings glued on at an angle. Glue the finished owl onto a strip of brown paper or a real twig so it looks like it’s perched on a branch.
Owls make a nice break from the usual turkey-and-pumpkin lineup, and since fall and Thanksgiving crafts overlap so much, this one works right through the whole season instead of getting packed away in early November.
Oversized googly eyes make the biggest visual difference here; don’t skimp and use small ones.
17. Scarecrow Face
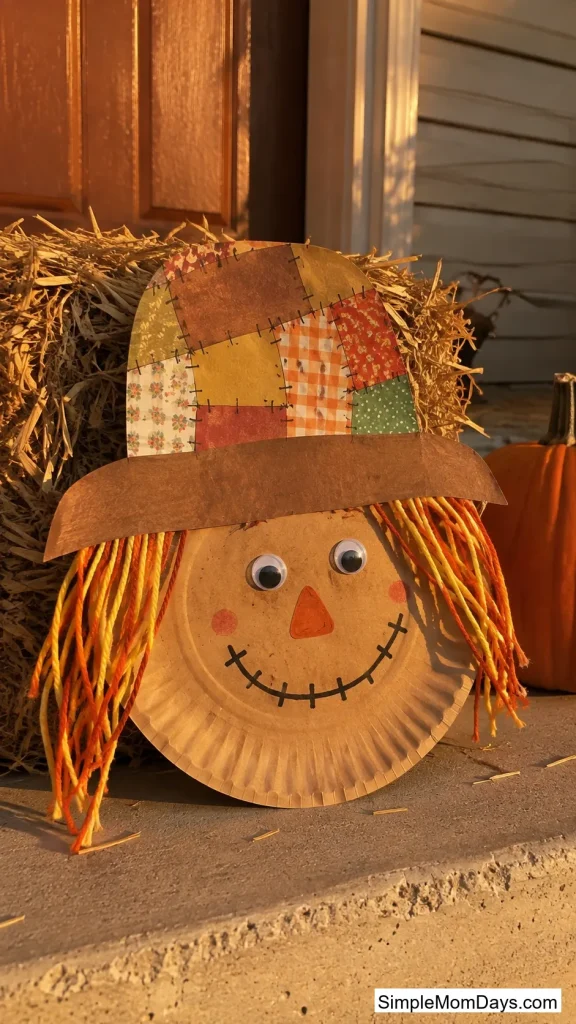
Paint a plate to look like burlap or straw-colored fabric, then add a triangle nose, a stitched-looking mouth in marker, and a patchwork paper hat glued at an angle across the top. Yarn glued around the edges makes straw-like hair poke out from under the hat.
The patchy, imperfect look scarecrows are supposed to have means there’s no real way for a kid to “mess up” this craft, which makes it a low-pressure pick for a child who gets frustrated when things don’t look neat.
Raffia works even better than yarn for the hair if there’s any lying around, since it already looks like straw.
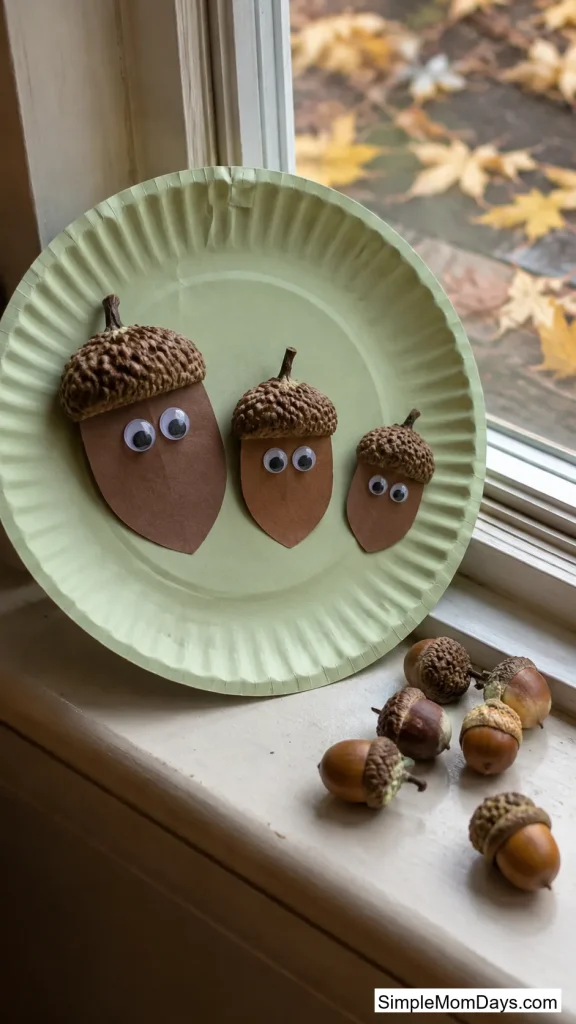
18. Acorn Trio
Cut three different-sized oval shapes from tan or brown paper for the acorn bodies, then glue a small brown half-circle cap on top of each and add googly eyes. Arrange the trio across a plain paper plate so it reads as a little family of acorns.
Working with multiple small shapes instead of one big one gives older kids more to actually do with scissors, while the finished piece stays simple enough for a preschooler to help assemble.
A plate painted pale green as a grassy background makes the acorns pop more than leaving the plate white.
Pumpkin Crafts That Aren’t Just a Painted Circle
Pumpkin ideas get repetitive fast, so these three lean into different techniques instead of the standard paint-and-face routine.
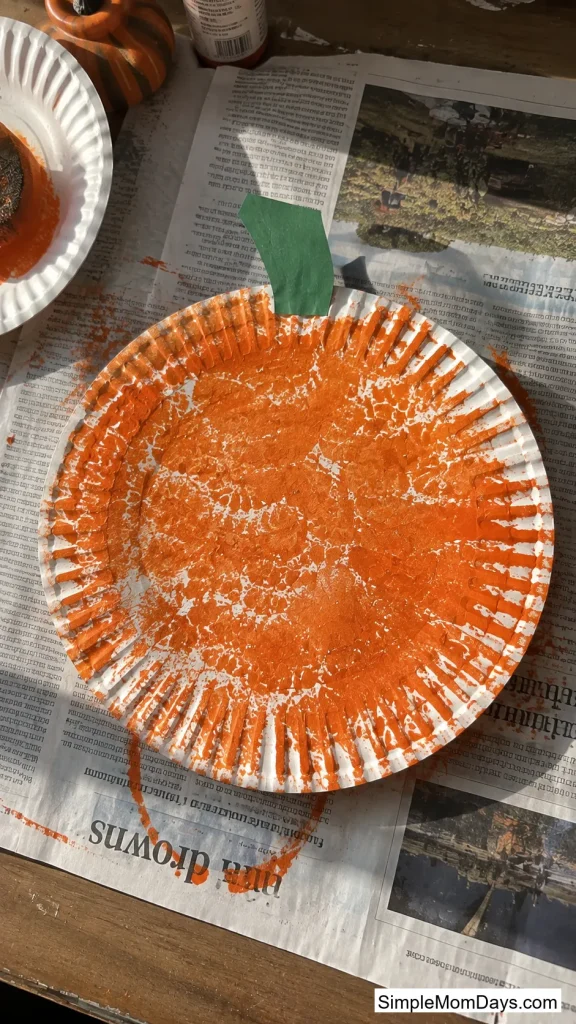
19. Mini-Pumpkin Stamped Texture Plate
Dip a small real pumpkin (or a large marble, in a pinch) in orange paint and roll or press it across a paper plate to build up a textured, ridged surface instead of a flat coat of paint. Add a green paper stem and leaf once it’s dry.
The stamped texture actually looks closer to a real pumpkin’s ridges than a paintbrush ever manages, and rolling a pumpkin around a plate is a genuinely different sensory experience than holding a brush.
Lay down newspaper first; rolling paint tends to fling further than brushing it does.
20. Pumpkin Pie Slice
Cut a paper plate into a wedge shape, cover the wedge in orange tissue paper squares for the filling, then staple an accordion-folded strip of brown paper along the curved edge for a crimped crust. Two glued-on cotton balls finish it off as a dollop of whipped cream.
It’s a fun one to make right around actual pie time, since kids can compare their paper slice to the real dessert sitting on the counter waiting for dinner.
Tearing the tissue paper into rough squares ahead of time speeds this one up for younger kids who’d otherwise spend the whole craft cutting tiny pieces.

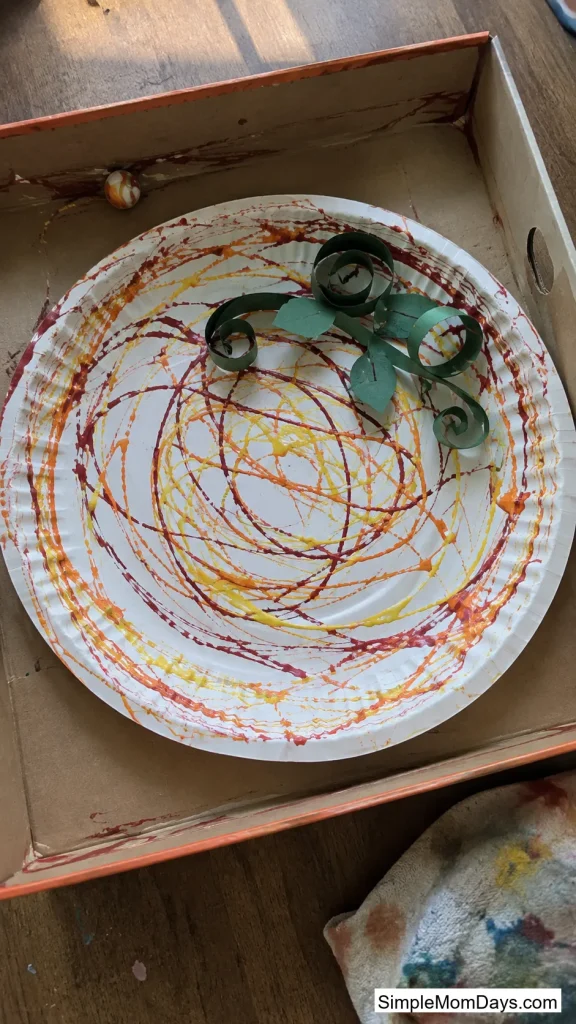
21. Marbled Pumpkin
Drop a marble (or a few) into a shallow box lined with a paper plate, add small dabs of orange, yellow, and red paint, and tilt the box side to side so the marble rolls through the paint and leaves swirled trails across the plate.
The swirl pattern comes out different every time, which makes this one satisfying to repeat two or three times in a row just to see what shows up next. Add a stem and a curled green vine once it dries to finish the pumpkin shape.
A shoebox lid contains the marble far better than trying this out on an open table.
Gratitude Keepsakes for the Table
These lean into the actual meaning of the holiday a bit more than the animal and character crafts above.
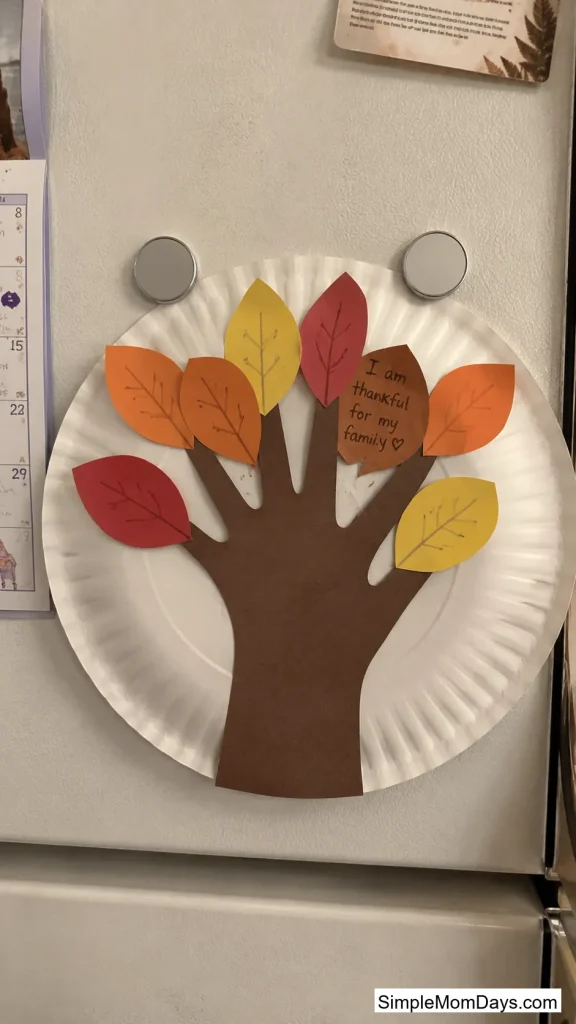
22. Handprint Thankful Tree
Trace a child’s hand and forearm onto brown paper, cut it out, and glue it to a paper plate so the fingers spread out like bare tree branches. Cut small paper leaves in fall colors, write one thing the child is thankful for on each leaf, and glue them onto the branch tips.
The handprint becomes a keepsake of a specific size and shape a child will only have for that one year, which makes this one worth setting aside rather than tossing at the end of the season the way a lot of quick crafts get.
A handful of five or six leaves is plenty for younger kids; older kids who can write longer sentences may want a bigger tree with room for ten or more.
23. Woven Gratitude Placemat
Cut evenly spaced slits from the center of a paper plate outward, almost to the rim, then weave strips of colored paper in and out through the slits, alternating over-and-under as you go around, until the whole plate is covered in a woven pattern.
Paper weaving is a solid fine-motor exercise on its own, and turning it into something a kid actually uses, a placemat sitting under their plate at Thanksgiving dinner, gives the finished project a purpose beyond just sitting on display.
Wider strips, about an inch, are far easier for small hands to weave than narrow ones; cut the slits with a ruler as the adult prep step.

24. Turkey Place Card Holder
Build a small turkey face on a folded paper plate wedge so it stands upright on its own, then cut a small slit in the front just below the face and slide a folded index card with a guest’s name through it.
It solves an actual logistical need at a crowded Thanksgiving table, telling everyone where to sit, while still being simple enough for a kid to build one for every seat.
Cut the slit before decorating; cutting into a fully glued, dry turkey risks tearing off a wing or feather that’s already attached.

25. Spin-the-Gratitude Wheel
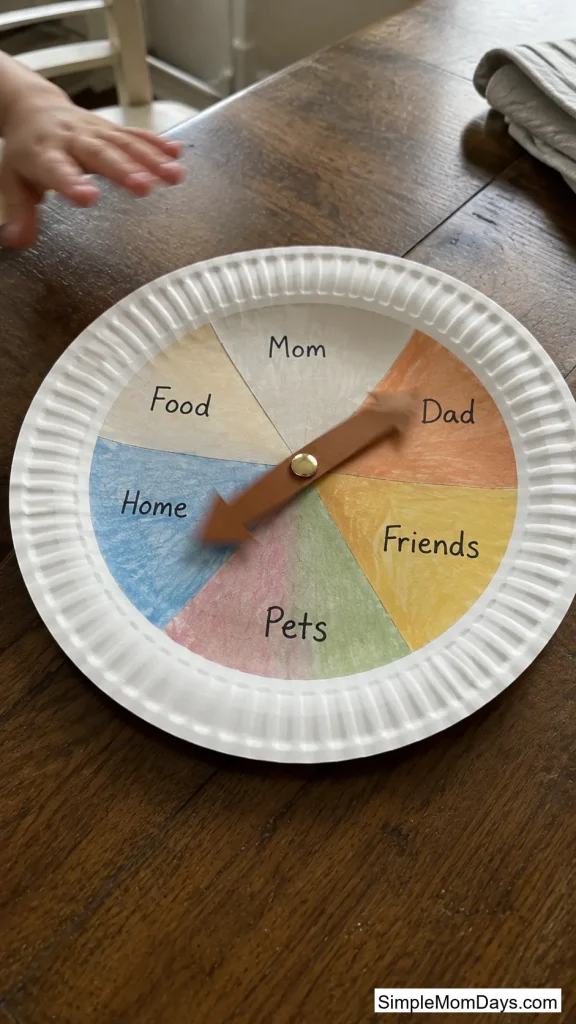
Divide a paper plate into six or eight sections with marker lines, write or draw a different thing to be thankful for in each section, then attach a paper arrow to the center with a brass fastener so it spins freely.
Passing it around the table before the meal turns a paper plate craft into an actual shared activity, spinning the arrow and talking about whatever it lands on instead of just displaying a finished piece.
A brass paper fastener works better than tape or glue for the spinner, since it needs to rotate loosely without falling off.
Thanksgiving Games Built From a Stack of Plates
The last two turn leftover plates into something to actually play with once the crafting itself is done.
26. Feather Beanbag Toss
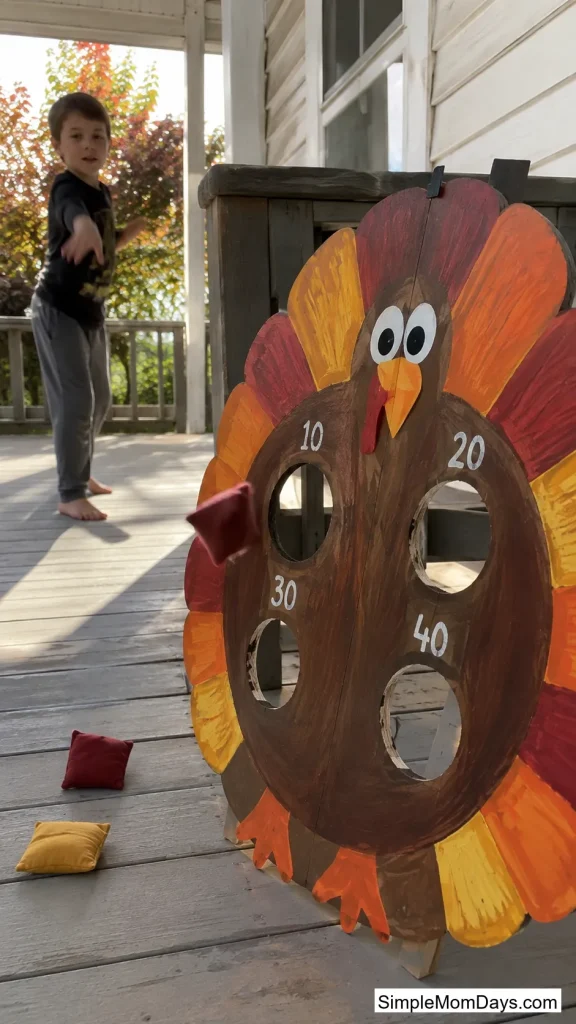
Paint a turkey body across a paper plate, then cut three or four round holes into the body large enough for a small beanbag to pass through. Prop the plate against a box or lean it on a wall, stand back a few steps, and toss small fabric squares or rolled-up socks through the holes.
It gets kids up and moving during the stretch of time between dinner and dessert, which is exactly when a room full of relatives usually needs something to occupy the youngest guests.
Number each hole for different point values if older kids want to turn it into a scored game.
27. Turkey Ring Toss
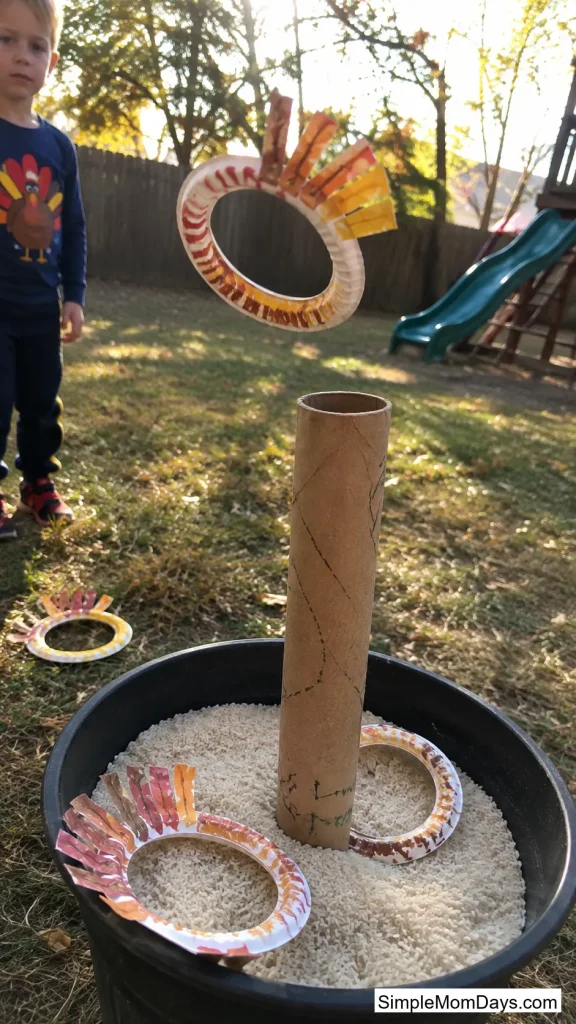
Cut the centers out of several small paper plates to make rings, the same way you’d start a wreath, then decorate each one as a mini turkey tail or pumpkin. Stand an empty wrapping paper tube upright in a bucket filled with sand or dried rice, and take turns tossing the rings to land around it.
This one reuses the exact same ring-cutting step as the wreaths above but turns it into an active game instead of a wall decoration, a good way to use up a leftover stack of plates that didn’t make it into anything else on this list.
Not every one of these needs to happen in the same afternoon. Pick two or three that match the ages at your table, mostly gluing and gratitude for the youngest kids, paint and cutting for the ones with steadier hands, and set the rest aside for next year’s stack of plates.