Construction paper, scissors, and a glue stick can fill an entire rainy October afternoon, and you probably already have everything you need in a drawer somewhere. That’s the real appeal of paper crafting for Halloween: no paint to dry, no oven timers, no supply run to the craft store. Just cutting, folding, and gluing shapes into bats, ghosts, and pumpkins.
The list below runs from two-minute folds a toddler can manage to paper engineering projects that will actually challenge a ten-year-old. Pick a few from each section and you’ll have decorations, party favors, and keepsakes covered without repeating the same jack-o’-lantern cutout nineteen times.
Five-Minute Folds for Little Hands
These need almost no setup and forgive shaky scissor lines, which makes them a good starting point for kids under six.
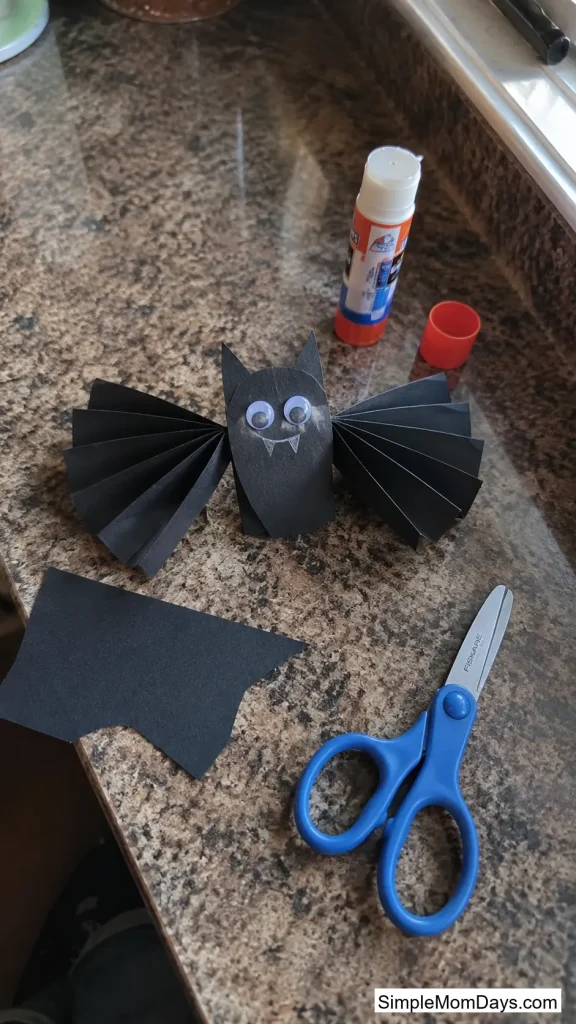
1. Accordion-Fold Bat
Fold a rectangle of black paper back and forth like a paper fan, then pinch the middle and let both sides fan open into a set of wings. Glue on a separate round head with two triangle ears and the bat is done.
The accordion motion is what makes this worth including over a flat bat cutout — small hands get real practice with repeated, even folds, and the finished wings actually have movement to them when you tap the bat on a table.
A single sheet of paper makes one bat in about three minutes, so this is the one to reach for when you need a dozen bats for a garland in one sitting.
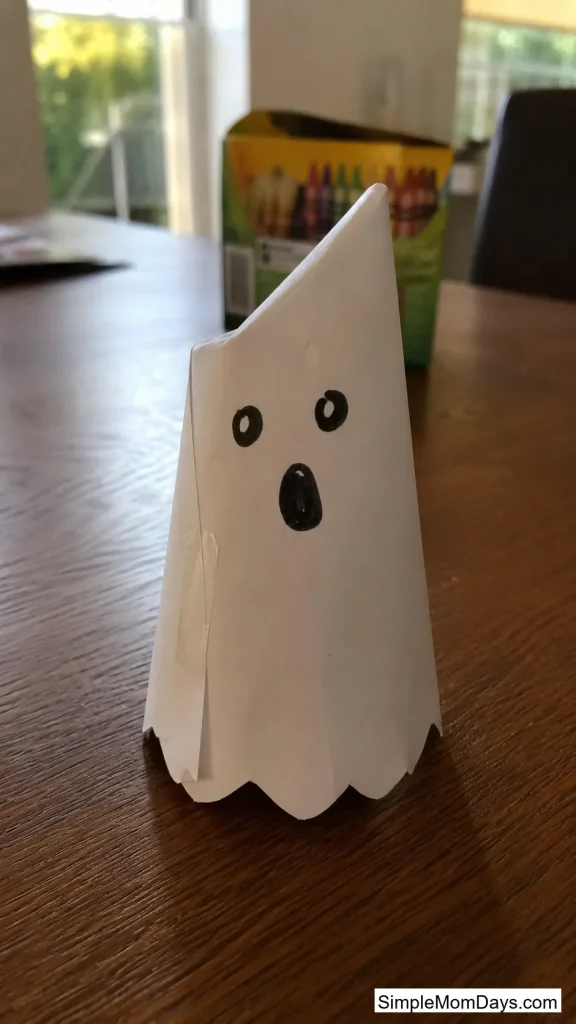
2. Cone Ghost Puppet
Roll a half-circle of white paper into a cone, tape the seam, and draw a face near the top. Slide a finger up through the open bottom and the ghost “floats” as you move your hand around.
Unlike a flat ghost shape taped to a popsicle stick, the cone gives kids something to actually play with after the craft is over — it becomes a puppet, not just a decoration.
Cut the bottom edge in a scalloped or jagged line before rolling it up for a floatier, less geometric silhouette.
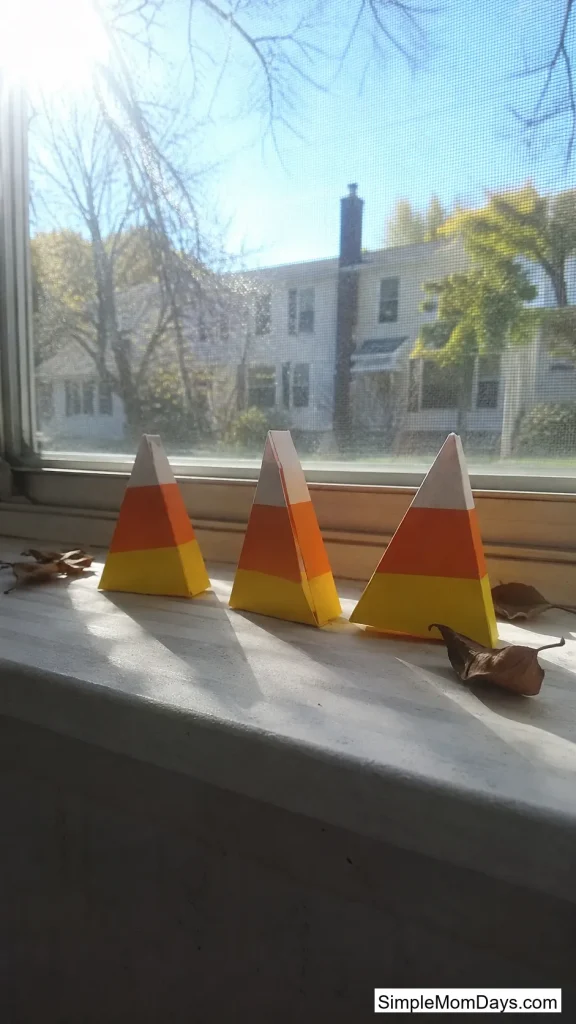
3. Folded Candy Corn Standees
Cut a triangle from yellow, orange, and white paper stacked and offset like a real candy corn, then score two horizontal fold lines so the triangle stands up on its own like a little tent card.
Standing pieces read as more finished than flat cutouts taped to a wall, and a row of them across a windowsill or shelf edge looks intentional rather than thrown together.
Kids around age four can manage the stacking and gluing even if an adult handles the scoring.
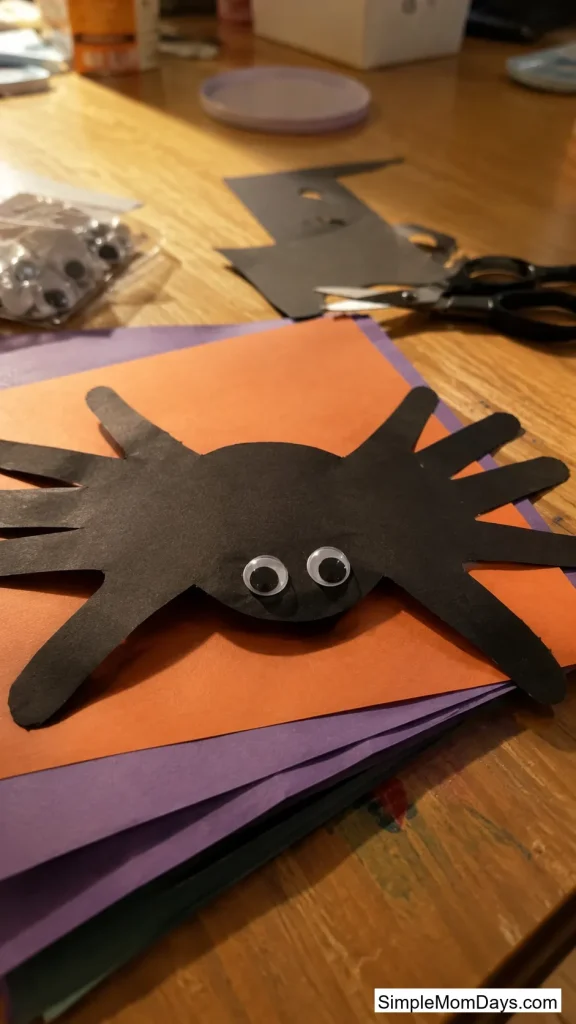
4. Traced-Hand Paper Spider
Trace a child’s hand twice on black paper, cut both out, and glue the four fingers of each hand together at the wrist to form eight spider legs. Add a round body and googly eyes in the gap where the wrists meet.
Because the legs come from an actual handprint, no two spiders turn out identical, and the size scales naturally with whichever kid is making it.
Keep a few of these — they double as a growth marker if you make one every October and label the year on the back.
Scissor-Practice Cutouts
This group leans on straight cuts, curved cuts, and fringing — good territory for kids who’ve moved past basic snipping but aren’t ready for anything with measurements.
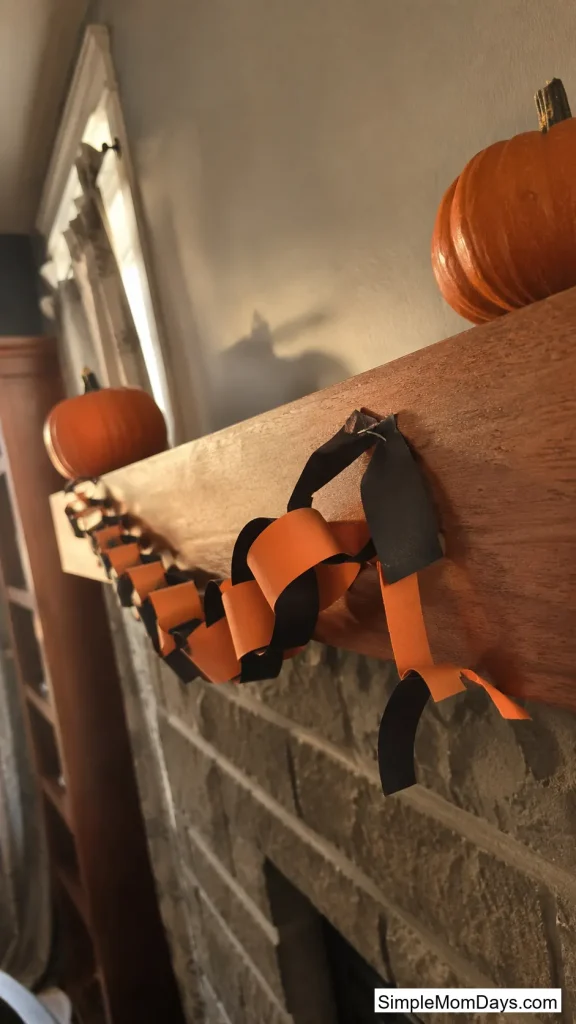
5. Loop-Chain Countdown Garland
Cut strips of orange and black paper, loop the first one into a circle, thread the next strip through before sealing it, and keep going until the chain reaches however long you want.
Make it exactly 31 links and let kids tear one off every night leading up to Halloween — it turns a decoration into a countdown they check daily.
Strips about an inch wide work best; thinner strips tear at the glue seam before the chain gets any real length.
6. Silhouette Window Clings
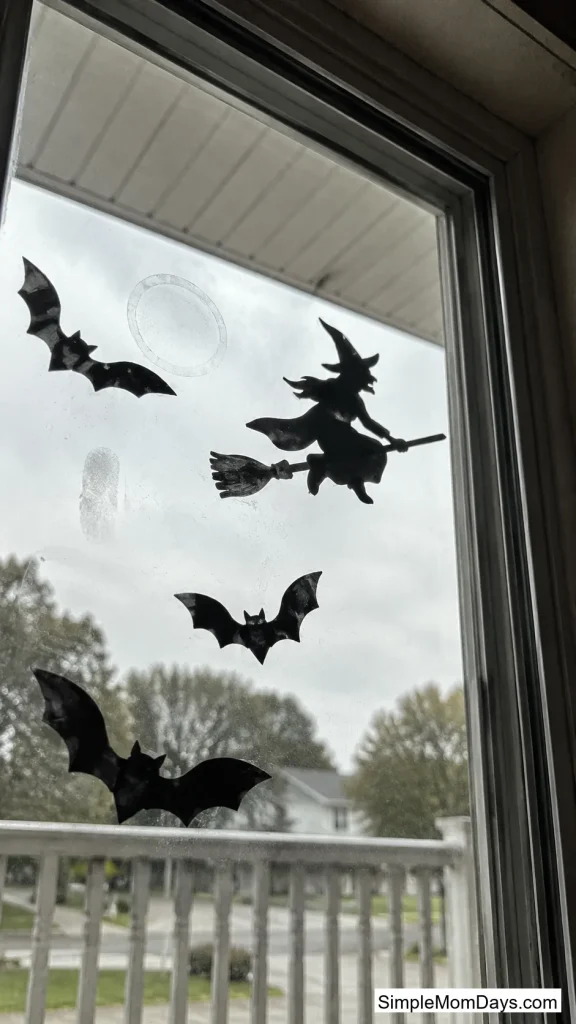
Cut witch, cat, or bat shapes from black paper and press them onto a window with a light mist of water instead of tape — the paper clings on its own and peels off clean later.
From outside, the shapes read as sharp black silhouettes against daylight, which looks more like a storefront display than a typical taped-up classroom cutout.
This one skips glue entirely, so it’s a good pick for a kid who’s tired of sticky fingers by the fifth craft of the afternoon.
7. Doily Spiderweb
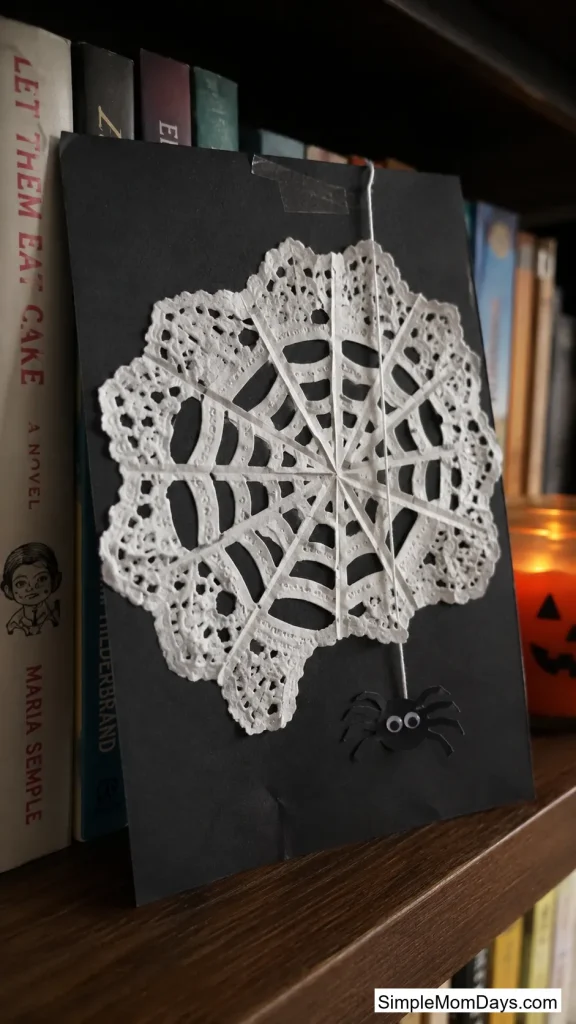
Fold a paper doily or a circle of white paper in quarters, snip a few triangular notches along the folded edges, and unfold to reveal a lacy web pattern. Mount it on black paper for contrast.
The fold-and-snip method means the web comes out symmetrical even if the cuts themselves are a little wobbly, which takes the pressure off getting a “perfect” web freehand.
Add a small paper spider dangling from a thread taped to the center for a finished, layered look.
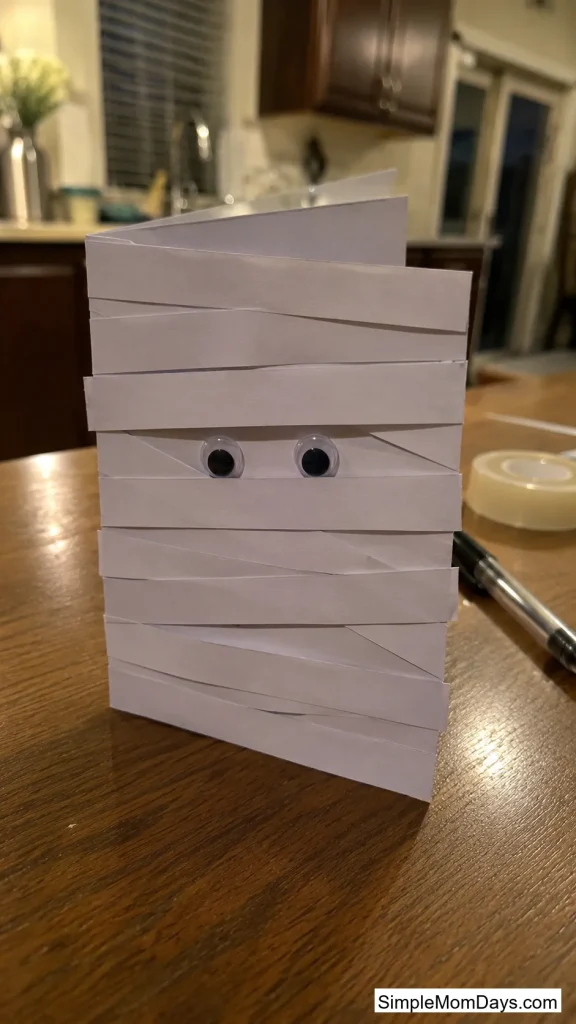
8. Fringe-Cut Mummy Card
Cut narrow fringe strips into a rectangle of white or tan paper and glue the strips in overlapping rows across a folded card, leaving a gap for two glued-on eyes.
Repeated fringe cutting is one of the better scissor drills out there, and this version turns the drill into an actual keepsake instead of a worksheet.
Write a Halloween message inside and it works as a trick-or-treat thank-you note for grandparents.
Pop-Up and Moving Paper Toys
These involve a bit more precision — mostly scoring and slit cuts — and reward the extra effort with something that actually moves.
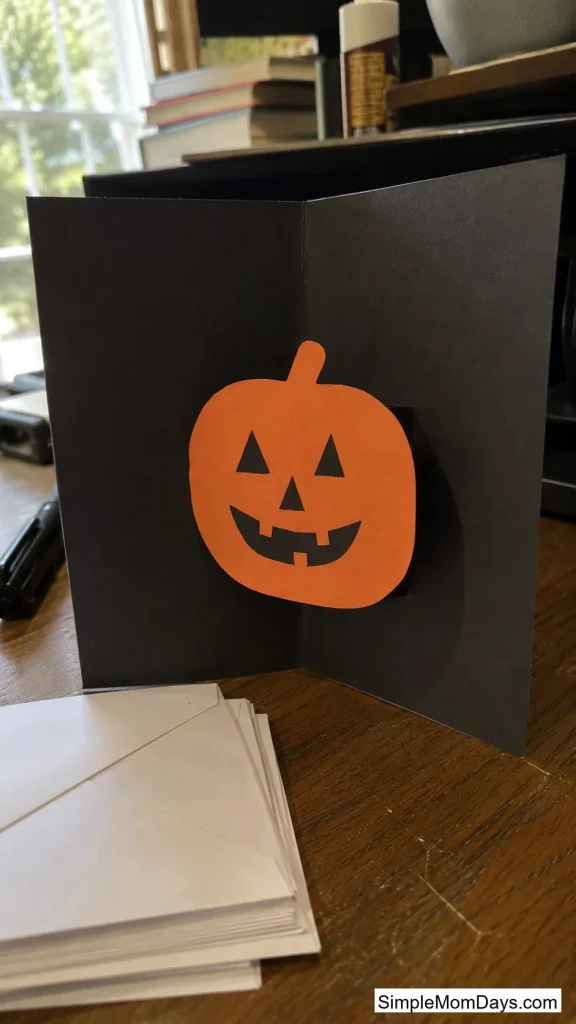
9. Pop-Up Jack-o’-Lantern Card
Cut a V-shaped slit into the fold line of a card, push the flap through to the inside, and glue an orange pumpkin face onto the flap so it pops forward when the card opens.
The pop-up mechanism is simple enough for a seven-year-old to follow but looks like a store-bought greeting card once it’s folded shut.
Making a small batch doubles as Halloween party invitations, which saves a separate trip to buy any.
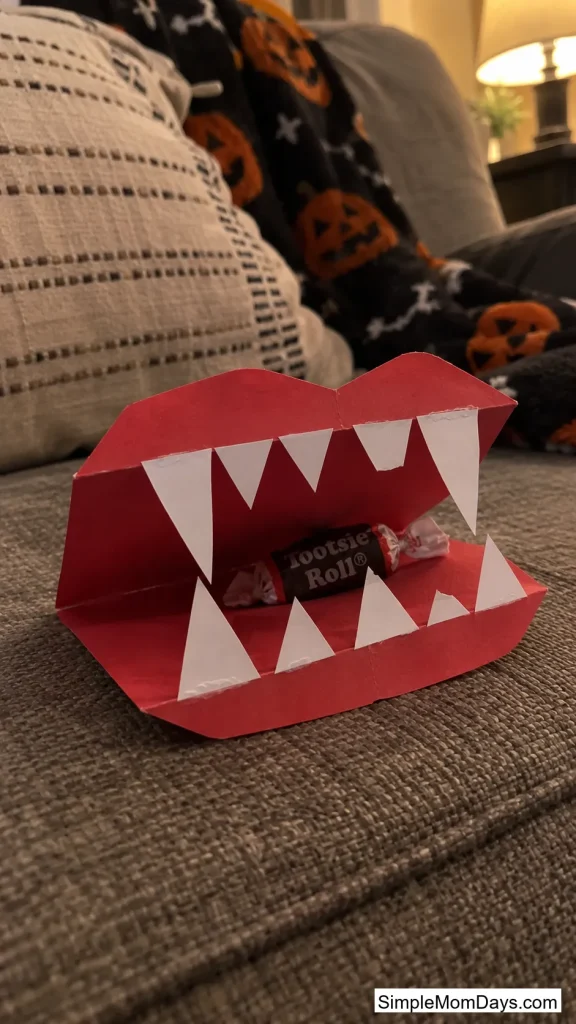
10. Snapping Vampire Mouth
Fold a rectangle of red or black paper in half, cut a jagged row of white paper fangs, and glue them along the fold so the mouth opens and snaps shut when you pinch the sides.
Kids get an oddly satisfying amount of mileage out of just opening and closing it, which makes this one of the few crafts that stays in play well after the glue dries.
Slide a small piece of candy inside before handing it to a sibling for a quick jump-scare gag.
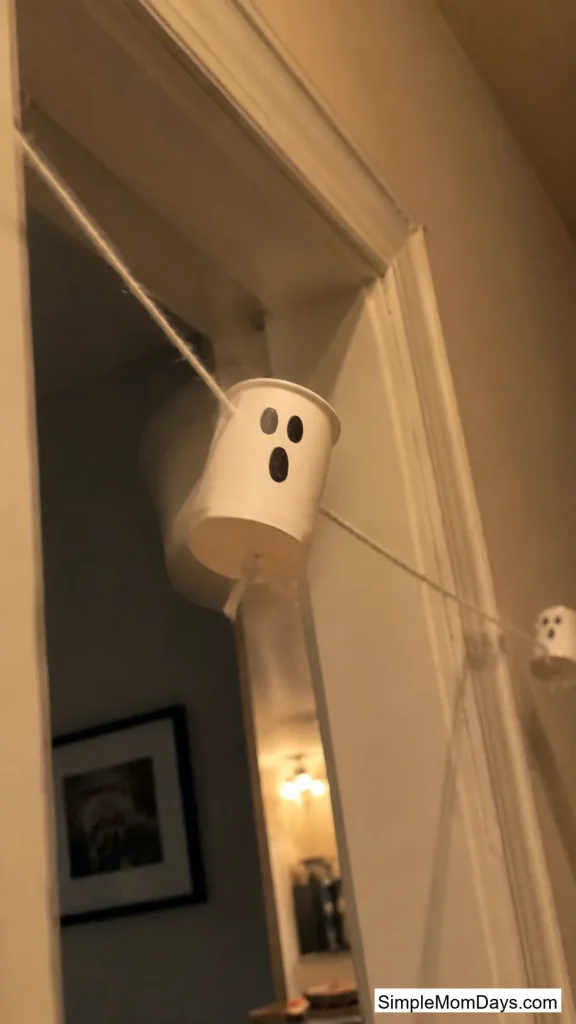
11. String-Pull Flying Ghost Cup
Poke a small hole in the bottom of a paper cup, thread yarn through with a knot on the inside, and draw a ghost face around the cup’s rim so the cup “flies” up and down the yarn when you pull it taut.
Because the ghost genuinely travels along the string, this holds a kid’s attention far longer than a static cutout — it’s closer to a toy than a decoration.
Hang several from a doorway at different heights for a small ghost swarm that guests brush past on the way in.
12. Balancing Finger Bat
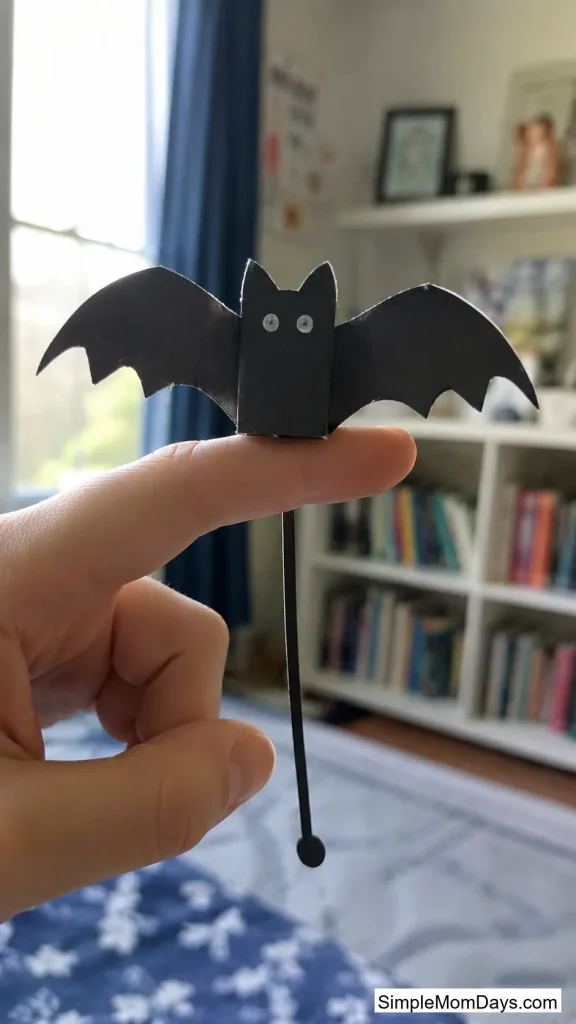
Cut a bat shape with a long, weighted tail section, fold the wings slightly downward, and balance the tail tip on a fingertip so the bat perches without falling.
The trick lives entirely in where you cut the tail’s weight, so kids end up experimenting with shape and balance rather than just following one fixed template.
Once it balances, it balances on shoulders, pencils, and doorframes too — kids tend to carry this one around the house.
Paper Engineering for Older Kids
Tweens who’ve outgrown basic cutouts get more out of projects with real folding sequences or symmetry rules to follow.
13. Pentagon Box Pumpkin
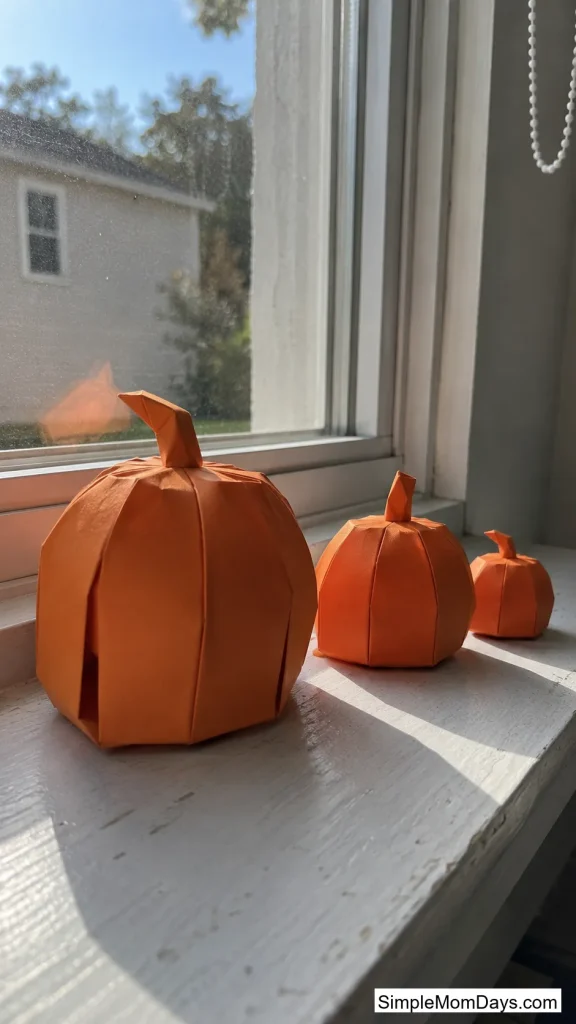
Fold a five-sided paper base into a rounded 3D pumpkin shape, tucking each panel into the next until it holds its form without glue, then add a small folded stem on top.
Multi-panel origami like this takes real sequencing to get right, and getting all five sides even is a genuine small win worth the twenty extra minutes it takes.
Line up five or six in graduating sizes along a mantel for a display that looks intentionally coordinated rather than crafted in one sitting.
14. Kirigami Symmetrical Skeleton
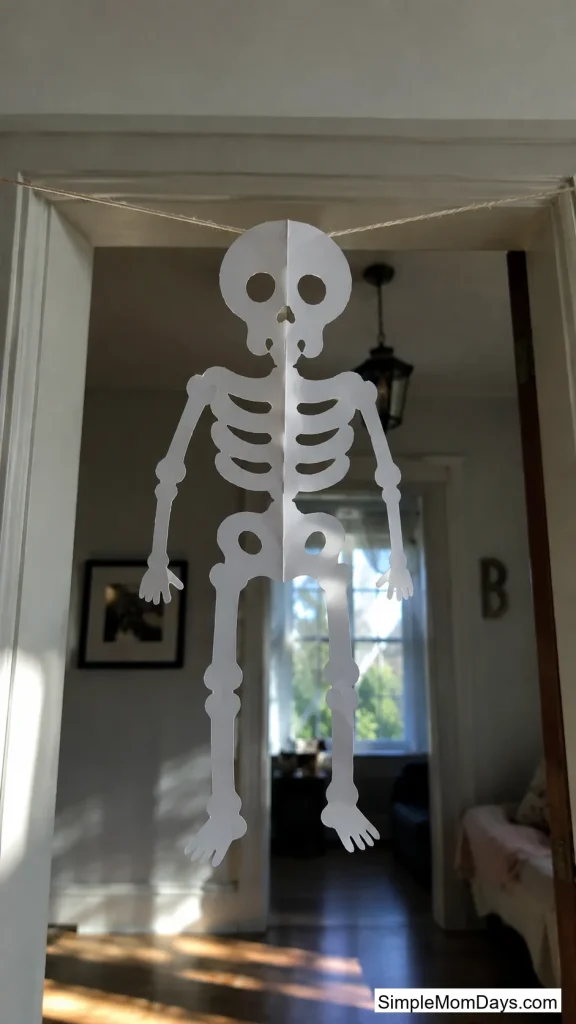
Fold paper in half, sketch half a skeleton along the fold, and cut through both layers so the finished shape opens into a perfectly symmetrical figure.
This is a sneaky geometry lesson — kids have to think in mirror image the whole time they’re cutting, which is a different skill than freehand cutting a full shape.
Hang a row of these from a string across a doorway and the symmetry actually shows once light passes through the cutouts.
15. Woven Paper Spiderweb Placemat
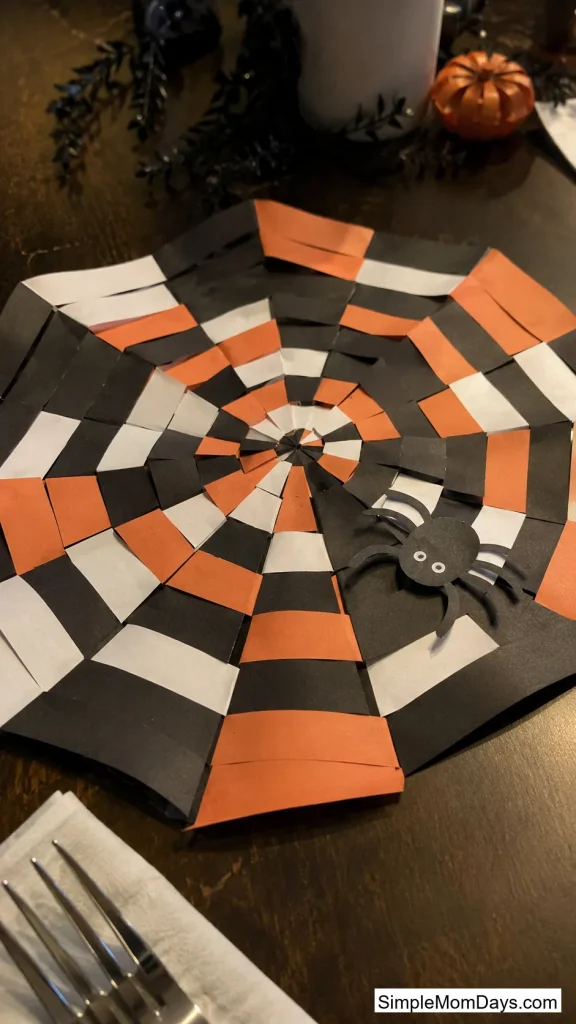
Cut slits into a folded square of black paper, then weave strips of orange and white paper in and out through the slits to build a checkerboard-style web pattern.
Weaving asks for a different kind of patience than cutting or folding — kids have to track an over-under rhythm across the whole grid, and mistakes show up immediately if they lose count.
Laminate the finished piece and it holds up as an actual placemat for the rest of October, not just a one-off craft.
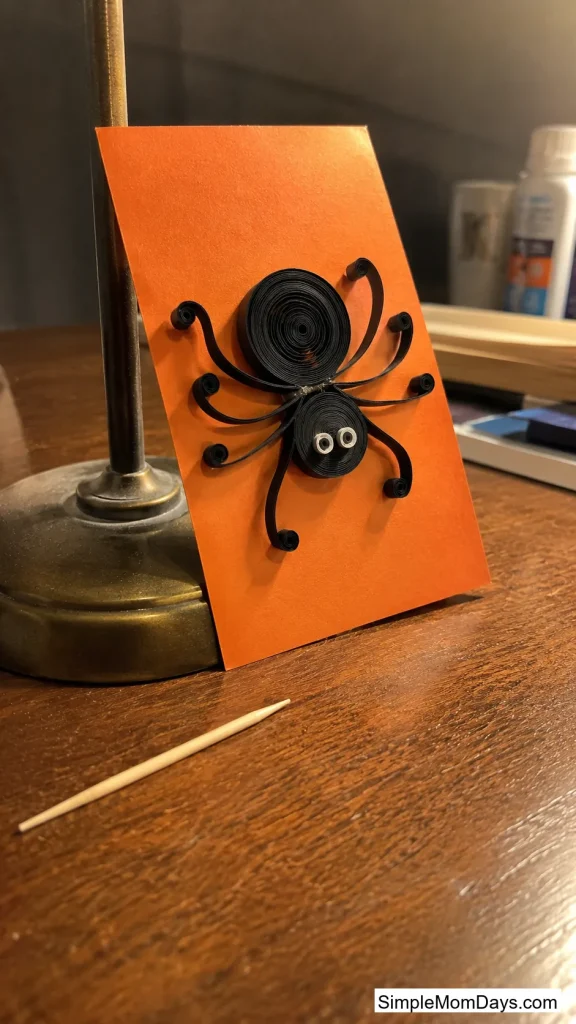
16. Quilled Paper Spider Art
Roll thin strips of black paper into tight coils, pinch some into teardrop shapes, and glue the coils together into a spider body with curled paper legs radiating outward.
Quilling is a slower, more meditative craft than most of the others on this list, which makes it a solid pick for a kid who wants something to focus on rather than rush through.
A toothpick or the end of a paintbrush works fine as a rolling tool if you don’t own an actual quilling needle.
Wearable and Take-Home Paper Crafts
These hold up outside the house — in a backpack, on a wrist, or in a coat pocket on the walk to trick-or-treat.
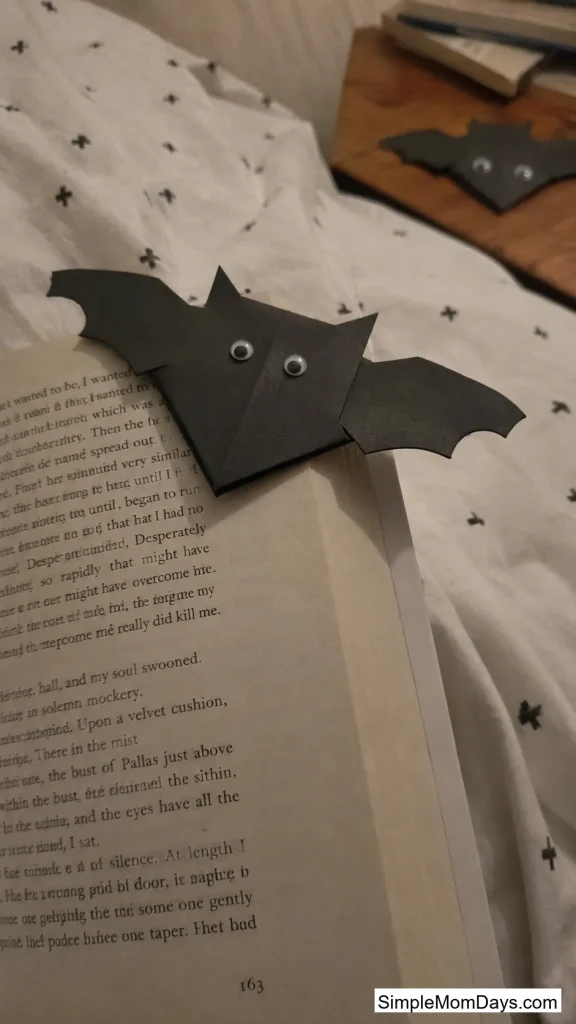
17. Corner Bookmark Bats
Fold a square of black paper diagonally into a pocket that slips over a book’s corner, then glue on wing shapes and eyes so the bat appears to be perched on the page.
Unlike most Halloween crafts, this one gets used year-round instead of packed away after October 31st, which makes it worth the extra folding time.
Kids who read a lot will ask to make a whole set — one for every book currently on their nightstand.
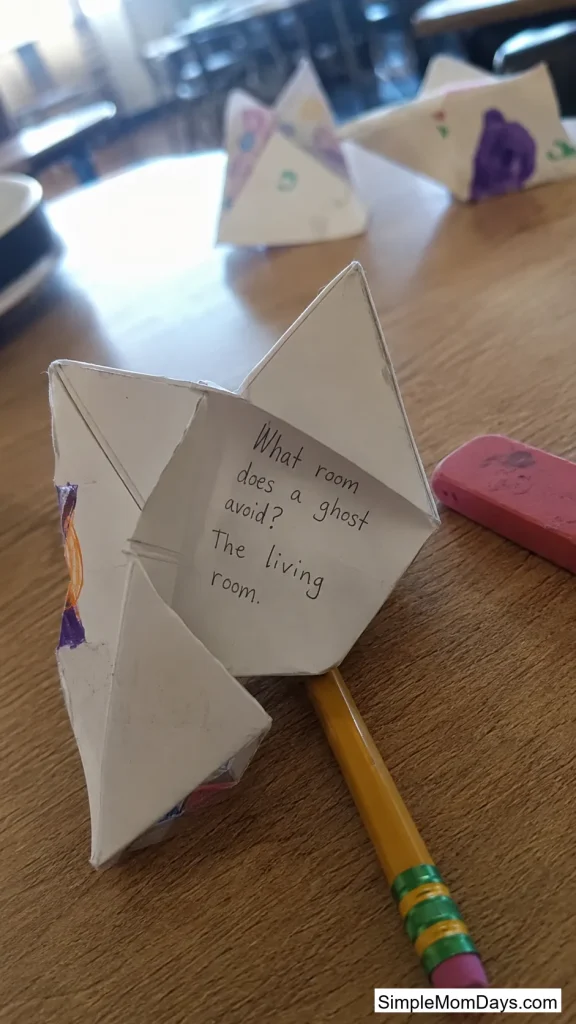
18. Fortune-Teller Joke Catcher
Fold a square of paper into the classic pinch-and-open cootie catcher, then write a Halloween pun or riddle under each flap instead of the usual fortunes.
The interactive fold means kids play with it long after making it, passing it around at a party instead of setting it down like most crafts.
Let older kids write their own jokes on the inside flaps — the writing practice sneaks in without anyone noticing it’s a lesson.
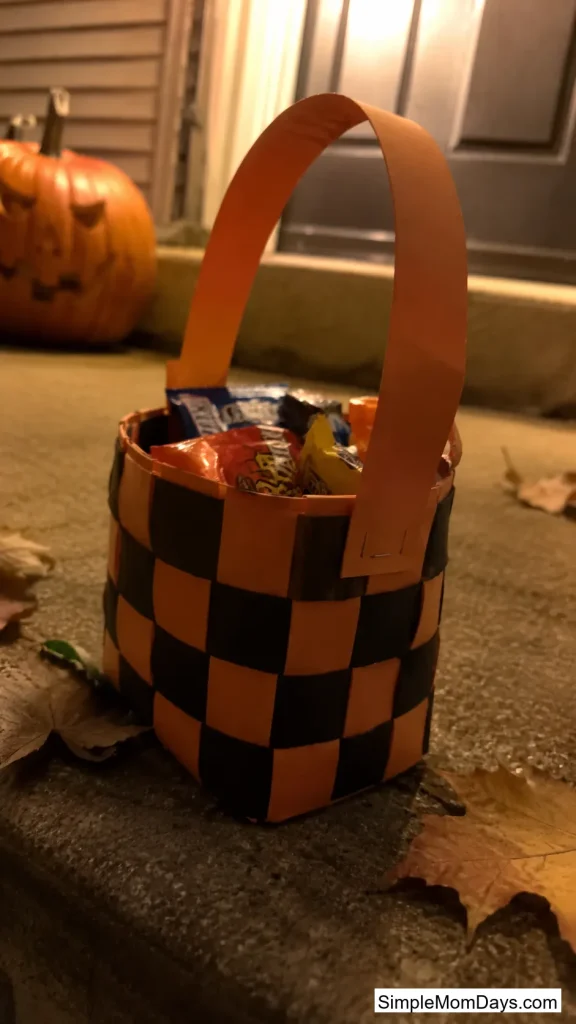
19. Paper Basket Trick-or-Treat Tote
Weave two strips of orange or black paper into a woven base, fold the sides up into a small basket shape, and attach a paper handle stapled at both ends.
A basket a kid folded themselves holds more pride than any plastic pumpkin bucket bought at a store, even at a fraction of the size.
Fill it with a few pieces of candy or stickers right after it’s finished and it works as a party favor kids carry straight out the door.
Not every one of these needs to happen in a single afternoon. Pull three or four from different sections, spread them across a couple of weekends, and you’ll end up with a mix of decorations, toys, and keepsakes instead of nineteen identical jack-o’-lanterns lined up on a shelf.