

This post contains Amazon affiliate links. As an Amazon Associate, I earn from qualifying purchases at no extra cost to you. I only recommend products I’d genuinely suggest to a friend.
Most pumpkin contests get decided in the first five seconds a judge spends walking past a table. They pass thirty near-identical painted faces and stop for maybe three. The pumpkins that win usually aren’t the most technically perfect — they’re the ones that make someone stop walking.
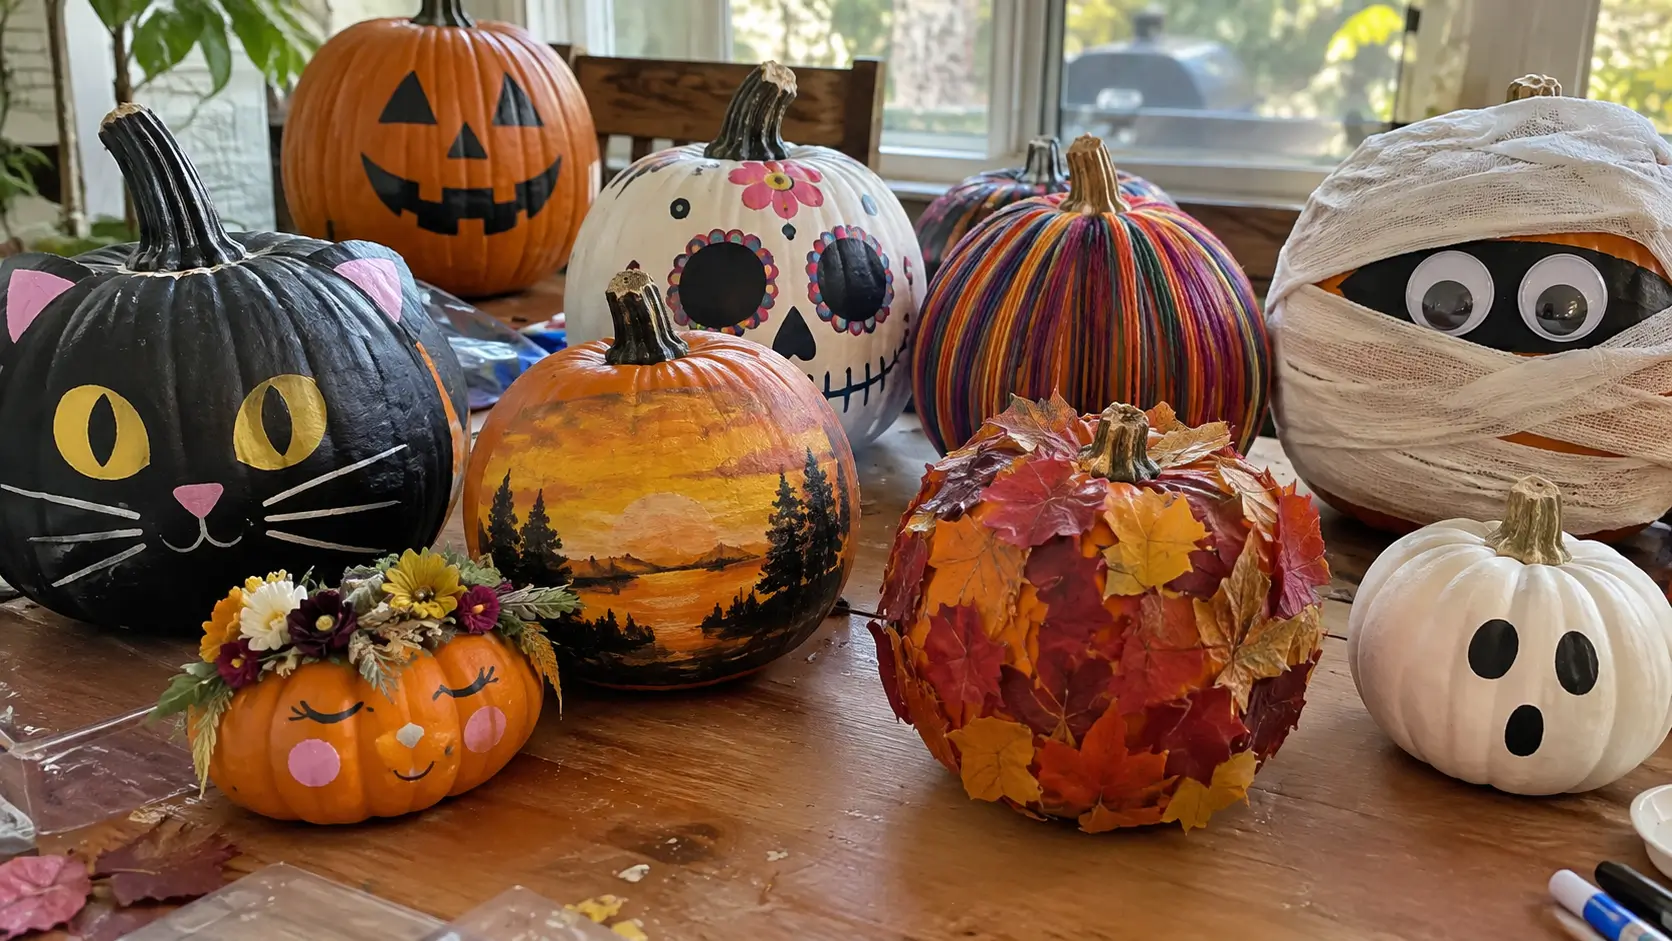
This list skips the standard rhinestones-and-glitter routine you’ve probably already seen on every fall board this year — ombre paint, chevron tape stripes, googly-eyed monsters. Instead it leans into illusions, real sculptural builds, and a few genuinely funny pun pumpkins that people actually bring up after judging is over.
Pick one or two that match a skill you already have and the time you actually have before drop-off, not all nineteen. A well-executed clay relief face beats a rushed diorama every time.
⚡ IN A HURRY?
Quick Picks for Your Contest Pumpkin
Short on time? These are the supplies worth grabbing before you start — everything else in the post is inspiration, but start here.
- Pumpkin-Safe Acrylic Paint Set — lays down smooth, opaque color on pumpkin skin without cracking as it dries, even over curves.
- UV Blacklight Reactive Paint — turns a plain-looking pumpkin into a hidden showstopper the second someone flips off the lights.
- Air-Dry Modeling Clay — builds raised features that pop off the surface instead of sitting flat under a coat of paint.
- Mini Hot Glue Gun Kit — holds sequins, scales, and mosaic pieces in place fast enough to actually finish before the deadline.
- Self-Adhesive Craft Gems Assortment — gives you a ready mix of shapes and sizes instead of hunting down gems one pack at a time.
- Chalkboard Paint — turns a pumpkin into a surface people can actually write or vote on, which judges tend to remember.
Illusions That Make Judges Do a Double-Take
These four rely on a visual trick rather than raw craft skill, which makes them a good fit if you’re short on painting experience but have patience for planning.
1. The Cracked-Open Treasure Pumpkin
Paint a jagged crack across one side of the pumpkin in black and grey, then fill the “opening” with something unexpected — gold leaf paint, a galaxy swirl, or a cluster of painted gems spilling out. From a few feet away it reads as a regular pumpkin until the crack catches someone’s eye.
Judges walking a long table of solid-color pumpkins tend to stop at the one that looks broken. The illusion does the attention-grabbing for you, so you don’t need elaborate carving skills — just a steady hand with a paint pen for the crack lines and confidence with the “reveal” color inside.
Budget an evening for this one. Base coat and dry time take longer than the actual crack painting, so start at least two days before drop-off.
2. The Blacklight Reveal Pumpkin
Paint a normal-looking design in daylight colors, then layer a second, hidden design over it using UV-reactive paint that stays invisible until a blacklight hits it. A plain orange pumpkin under regular lighting turns into a glowing constellation, skeleton, or spiderweb the moment someone points a blacklight at it.
This works especially well for evening or indoor contests where judges walk the table with a phone flashlight or a blacklight is already part of the display. It’s also one of the few ideas here that gives you two entries in one pumpkin — the daytime look and the reveal.
A small UV flashlight costs less than most paint sets, and it’s worth keeping one on hand at drop-off so you can demonstrate the reveal yourself if judges don’t think to check.
3. The Gravity-Defying Pour
Mount the pumpkin on a small stand, then run a stream of thick acrylic or puff paint from the top so it looks frozen mid-drip — except you angle the stand or add a wire support so the “drip” curls upward or hangs suspended instead of falling straight down.
The physical wrongness of it is what makes people stop. A normal drip pumpkin reads as pretty; a drip that defies gravity reads as a trick, and people want to figure out how you did it.
Puff paint holds its shape better than regular acrylic for the suspended sections. Let each layer set before adding the next, or the whole thing sags before it dries.
4. The Camouflage Vanishing Pumpkin
Instead of decorating the pumpkin to stand out, paint it to blend into whatever it’s sitting on — bark texture against a pile of logs, brick pattern against a brick planter, gingham against a picnic blanket. Done well, it takes a second look to realize there’s even a pumpkin there.
It’s a genuine change of pace on a table full of pumpkins competing to be the loudest. Judges who’ve seen forty bright designs tend to remember the one that made them look twice, and this is the rare idea that wins on restraint instead of spectacle.
Bring a small sample of your display surface home before you start painting — matching bark or brick from memory almost never looks convincing next to the real thing.
Sculptural Builds With Real Dimension
These take longer than a coat of paint, but they’re what separate the pumpkins judges photograph from the ones they just walk past.
5. The Clay-Relief Face Pumpkin
Instead of painting a flat face, build the features out first. Press air-dry clay onto the pumpkin to form a raised brow, nose, and cheekbones, let it dry, then paint over the whole thing so the face has actual shadow and depth instead of just color contrast.
This tends to beat flat-painted entries in the same category almost automatically, because most contest judging rewards craftsmanship and effort, and a sculpted face is visibly more work than a stencil. The shadows the raised clay throws under any lighting do a lot of the selling for you.
Keep the clay layer thin — under half an inch — so it dries without cracking off the curved surface. Full cure usually takes a day or two depending on humidity.
6. The Dragon-Scale Pumpkin
Starting at the bottom, glue overlapping rows of sequins, fabric scraps, or flattened bottle caps in a fan pattern working upward, the same way roof shingles or fish scales layer. Each row covers the glued edge of the row below it.
The overlap is what sells the effect — a single layer of gems just looks bedazzled, but three or four overlapping rows catches light differently at every angle and genuinely looks like it has texture and weight. It photographs well too, which matters if the contest posts winner photos online.
A hot glue gun goes through a lot of glue sticks on a pumpkin this size — buy more than you think you need, because running out mid-row leaves a visible gap.
7. The Kinetic Pinwheel Pumpkin
Attach two or three small pinwheels, or a simple hand-crank paper mechanism, to the top or sides of the pumpkin so part of the design actually moves in the wind or with a nudge.
Almost nothing else on a typical contest table moves, so this one gets noticed by motion alone before anyone even looks at the paint job. It reads as more ambitious than a static design even if the rest of the decorating is simple.
Keep the moving pieces lightweight — craft foam or cardstock pinwheels, not anything heavy enough to tip the pumpkin over in a breeze.
8. The Diorama Window Pumpkin
Cut a window into one side of the pumpkin instead of a full top, hollow out the inside, and build a tiny scene inside using clay figures, moss, small rocks, and a battery tea light — a campfire scene, a haunted house, or a miniature garden.
People lean in to look at this one, which is the whole game at a contest table — you want judges spending more than three seconds at your entry. The lit interior also makes it one of the few ideas here that works even better after dark.
Plan the window size before you start hollowing. Too small and the scene is hard to see; too large and the pumpkin loses structural integrity and can cave in before the contest.
Pun and Story Pumpkins Judges Actually Remember
Craftsmanship gets admired for a moment. A good joke gets repeated to other people for the rest of the day.
9. The Visual Pun Pumpkin
Build the whole design around a pun on “pumpkin” or fall itself — a pumpkin dressed as a “pump” at the gym in tiny sneakers and a headband, or a pumpkin turned into a takeout cup labeled “pumpkin spice” with a lid and straw.
Jokes travel. A judge who laughs at your pumpkin is a judge who mentions it to the other judges, and a pun pumpkin is one of the few entries people actually describe to someone else afterward instead of just photographing and moving on.
Keep the joke to one clean idea. A pumpkin trying to make three different puns at once usually reads as cluttered instead of clever.
10. The Literal Costume Pumpkin
Rather than painting an outfit on, sew or hot-glue an actual small costume onto the pumpkin — a felt cape, a tiny knit hat, a fabric bowtie — so it looks dressed rather than decorated.
Fabric behaves differently than paint under contest lighting; it has real folds and texture that catch shadows a flat painted version can’t. It also tends to stand out on a table where almost everything else is paint-based.
Hot glue holds fabric to pumpkin skin fine for a one or two day contest window, but it won’t survive much handling, so save this one for entries that stay on a display table rather than getting picked up and passed around.
11. The Pumpkin Family Tableau
Instead of one pumpkin, decorate three to five in graduated sizes and arrange them as a scene with a story — a family at a picnic, a tiny sports team, a classroom of pumpkin “students” each with a different painted expression.
A tableau takes up more table space than a single entry, which naturally draws the eye, and giving each pumpkin its own small personality gives judges more to look at and comment on than a single face ever could.
Check your contest rules before building one — some categories judge by single entry and won’t allow a grouped display, so confirm this is allowed before you commit a weekend to it.
12. The Caption-This Chalkboard Pumpkin
Coat the pumpkin in chalkboard paint, leave a blank speech bubble or sign shape in white, and set out a piece of chalk so anyone walking by — including the judges — can write their own caption or reaction directly on it.
This one wins on interaction rather than craftsmanship. A pumpkin people can touch and change gets circled back to more than once during judging, and by the end of the event it’s usually covered in other people’s jokes, which makes it the most talked-about entry on the table without extra work from you after drop-off.
Chalkboard paint needs two full coats and a day to cure before it’s ready to write on, so build that drying time into your schedule ahead of the deadline.
Upcycled Mosaic Techniques
All four of these trade paint for texture, built from materials most people already have sitting in a drawer or a closet.
13. The Puzzle-Piece Mosaic Pumpkin
Cover the entire surface in mismatched jigsaw puzzle pieces from old, incomplete puzzles, glued edge to edge in a shingled pattern so no pumpkin skin shows through.
The texture alone sets it apart from every painted pumpkin on the table, and it’s a genuinely good use for old puzzles missing too many pieces to ever get finished again. Mixing puzzle images and colors randomly actually looks more intentional than trying to match them.
A medium pumpkin eats through two or three full puzzles. Thrift stores and yard sales are a cheaper source than buying new ones just to cut apart.
14. The Button and Bottle-Cap Mosaic Pumpkin
Glue a mix of buttons, flattened bottle caps, and old jewelry pieces across the surface in rings or a gradient, working from a dominant color at the base to something lighter near the stem.
This is the rare contest pumpkin built almost entirely from things already sitting in a junk drawer, which judges tend to notice and appreciate as much as the finished look — a mosaic made from real found objects reads as more resourceful than one built from a craft store kit.
Sort your materials by size before gluing. Working from a pre-sorted pile is much faster than digging through a mixed bowl piece by piece while the glue gun cools between each one.
15. The Full-Wrap Yarn Pumpkin
Wrap the entire pumpkin in yarn, spiraling from the stem down to the base in a continuous strand, switching colors every few rows so the finished piece shows a gradient or striped effect with zero paint involved.
The wrapped texture reads as cozy and tactile in a way flat paint never does, and it’s forgiving of an unevenly shaped pumpkin since the yarn smooths out bumps and dents as it wraps around them.
Pin the first few wraps in place with a dab of hot glue at the stem before you start spiraling, or the whole thing slips loose before you’ve covered a quarter of the surface.
16. The Quilted Patchwork Pumpkin
Cut small fabric squares, fold the edges under, and glue or sew them on in overlapping rows so the pumpkin ends up looking like a quilted patchwork ball rather than a flat piece of fabric-covered decor.
The raised, folded edges give this actual dimension that a basic mod-podged fabric pumpkin doesn’t have, and it holds up well outdoors since fabric weathers better than most paint finishes.
Pre-cut all your squares before you start gluing — cutting one square and gluing one square at a time slows the whole project down by a wide margin.
Living and Foraged, Reinvented
These three skip the craft store almost entirely and lean on real plants and natural materials instead.
17. The Stained-Glass Petal Pumpkin
Hollow the pumpkin and cut a few window openings, then layer pressed, translucent flower petals over the openings with a clear sealant so light from a tea light inside filters through the petals like stained glass.
It’s one of the more delicate builds on this list, but the payoff is real — nothing else on a contest table glows quite like this after dark, and pressed petals hold their color far longer than people expect once they’re sealed.
Press your petals for at least a week before building. Fresh petals still hold moisture and will mold under the sealant instead of drying flat.
18. The Living Moss Terrarium Pumpkin
Cut and hollow the top of the pumpkin, add a layer of potting soil, and plant moss, a few small succulents, or tiny fairy-garden pieces directly into it so the pumpkin functions as a living planter rather than a static decoration.
This is the one entry on the table that’s still growing after the contest ends, and it tends to earn extra credit from judges who value originality over craft-store materials. It also smells like a garden instead of craft paint, which people notice without quite knowing why.
A real pumpkin only holds up as a planter for one to two weeks before it starts to soften, so this idea works best for contests judged and taken home the same day.
19. The Foraged Relief Map Pumpkin
Instead of flowers or leaves scattered loosely on top, use dried seed pods, bark chips, acorn caps, and twigs to build up a textured, topographic-looking relief across the surface — closer to a miniature landscape than a decoration.
Texture photographs and reads differently than flat botanical arrangements do, and building an actual relief pattern out of foraged pieces takes real planning, which judges scoring on originality and effort tend to reward over a pumpkin with a few leaves glued on for show.
Let every piece dry out fully before gluing — anything foraged with moisture still in it will shrink and pop loose from the pumpkin within a day or two.
Final Thoughts
Most contest tables have at least a dozen painted faces and a handful of rhinestone pumpkins by the time judging starts. Pick an idea from this list that plays to a skill you already have — sewing, painting, or just patience with a glue gun — and give yourself more lead time than you think you need. The best-looking pumpkin on the table is rarely the one finished at 11pm the night before.