
This post contains Amazon affiliate links. As an Amazon Associate, I earn from qualifying purchases at no extra cost to you. I only recommend products I'd genuinely suggest to a friend.
Every preschool teacher hits the same wall in August. You’ve got a blank bulletin board, eighteen kids whose birthdays you can’t keep straight yet, and about forty minutes before the room has to look finished.
A birthday board fixes two problems at once. It keeps you from forgetting Micah’s birthday until three days after it passed, and it gives four-year-olds a reason to walk over to a wall and look for their own name — which is more early literacy practice than it sounds like.
Here are 19 setups that hold up through a full school year, including a few ways to handle the July and August kids who always get left out.
⚡ IN A HURRY?
Quick Picks for Your Birthday Board
Short on time? These are the essentials worth grabbing — everything else in the post is inspiration, but start here.
- Birthday Pocket Chart — the fastest route to a finished board, since the month labels and name cards come ready to slide in.
- Thermal Laminating Pouches — laminate the pieces once and you’re reusing the same board every September instead of rebuilding it.
- Adhesive Hook-and-Loop Dots — lets kids pull their own name off the wall on their day, which is the whole appeal for a four-year-old.
- Paper Birthday Crowns — keep a stack clipped beside the board so nobody’s day arrives with nothing ready.
- Wet-Erase Markers — they stay put on laminate all year instead of smudging off every time a sleeve brushes the board.
- Mini Wooden Clothespins — the cheapest way to make a board updatable when a new kid enrolls in February.
Boards Kids Can Actually Touch
A board nobody interacts with becomes wallpaper by October. These ones give kids a reason to walk over.
1. The Name Card Pull-Down
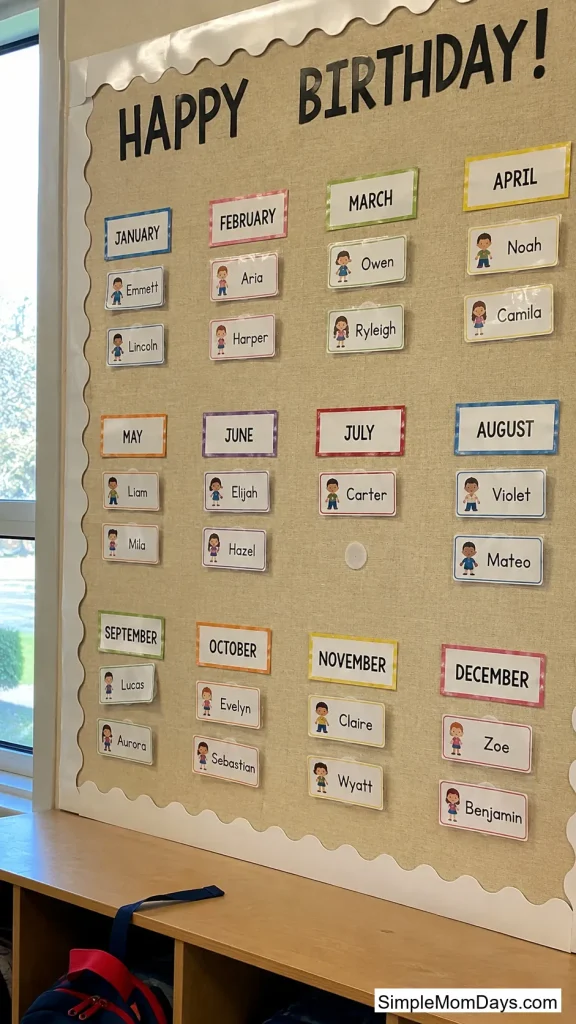
Mount each child’s name card on the wall with a hook-and-loop dot instead of a staple. On their birthday, they get to walk up and peel their own card off the board and carry it around in their pocket all day.
Four-year-olds love this far more than the cost justifies. It’s about $6 in Velcro dots, and the physical act of removing the card makes the day feel like it’s actually happening — versus a name printed on a wall that never changes.
Have a spot at the bottom of the board where they stick it back at the end of the day. That’s the part that makes it reusable.
2. Countdown Clip on a Ribbon
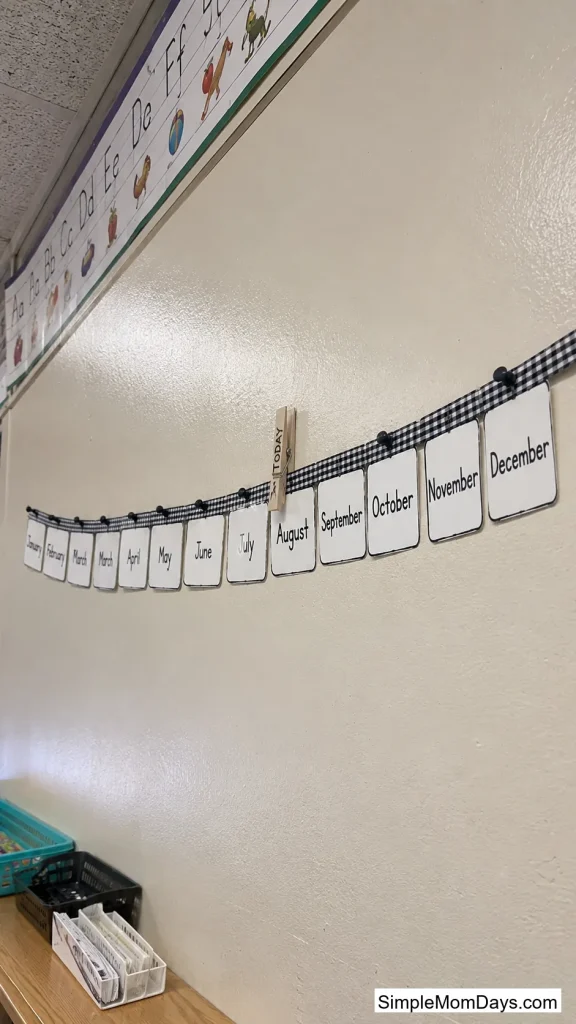
Run a length of ribbon across the board, left to right, with all twelve months marked. A single clothespin marked “TODAY” moves along it during morning meeting.
This does something a static board can’t: it shows kids that time moves in one direction and that their birthday is coming closer. Preschoolers don’t understand months, but they understand “the clip is almost at my picture.”
3. The Photo Booth Board
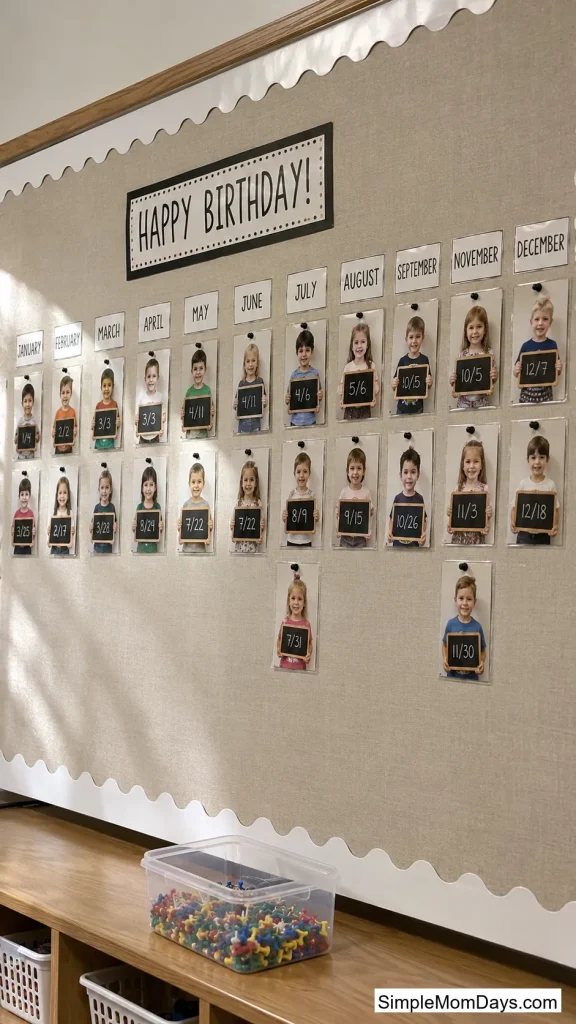
Take a photo of each child on day one holding a small blank chalkboard or dry-erase card. Write their birthdate on it in post, print, and mount by month.
The advantage over name cards is that non-readers can find themselves instantly. It also solves the January problem where new enrollees feel like the board wasn’t made for them — you just take one more photo.
4. Sticker Chart Doors
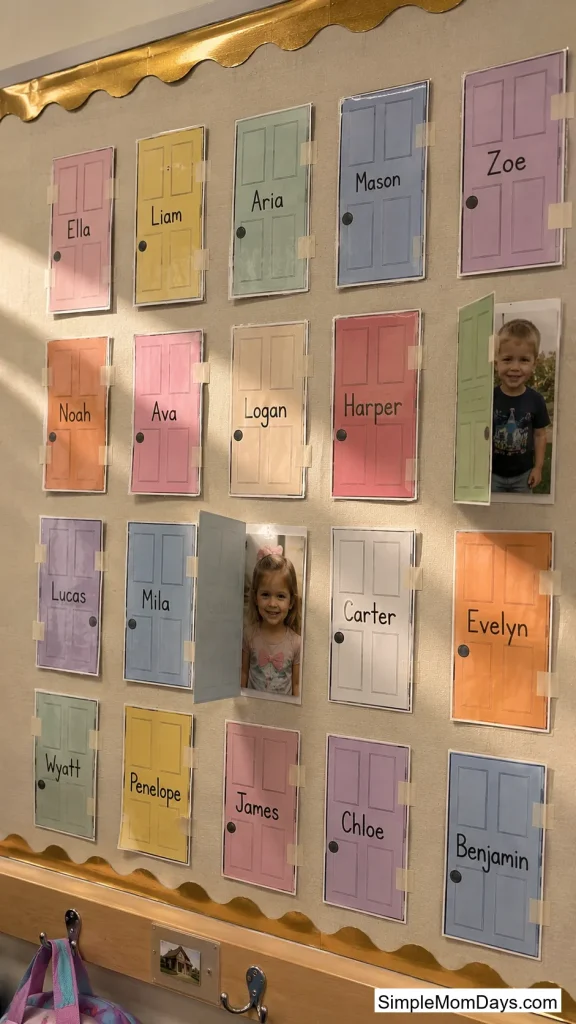
Cut small paper “doors” that flip open, advent-calendar style, with the child’s photo hidden underneath and their name on the front. Kids flip them constantly to check who’s behind which door.
Cardstock survives about four months of preschool hands. Laminate the doors and use a strip of tape as the hinge and you’ll get the full year.
Setups That Survive More Than One Year
The best boards are the ones you don’t rebuild every August. These are designed around reuse from the start.
5. Laminated Month Cards With Wet-Erase
Print twelve month cards, laminate them, and write names on with a wet-erase marker instead of dry-erase. Dry-erase wipes off when a sleeve brushes it. Wet-erase needs a damp cloth, which means it survives an entire year and still comes off in June.
This is the single highest-value tweak on this list and it costs nothing extra. Teachers who use dry-erase on birthday boards end up rewriting names in November.

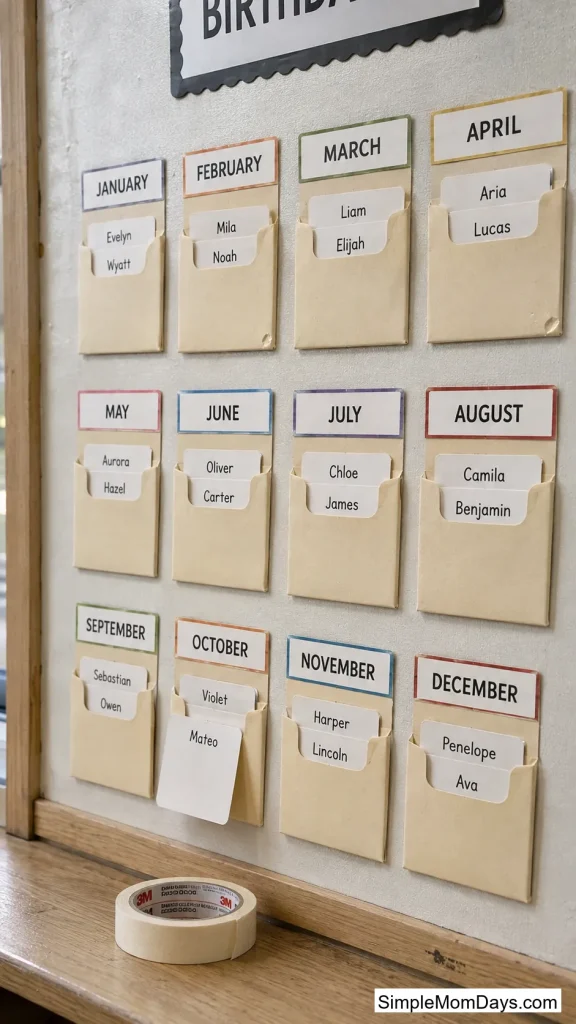
6. Library Pocket Board
Glue a library card pocket under each month and slot the name cards in. New kid enrolls in March? Write a card, drop it in the pocket. No stapler, no reprinting.
You can also pull a child’s card out and hand it to them on their day, then slide it back. Pockets run about $10 for a pack of 100, which is enough for years.
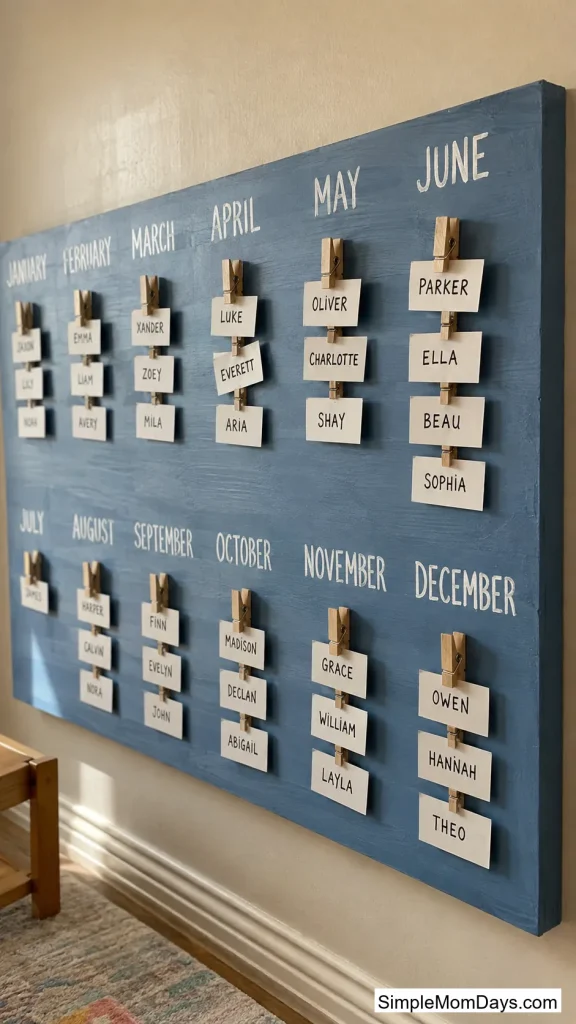
7. Clothespins on a Painted Board
Paint a piece of plywood or foam board with your month headings, then hot-glue a row of mini clothespins under each. Names clip on and off.
The reason this beats stapling: preschool rosters change. Someone moves in October, someone else leaves in February, and a stapled board means peeling and re-stapling every time.
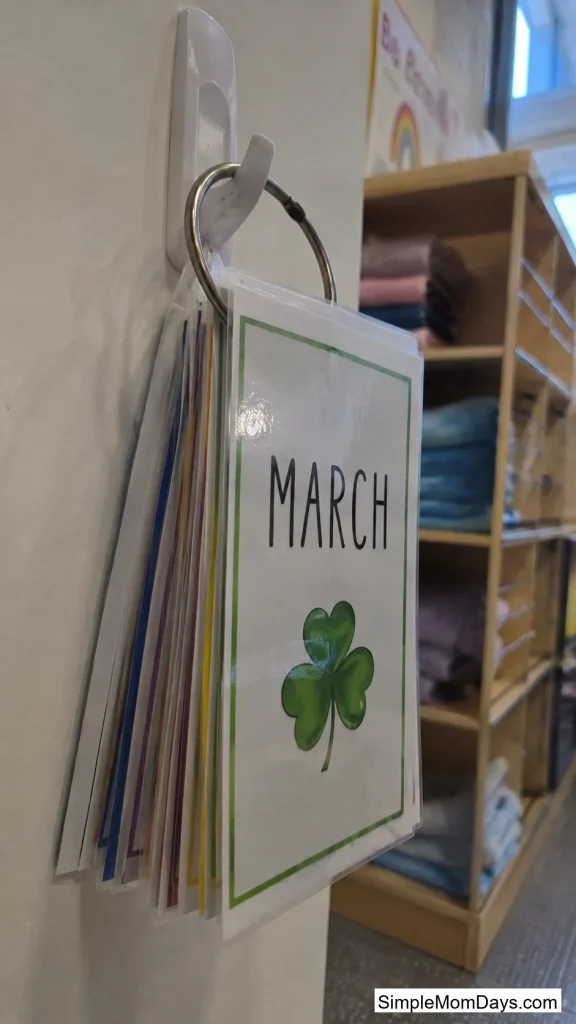
8. The Binder Ring Flip Chart
Instead of spreading twelve months across a wall, put each month on its own laminated card and bind them on a single ring. Hang it on a hook at kid height.
This is the answer for classrooms with almost no wall space — a shared room, a portable, a church basement setup. Kids flip through it during transitions, and it takes up about the footprint of a clipboard.
Boards That Teach Something While They Sit There
A wall gets looked at hundreds of times a year. It may as well be doing something.
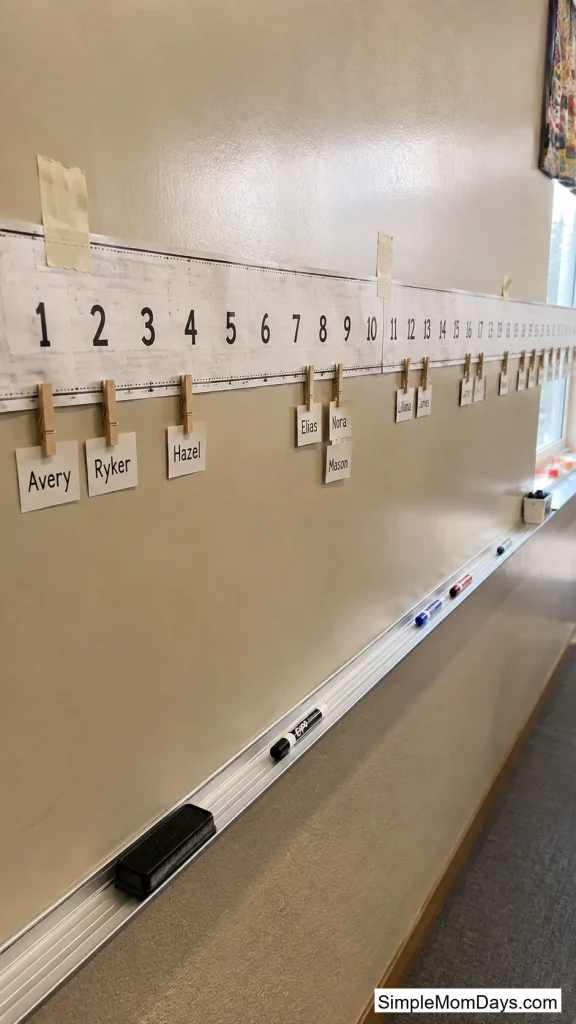
9. Number Line Birthday Strip
Skip the months entirely. Run a number line 1 through 31 and clip each child’s name at their date. Kids born on the 14th find the 14.
It quietly gives you a number line at eye level that you can point to during any counting activity, and it makes the “birthdays share numbers but not months” idea concrete when two kids clip to the same spot.
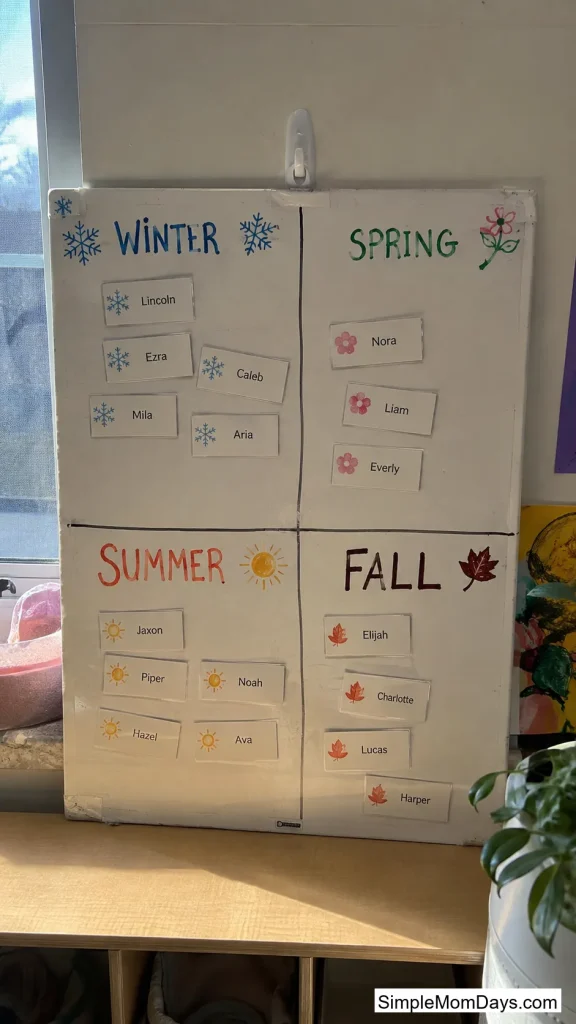
10. Seasons-Instead-of-Months Board
Group the board by four seasons instead of twelve months. Winter, spring, summer, fall — with the kids’ names under each.
Twelve is too many categories for a three-year-old to hold. Four is manageable, and it links birthdays to something they can see out the window. You can still write the exact date under each name for your own reference.
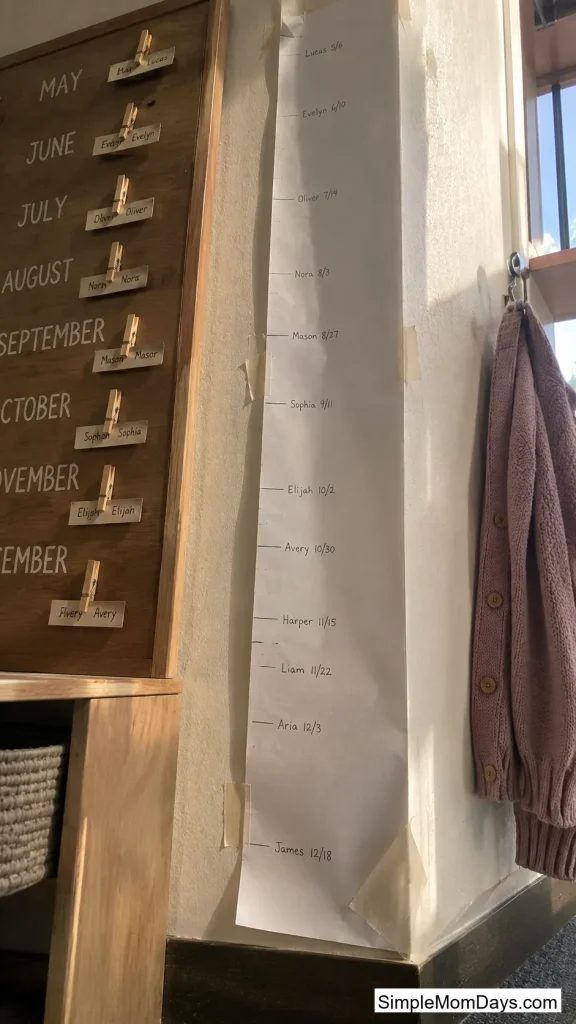
11. The Height Strip Board
Mount a growth chart next to the birthday board. On each child’s birthday, they get measured and a mark goes up with the date.
By spring you have a wall that shows what “getting older” physically means — which is the only part of a birthday a four-year-old actually cares about. Parents at pickup stop and look at this one every time.
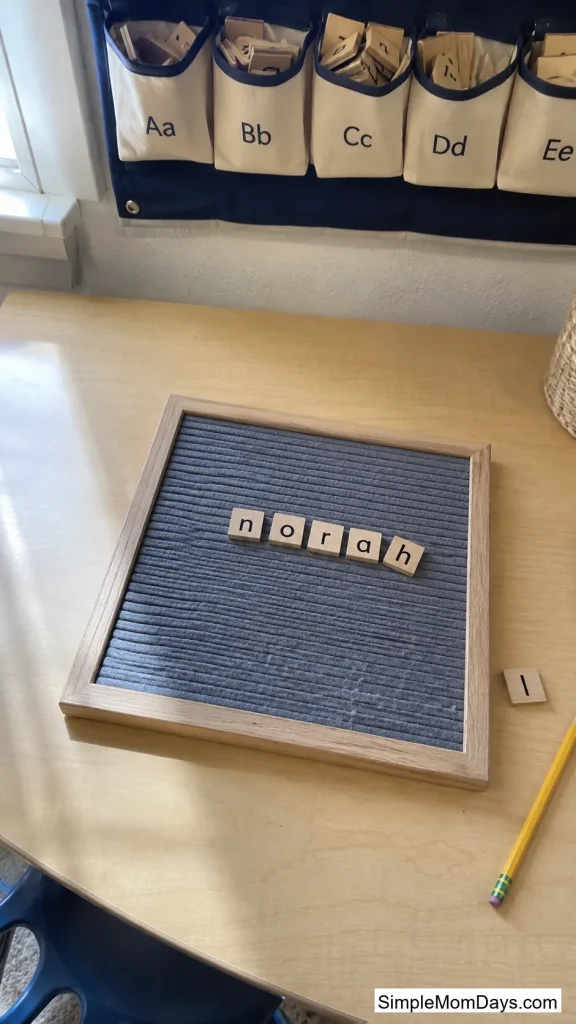
12. Name Puzzle Board
Cut each child’s name into individual letter tiles that sit in a small pouch under their birthday month. On their day, they assemble their own name on a felt board.
This runs the whole year as a name-recognition center, not just a decoration. Kids who finish early wander over and do other kids’ names too.
Low-Effort Boards for Teachers With No Time
Not every board needs to be a project. These take under an hour.
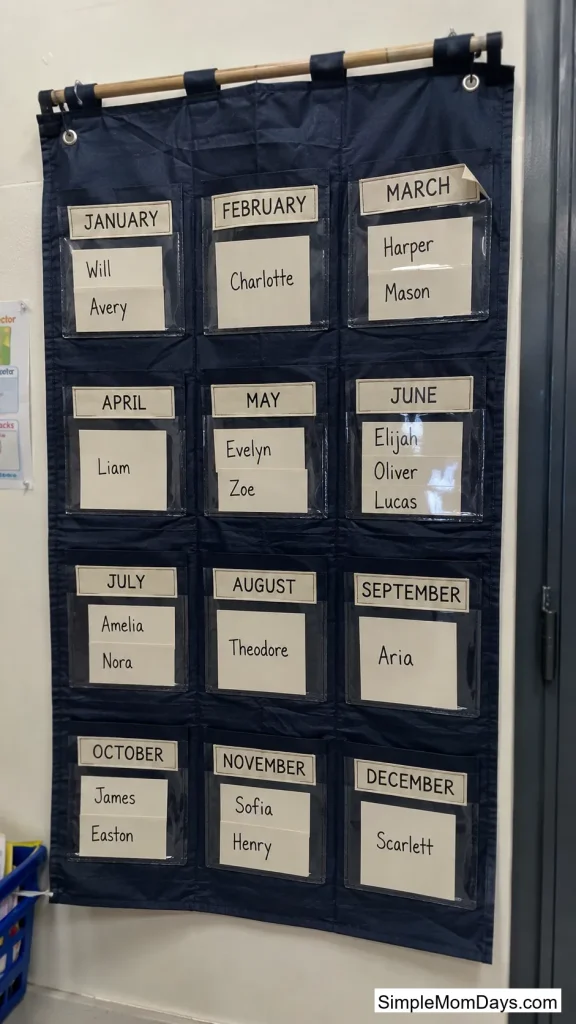
13. The Pocket Chart Shortcut
Buy a birthday pocket chart, write names on the included cards, slide them in. Done in fifteen minutes.
Worth knowing before you buy: the cheap ones have month cards that curl at the edges, and washable marker can rub off as you slide cards into tight pockets. Check that the pockets are loose and use a permanent marker on cards you plan to keep.
14. Small Frame + Dry-Erase
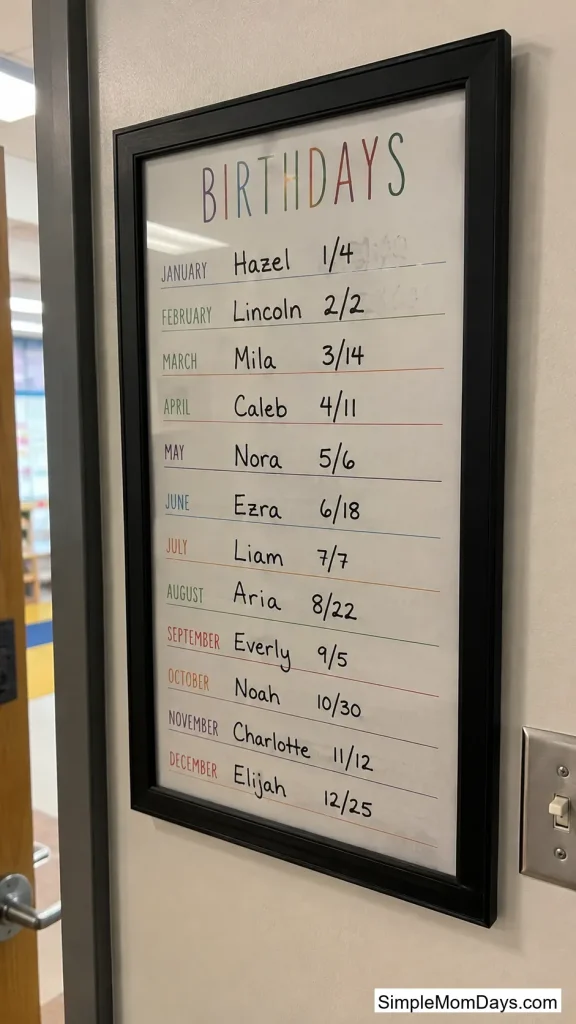
Print a single birthday list, put it in a cheap document frame, and write the names on the glass. Hang it by the door.
It’s not going on Pinterest. But it takes ten minutes, wipes clean in June, and works fine in a room where the walls are already covered.
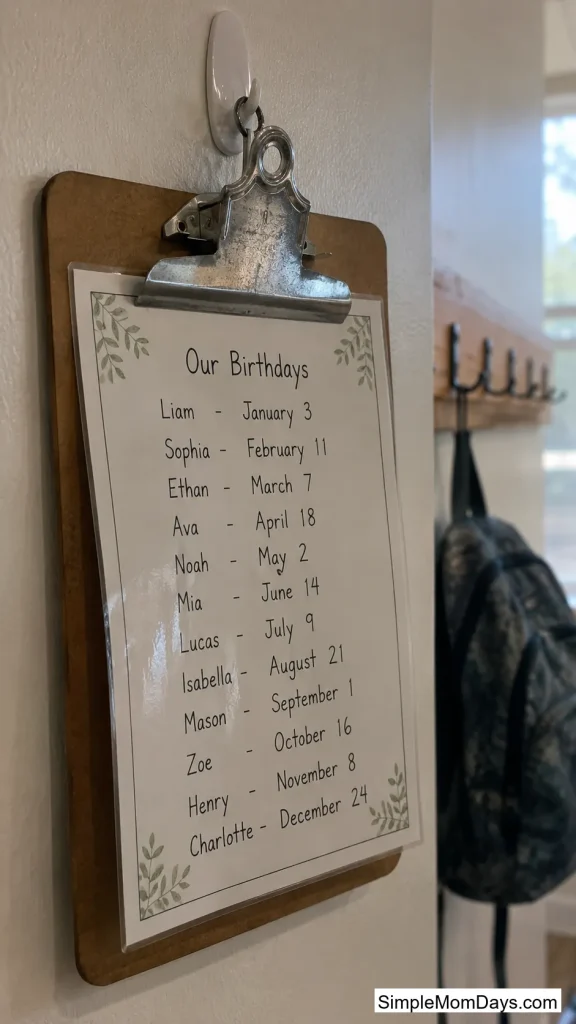
15. Clipboard by the Door
One laminated sheet on a clipboard, hung on a command hook. Teachers, subs, and floaters can all find it fast, and it moves with you if you switch rooms mid-year.
This one’s for the person reading this in mid-September who never got around to the board. It counts.
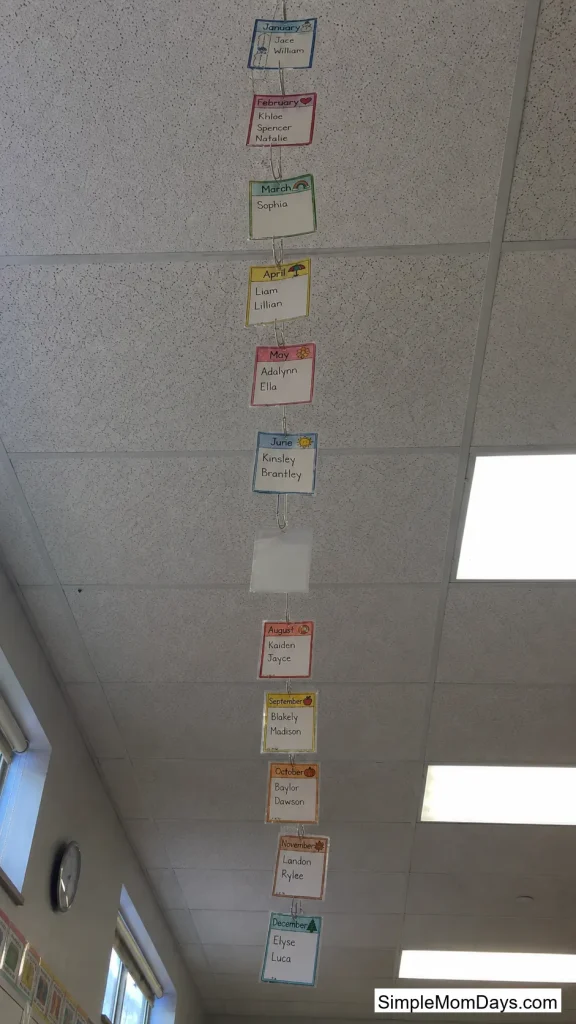
16. Ceiling Line Board
Zero wall space? String a line across the ceiling and hang laminated month tags from it with fishing line and paper clips.
Hang it above the circle time rug so it’s in the kids’ sight line when they’re already sitting and looking up. Check with your fire marshal first — some districts have rules about what hangs from ceilings.
Handling the Kids Everyone Forgets
Summer birthdays are the reason half of these boards quietly fail.
17. Half-Birthday Add-On
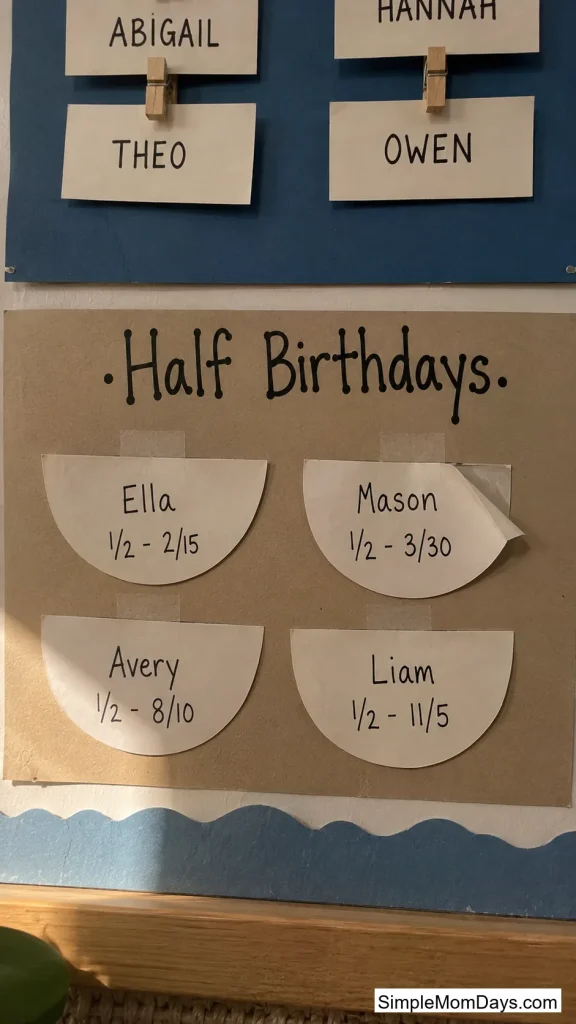
Add a small second section for half-birthdays and celebrate the July and August kids in January and February. Same crown, same song, half a cupcake shape on the board.
Kids don’t find this confusing at all. They find it fair. The June-through-August group is usually four or five kids out of eighteen, which is too many to skip.
18. Unbirthday Slot
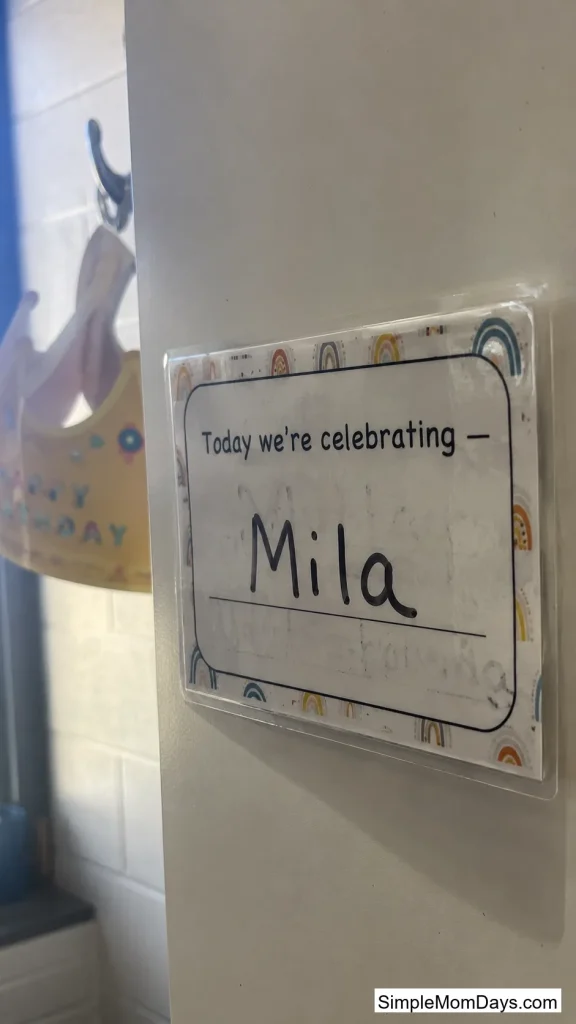
Keep one open card on the board that reads “Today we’re celebrating —” and fill it in on a random slow Tuesday for a summer-birthday child. No calendar logic required.
Some teachers do one per month, some do them all in the last week of school. Either works, as long as those kids get a turn wearing the crown in front of everyone.
19. The Grow-With-Us Slot
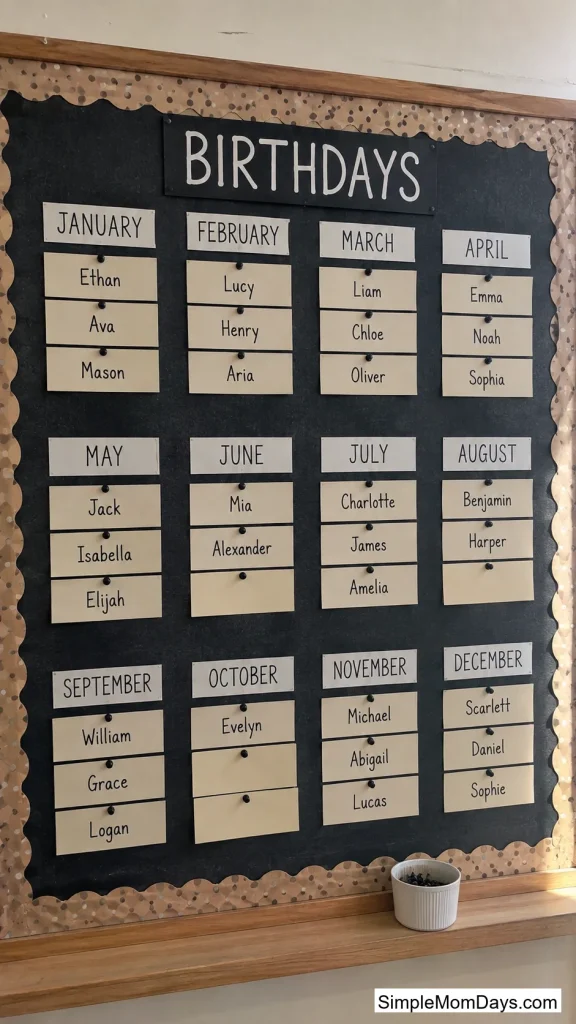
Leave two or three blank spots on the board on purpose, labeled and ready. When a new child enrolls in January, their name goes into a slot that was clearly always waiting for them.
This is a two-minute decision in August that saves an awkward moment in winter. A kid who joins mid-year and sees their name squeezed into a margin notices. One who sees it in a proper slot doesn’t.
Final Thoughts
The board that works is the one you’ll still be maintaining in March. That’s usually not the elaborate one.
Pick laminate over paper, pick clips over staples, and figure out your summer-birthday plan before September rather than in June. Everything else is decoration.