It’s the third week of October, the kids want the house to “look like Halloween,” and you have not touched a single decoration. That’s normal. Between school pickup, dinner, and everything else on the calendar, decorating usually lands somewhere near the bottom of the list until suddenly it’s tomorrow.
None of these ideas need a craft store trip, a hot glue gun you have to dig out of storage, or an afternoon you don’t have. Most use things sitting in a junk drawer, recycling bin, or the dollar store aisle you’ll walk past anyway while grabbing candy.
Grab a few from each section below, or knock out one whole category and call it done. A house doesn’t need every corner decorated to feel festive — it needs two or three spots that actually catch the eye.
Grab What’s Already in the House
These use items most homes already have on hand, so there’s no shopping trip standing between you and a decorated house.
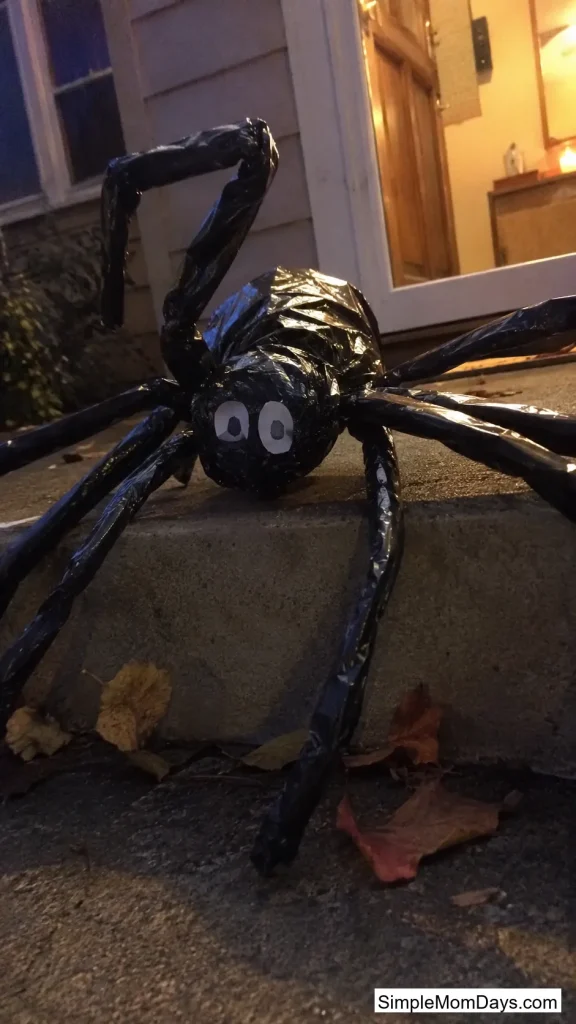
1. Trash Bag Spider Army
Stuff one black trash bag with newspaper or plastic bags until it’s round, twist the top closed, and that’s your spider body. Cut seven more bags into long strips for legs and tie them around the twisted neck.
Bend the legs into crawling positions so they look like they’re mid-scuttle across the porch or up a wall. A single giant one makes a statement by the front door; a cluster of smaller ones works well tucked into bushes or along a staircase.
Construction paper eyes finish it off, or use glow-in-the-dark paint if you want them visible after dark.
2. Egg Carton Bat Swarm
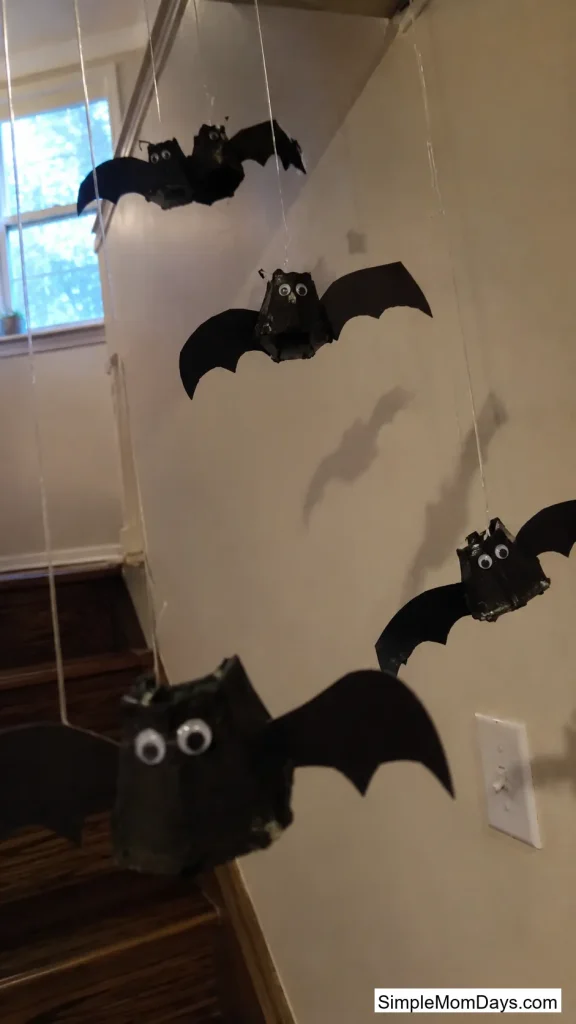
Cardboard egg cartons are already bat-shaped once you cut them apart. Trim each cup into wing shapes with a few notches on the sides, paint them black, and add small eyes with a marker or a dab of white paint.
The dimension makes these read as more interesting than flat paper bats cut from a template — the curve of the egg cup gives them a slightly hunched, wing-arched look.
String them from fishing line at different heights on a porch ceiling or stairwell for a swarm effect that moves slightly with the breeze.
3. Cotton Ball Ghost Jars
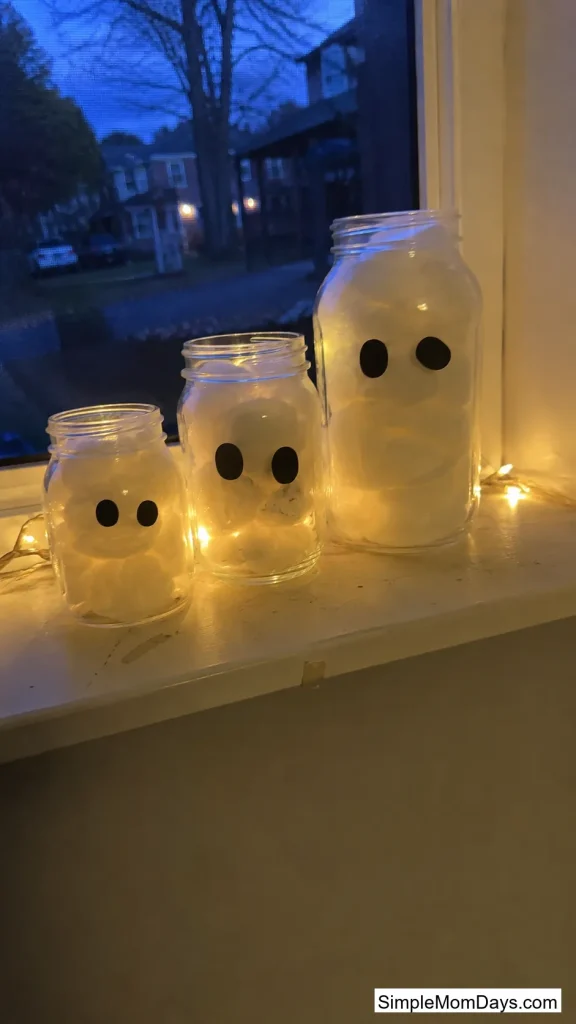
Any empty jar works here. Rip cotton balls into loose wisps and pack them inside, then cut small white paper circles, color in the centers for pupils, and stick them to the glass so it looks like eyes are peering out through the fog.
Set a strand of fairy lights behind the jars on a shelf or windowsill and switch them on at dusk — the cotton diffuses the light into a soft, hazy glow instead of a harsh point of light.
A row of three or four jars in graduated sizes reads better than one alone.
4. Cereal Box Mask Wall
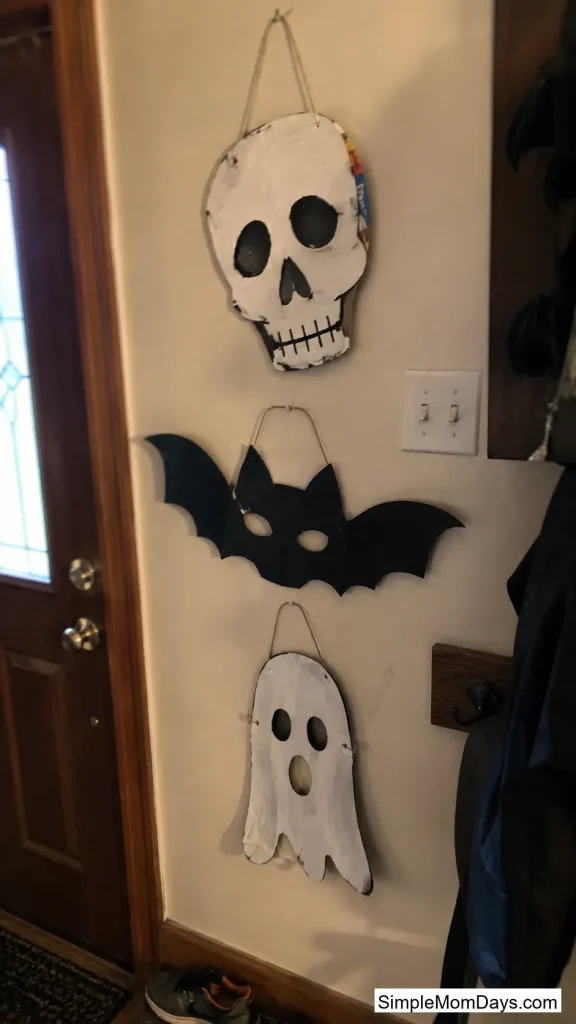
Flatten a few cereal boxes and cut mask shapes — a skull, a bat face, a simple ghost outline. Cardboard from cereal boxes has enough stiffness to hold its shape without warping, unlike regular paper.
Paint or color them, punch a hole at the top, and hang them in a cluster on a bare wall or the inside of a front door where guests will see them right when they walk in.
Kids can take over the coloring part entirely, which buys you fifteen quiet minutes while the decorating gets done.
No-Carve Pumpkin Fixes
Skip the mess and the knife altogether — these still make pumpkins the centerpiece without a single seed on the counter.
5. Gauze-Wrapped Mummy Pumpkins
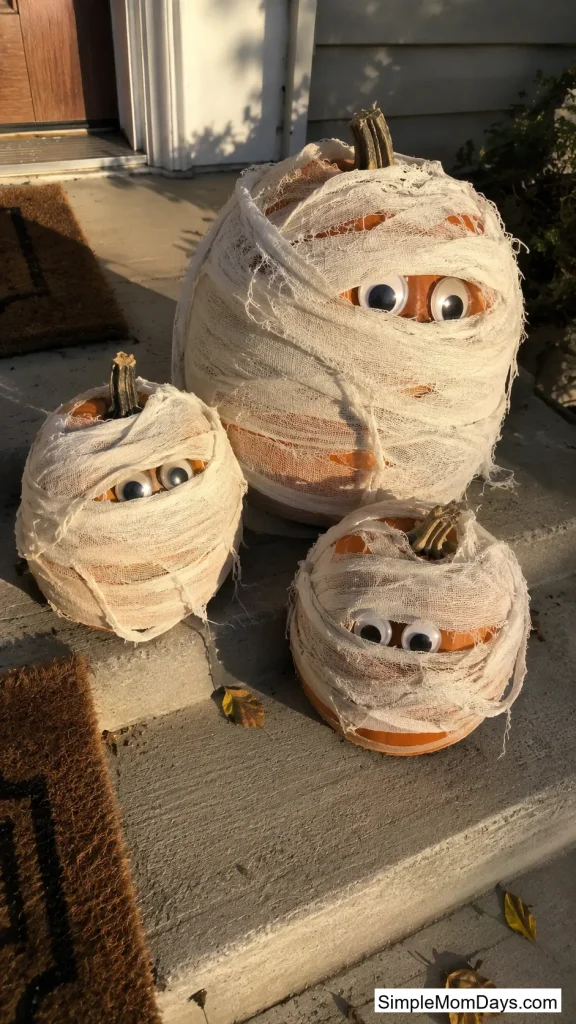
Wrap any pumpkin, real or faux, in strips of cheesecloth or gauze, leaving two gaps near the top uncovered. Stick on a pair of googly eyes in the gaps and the pumpkin instantly becomes a mummy.
The wrapping doesn’t need to be neat — loose, overlapping strips actually look more convincingly bandaged than a tidy wrap job.
A cluster of three mummy pumpkins on a porch step or mantel reads as a finished display rather than one lonely pumpkin.
6. Metallic-Dipped Pumpkins
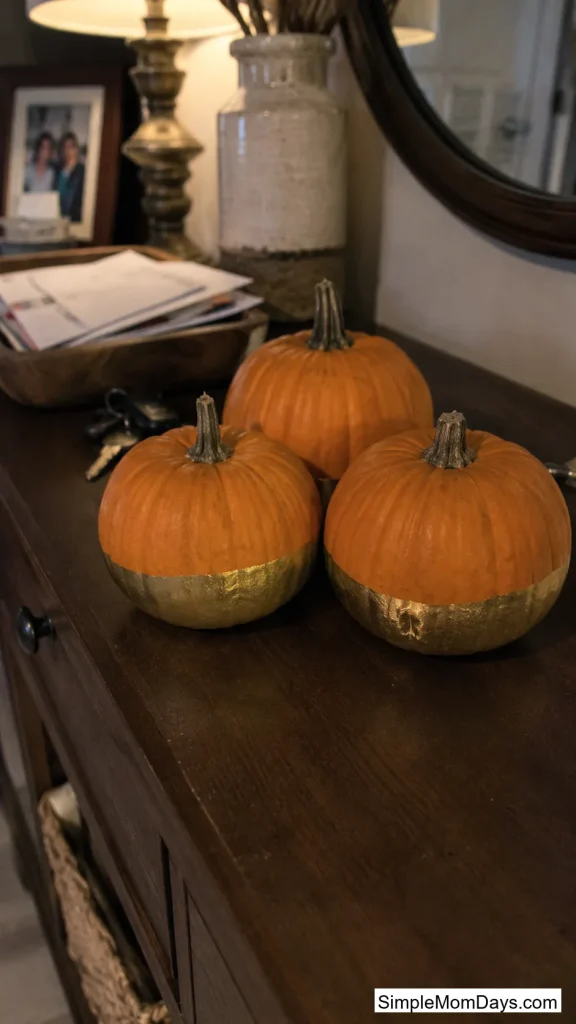
Dip the bottom third of a pumpkin in gold, silver, or copper metallic paint and let the rest stay natural orange or white. The contrast between the raw pumpkin texture and the metallic sheen looks pulled-together without any drawing or carving skill involved.
This works especially well on small pie pumpkins or gourds grouped together in threes, since the metallic bands line up visually even when the pumpkins are different sizes.
Let them dry somewhere flat for twenty minutes before moving them to their final spot.
7. Yarn Pumpkin Garland
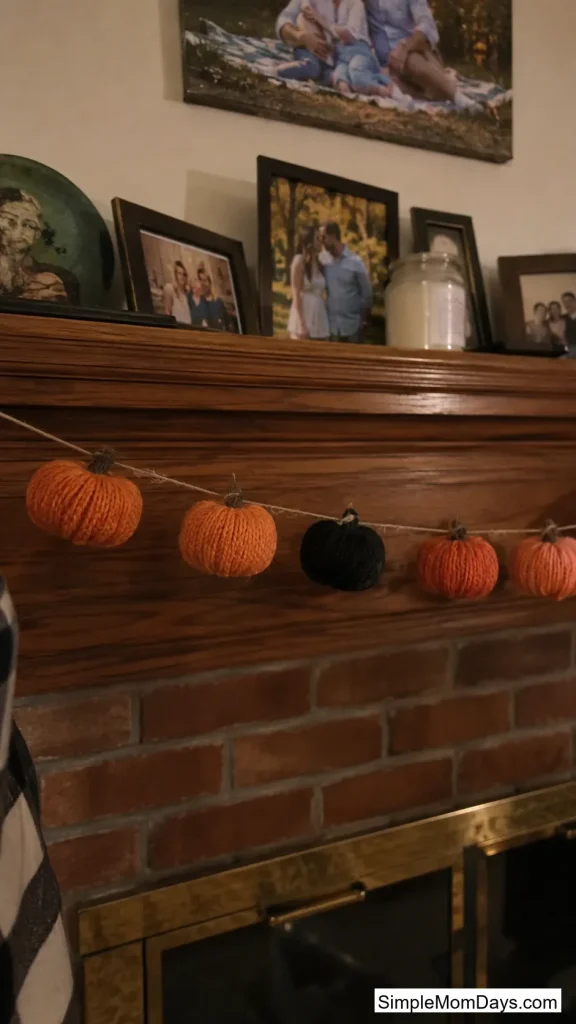
Wrap orange yarn around cardboard pumpkin cutouts or foam shapes until they’re fully covered, add a small brown pipe cleaner stem, and string several together with twine.
Hang the finished garland across a mantel, a window, or a stair railing — it holds up for the whole month since there’s no real pumpkin involved to rot or attract pests.
Mixing in one or two black yarn pumpkins along the orange ones breaks up the color and keeps the garland from looking flat.
8. Googly-Eye Monster Pumpkins
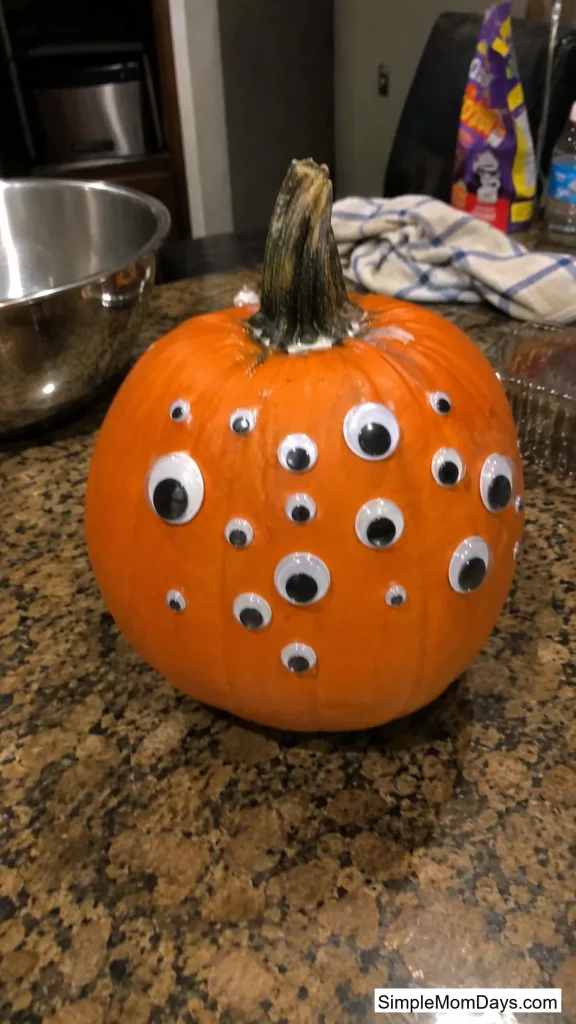
Skip drawing a face entirely. Stick a handful of googly eyes in random clusters and sizes across a plain pumpkin and it turns into a goofy, harmless monster without a single cut.
This is the fastest option on this whole list if you’ve got kids under six who want to help but shouldn’t be near a knife — hot glue the eyes on and they’re done in under five minutes per pumpkin.
Vary the eye sizes so the effect looks intentional rather than scattered.
Dollar Store Grab-and-Go Decor
A single stop at the dollar store covers this whole section, and none of it needs more than a pair of scissors at home.
9. Balloon Ghost Cluster
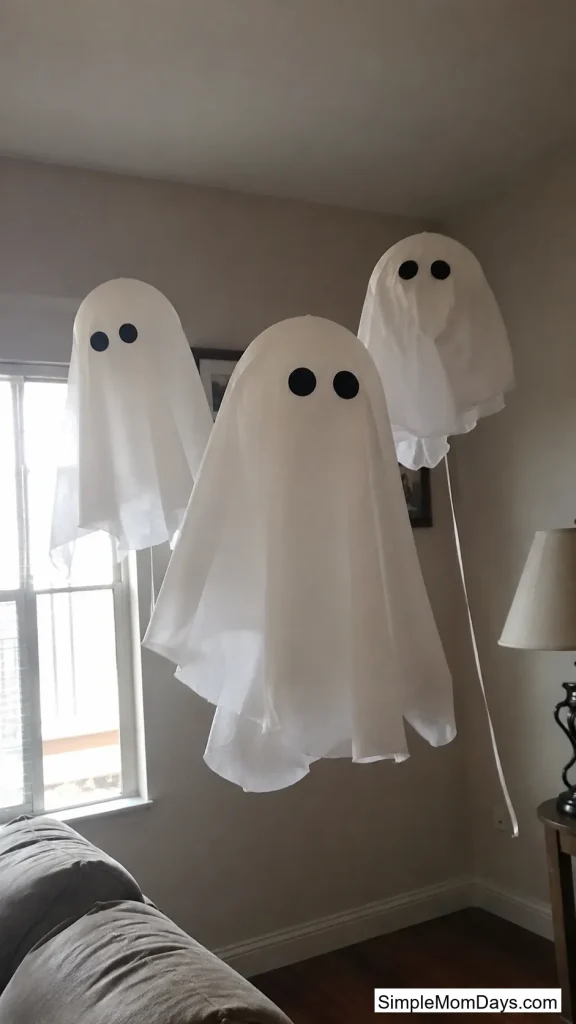
Inflate a handful of white balloons and drape a plain white tablecloth or thin fabric over each one, letting it fall into loose, ghostly folds. Add black felt or marker eyes near the top.
Hang a few from the ceiling at different heights, or group them together on a table or in a corner where they’ll catch a breeze and shift slightly on their own.
Because the fabric hides most of the balloon shape, these read as far more polished than the ten minutes they actually take.
10. Skull Vase Centerpiece
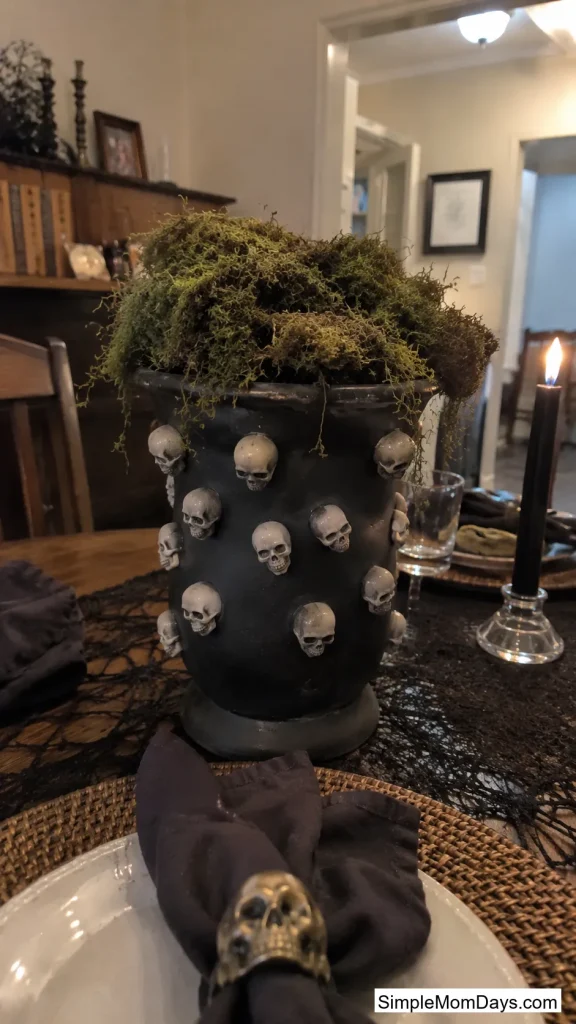
Buy a bag of small plastic skulls and a plain glass cylinder vase, then glue the skulls around the outside of the glass until it’s fully covered. One coat of matte black spray paint over the whole thing unifies it into a single eerie object instead of a pile of dollar store skulls.
Fill it with fake moss, black branches, or fairy lights depending on what you have around.
It works as a table centerpiece or tucked onto a mantel next to candles.
11. Stove Burner Cover Door Sign
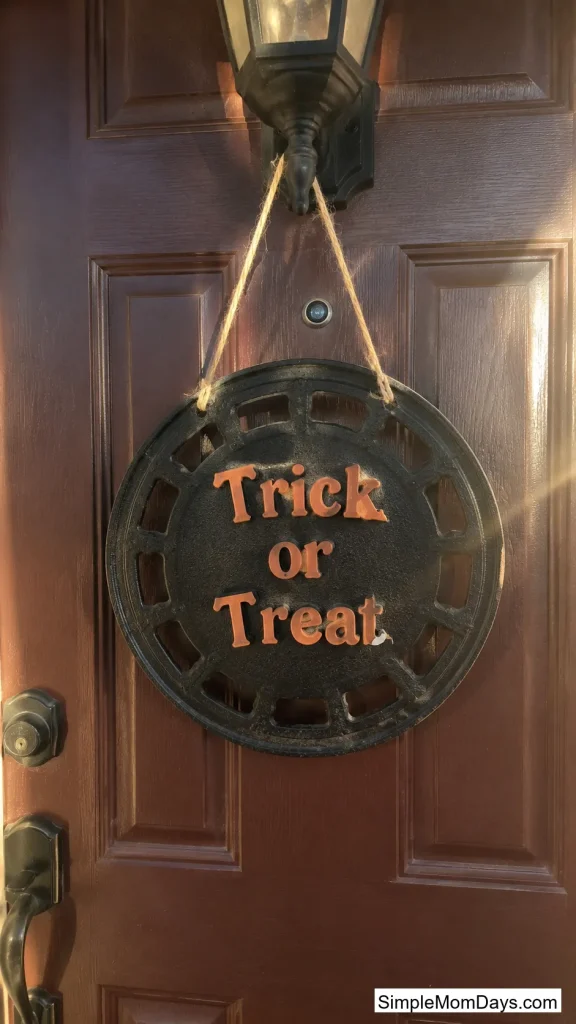
Dollar store stove burner covers are flat, round, and metal — exactly the right shape for a quick door hanger. Rough up the surface slightly with sandpaper so paint grips it, then spray paint it black or deep purple.
Once it’s dry, spell out “Trick or Treat” or a house number with stick-on letters or a paint pen.
Hang it with ribbon through a hole punched near the top, or hot glue a loop of twine to the back if you don’t have a way to punch through metal.
12. Mystery Specimen Jars
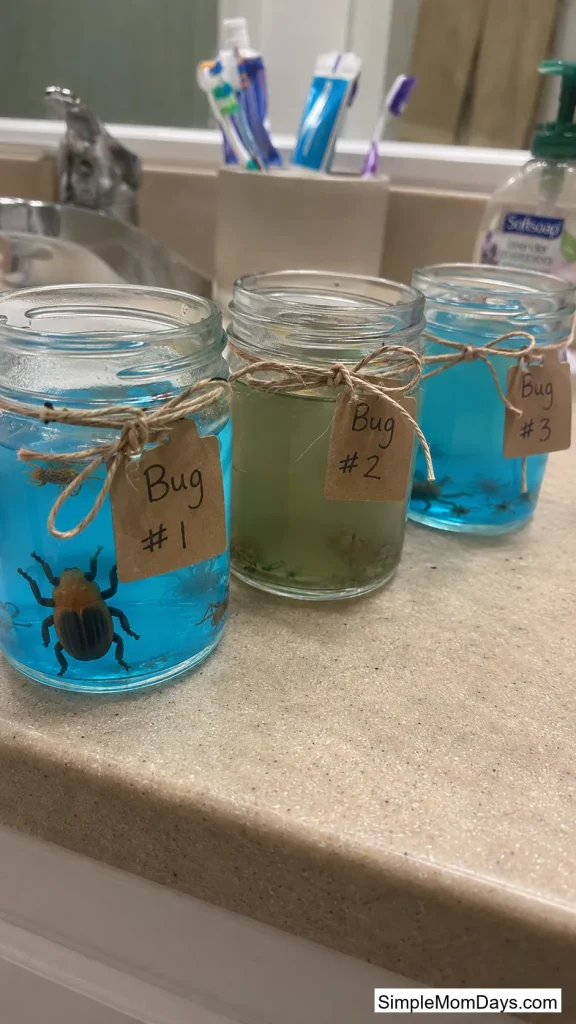
Fill a few empty jars with colored water — a few drops of food coloring does it — and drop in plastic bugs, fake eyeballs, or small toy skeletons from the dollar store bin. Screw the lids on tight.
Lined up on a windowsill or bathroom counter, these look like something out of an old apothecary shelf without any real ingredients involved.
A strip of twine and a handwritten paper label around the jar neck sells the look even further.
Porch and Yard in Minutes
Trick-or-treaters see the outside of the house more than anywhere else, so this is where a few small touches go the furthest.
13. Googly Eyes in the Garden
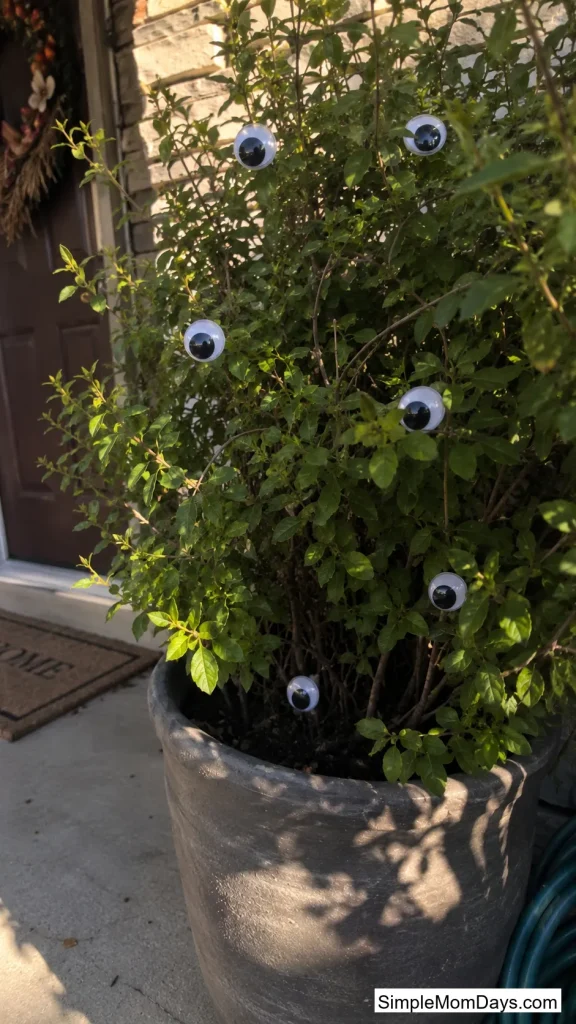
Push googly eyes of different sizes into the leaves of any bush, potted plant, or hedge already growing near the front door. Every plant on the property suddenly looks like it’s watching.
Glow-in-the-dark or reflective eyes work best here since they’ll still show up once it’s dark and trick-or-treaters are actually walking by.
This one costs almost nothing and takes less time than most items on this list — a bag of eyes and ten minutes outside covers the whole yard.
14. Cardboard Tombstone Graveyard
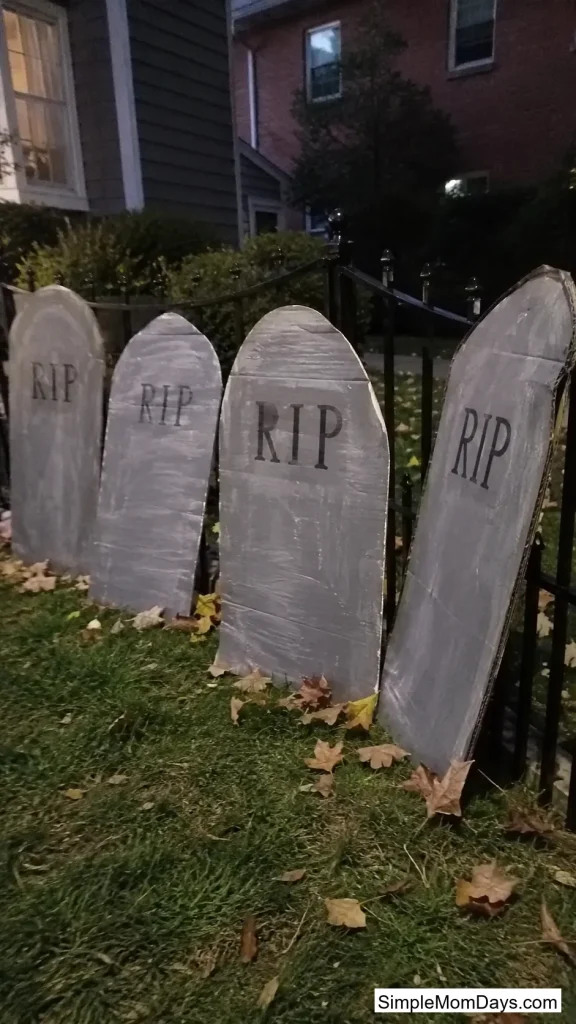
Cut old cardboard boxes into tombstone shapes — a rectangle with a rounded top works fine. Paint them gray with a few darker streaks for a stone texture, then add spooky lettering with a marker or paint pen.
Push them into the lawn or lean them against a fence in a loose cluster rather than a straight row, which reads more like an actual overgrown graveyard.
Prop up an extra one or two at slightly different heights and angles for a more convincing, lived-in look.
15. Glow Stick Eyes in the Shrubs
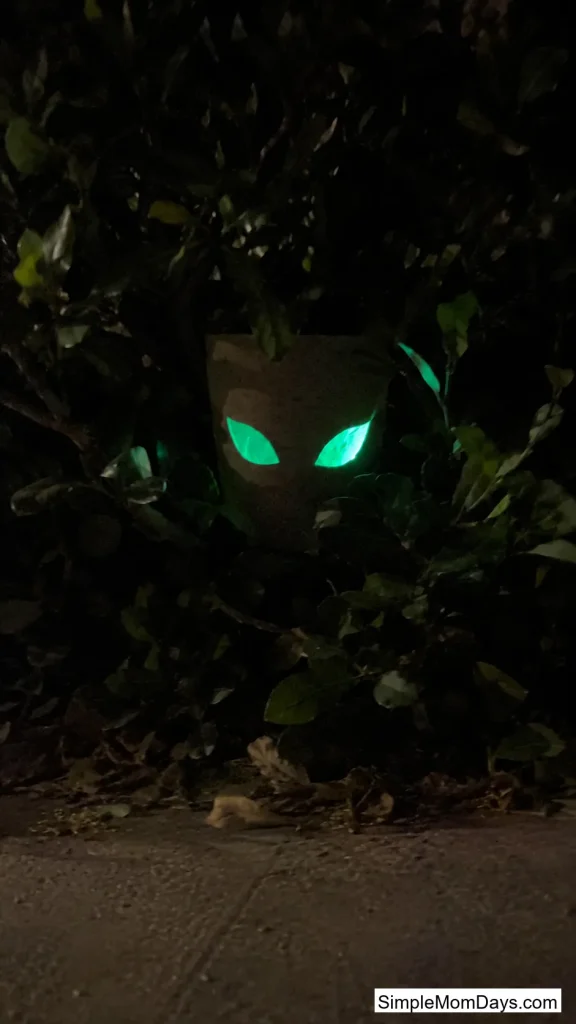
Cut two eye shapes into a toilet paper tube or a leftover gift wrap tube, then tuck a cracked glow stick or small flashlight inside. Nestle it into a bush or hedge near the walkway.
From a distance, all a passerby sees is a pair of glowing eyes staring out from the greenery — no visible tube, no obvious light source.
Set up two or three of these along the path leading to the door for the creepiest effect.
16. No-Carve Luminaria Path
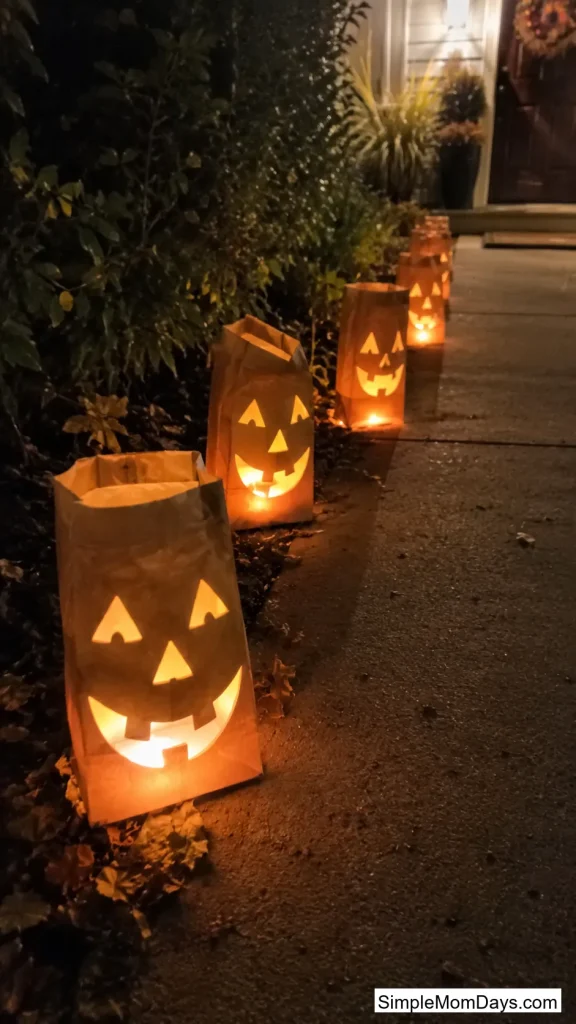
Draw or cut jack-o’-lantern faces onto paper gift bags, then drop a battery-powered tea light inside each one. Line them along the front walkway to guide trick-or-treaters to the door.
Because there’s no real pumpkin or open flame involved, these hold up fine even if it rains earlier in the day.
Space them about two feet apart for a path that reads clearly from the street.
Kid-Friendly Crafts Before Dinner
Hand these off to the kids and most of tonight’s decorating gets done while dinner is in the oven.
17. Handprint Ghost Garland
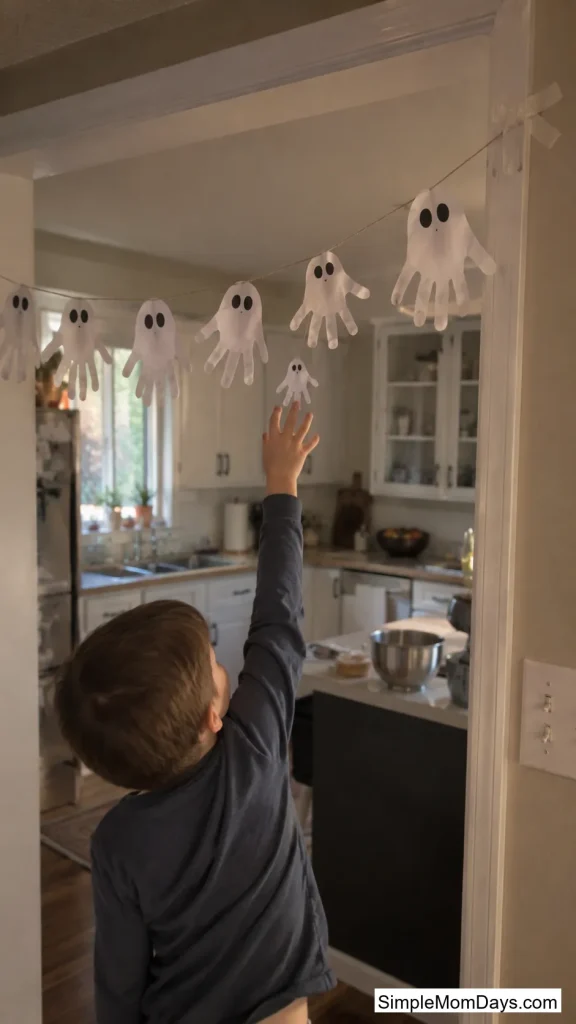
Trace each kid’s hand on white paper, cut it out, and draw two simple dot eyes on the palm. String the handprints together with a length of twine or tape them individually across a doorway or window.
A pack of white paper covers dozens of these, and every kid in the house wants to see their own handprint turned into a ghost.
Save a few from year to year — the size difference as they grow becomes its own kind of keepsake.
18. Popsicle Stick Tombstones
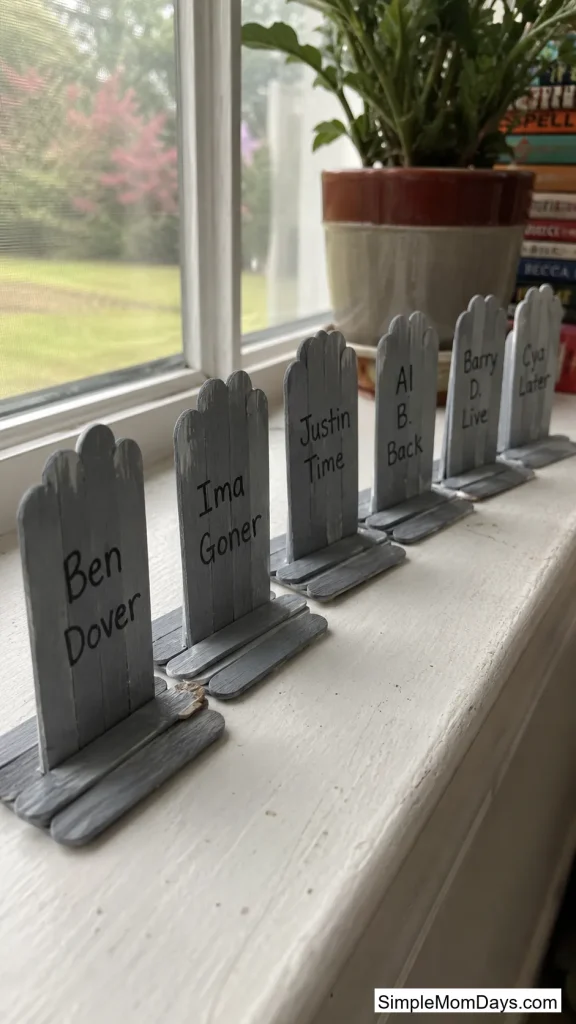
Glue a row of popsicle sticks together into a small rectangle, round off the top two corners, and paint the whole thing gray. Once it’s dry, write a family member’s name or a joke epitaph across the front.
These are small enough to line up along a windowsill, mantel, or the base of a real tombstone display outside.
Every kid at the table can make their own in under thirty minutes, and no two ever turn out the same.
19. Glow Stick Witch Brooms
Fold black paper into narrow strips and wrap them around one end of a cracked glow bracelet so it fans out like straw. The glow bracelet becomes the broom’s handle and its light source at the same time.
Hang a row of these on a wall or window and they glow on their own once the lights go down — no batteries, no separate light source to hide.
Kids can make several in one sitting since each one takes only a couple of minutes.
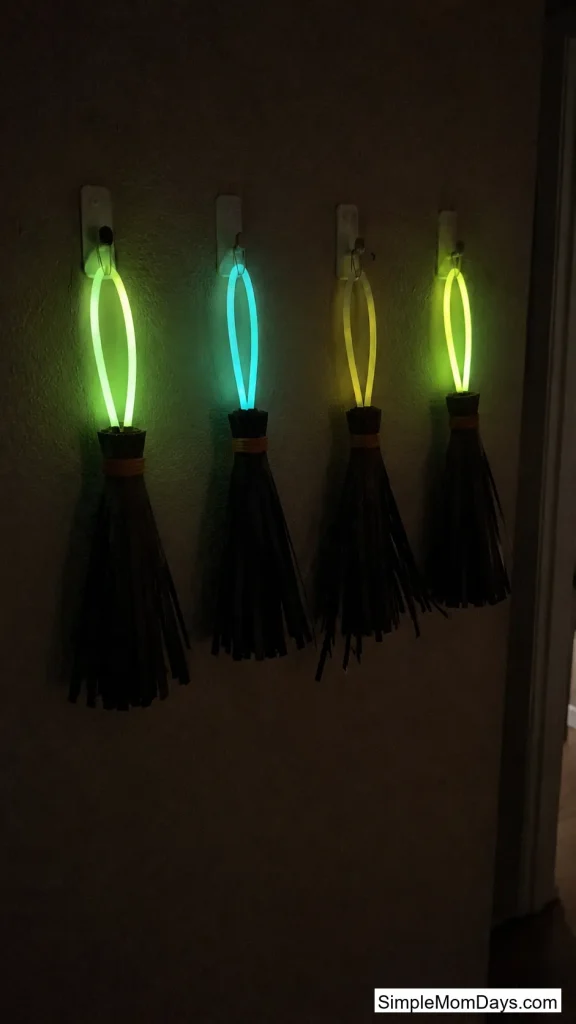
Table and Party Spread
If people are actually sitting down to eat, these two ideas cover the table without adding a single extra task to the cooking list.
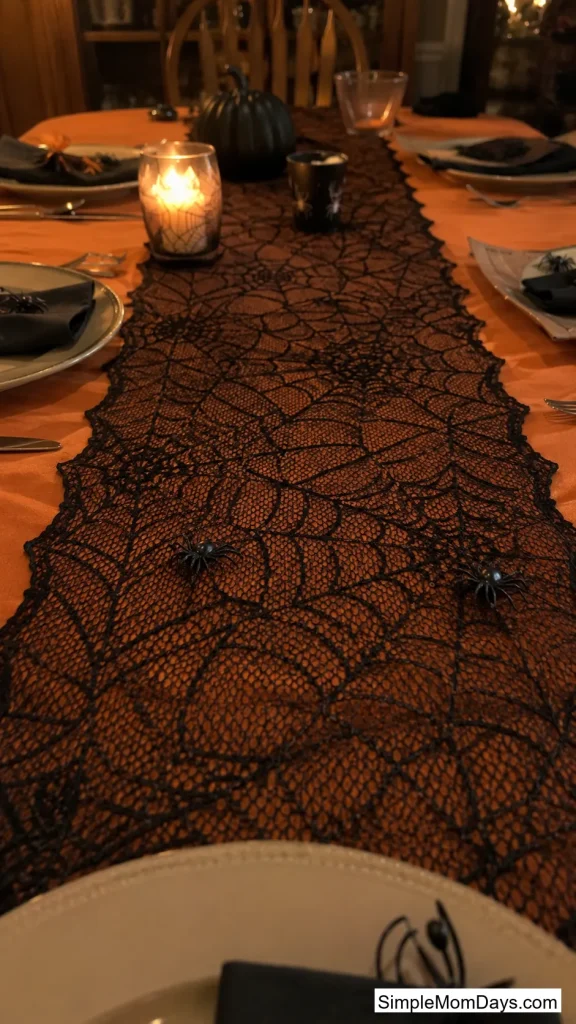
20. Cobweb Table Runner
Lay a length of black lace or a cut cobweb-style fabric runner down the center of the table, over a solid orange or white tablecloth so the pattern actually shows up. Scatter a few plastic spiders across it.
This takes about two minutes to set up and instantly makes a plain table look decorated without touching a single plate or napkin.
It also packs flat for reuse next year, unlike most centerpieces.
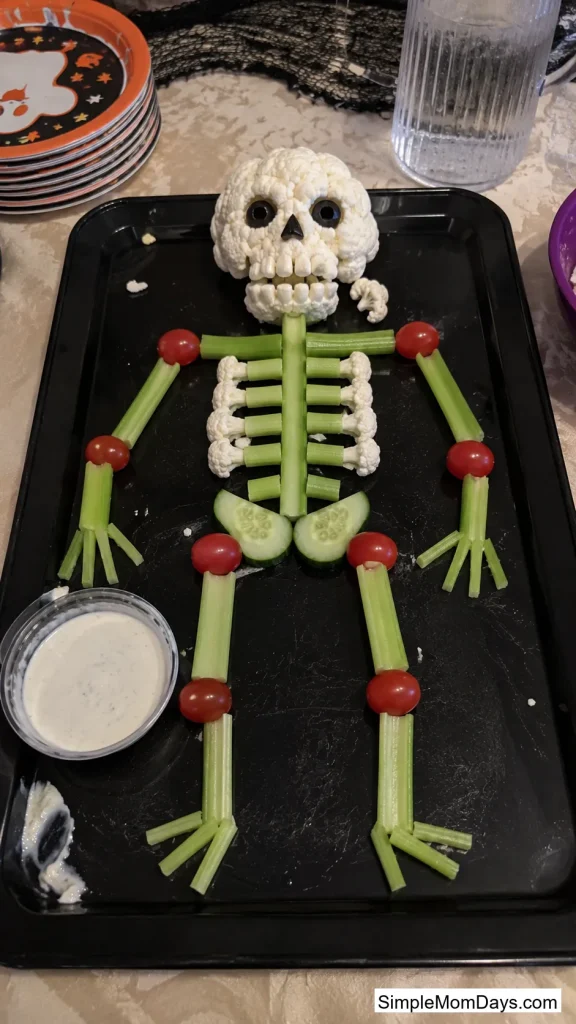
21. Skeleton Veggie Tray
Arrange a vegetable tray into a skeleton shape on a large platter — cauliflower florets for a skull, celery sticks for arms and legs, cherry tomatoes at the joints. Serve with a dip on the side.
It works double duty as the centerpiece and the snack table, which matters when there’s no extra surface left for decor once the food goes out.
Kids tend to eat more vegetables off a skeleton tray than a plain bowl, which is a nice bonus nobody’s mad about.
Pick a handful from whichever sections match what’s already lying around the house, and the porch and dining table will look pulled-together well before anyone rings the doorbell tonight.