Walk around the block in October and you’ll come home with more pine cones than you know what to do with. Kids scoop up every single one, and half of them end up forgotten in a bowl on the counter by November.
Before those cones get swept into the yard waste bin, there’s a lot you can do with them. Some of these ideas turn into the classic googly-eyed animals you’d expect. Others skip the glue entirely and turn into science experiments, math practice, or an outdoor painting session that doesn’t require a single trip to the craft store.
One quick note before you start: if your cones came straight off the ground, bake them at 200°F for 30-45 minutes first. This dries out any leftover sap, kills off anything that hitched a ride inside, and makes the scales open up wider, which actually makes gluing easier.
Backyard Animal Characters
The pine cone’s natural shape already does half the work here. These three are the ones kids ask to make on repeat.
1. Pine Cone Owls
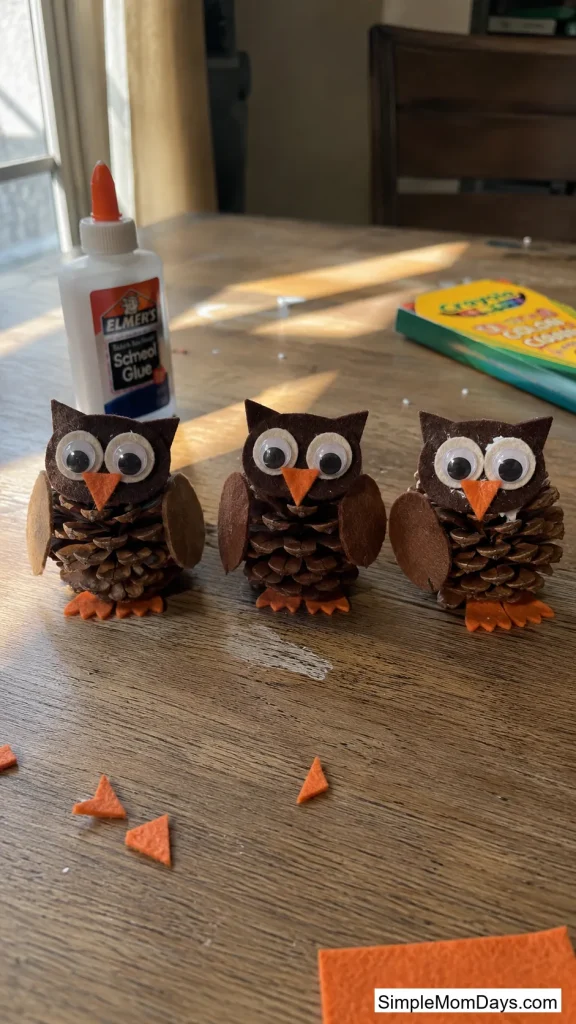
A pine cone standing upright already looks like a round little owl body, so this one comes together fast. Glue on two googly eyes near the top, a small orange felt triangle for a beak, and two felt wing shapes on either side.
It works because there’s almost no way to mess it up. The scales hide any crooked glue lines, so a 3-year-old’s version looks just as good as a 9-year-old’s.
Total cost usually runs under $2 if you’ve already got felt scraps and googly eyes on hand, and it’s sturdy enough to sit on a shelf for the whole season.
2. Pine Cone Hedgehogs
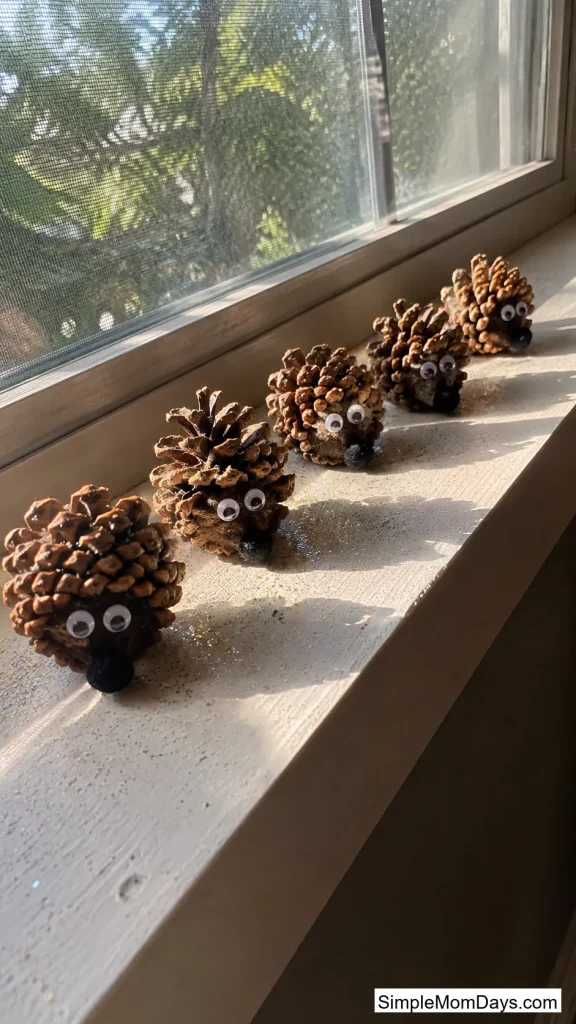
Paint the wide bottom half of the cone light brown or leave it natural, then glue on two small googly eyes and a tiny black pom-pom nose at the narrow tip.
This is the one to hand a toddler. There’s no cutting involved, no small pieces beyond the nose, and the “spiky” look is already built into the cone itself.
Line up five or six on a windowsill and it reads like a little hedgehog family, which kids get weirdly attached to by the end of the week.
3. Pine Cone Turkeys
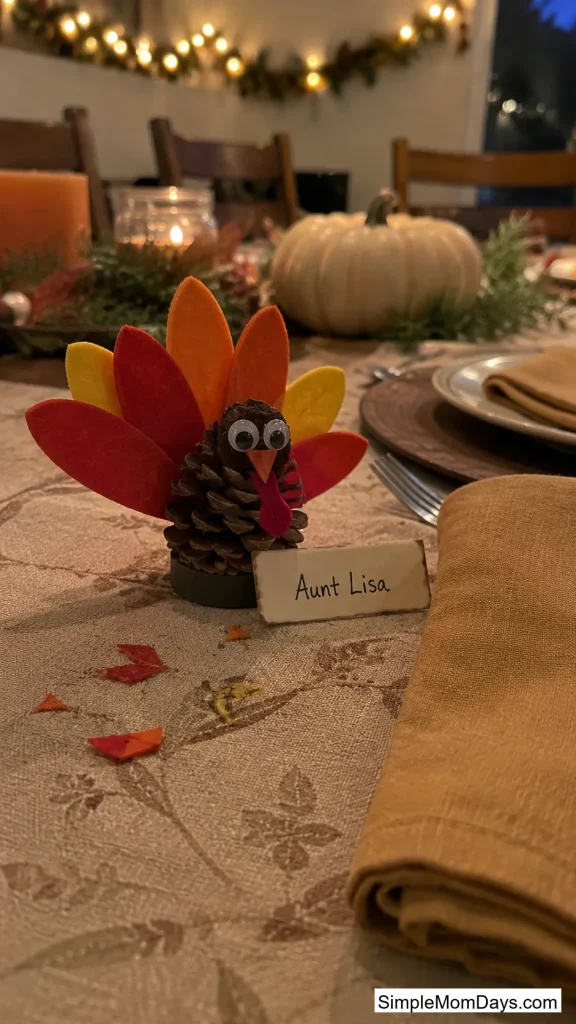
Fan out five or six felt or paper feather shapes in red, orange, and yellow behind the cone, then add a small paper head and wattle at the front with two bent pipe cleaners for legs.
Older kids can cut their own feathers; younger ones do better with feathers you’ve pre-cut so the gluing stays the focus.
These make good place cards for the Thanksgiving table if you write each guest’s name on a little flag glued to a toothpick and tuck it into the feathers.
Spooky Halloween Pine Cones
Same base material, a can of black paint, and suddenly you’ve got Halloween decor that costs almost nothing.
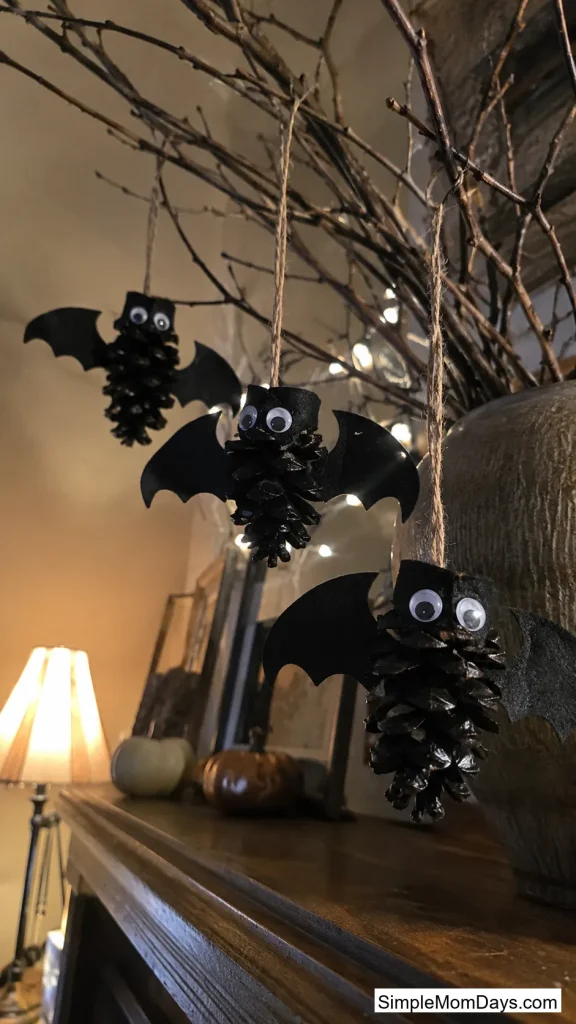
4. Pine Cone Bats
Paint the whole cone black and let it dry completely, then glue two felt or cardstock bat wings to the sides and two tiny white triangle fangs near the top.
The scales catch the black paint unevenly, which actually helps here. It gives the bat a slightly textured, furry look without any extra work.
Screw a small eye hook into the top scale and hang a few from a bare branch in a vase for an easy Halloween centerpiece.
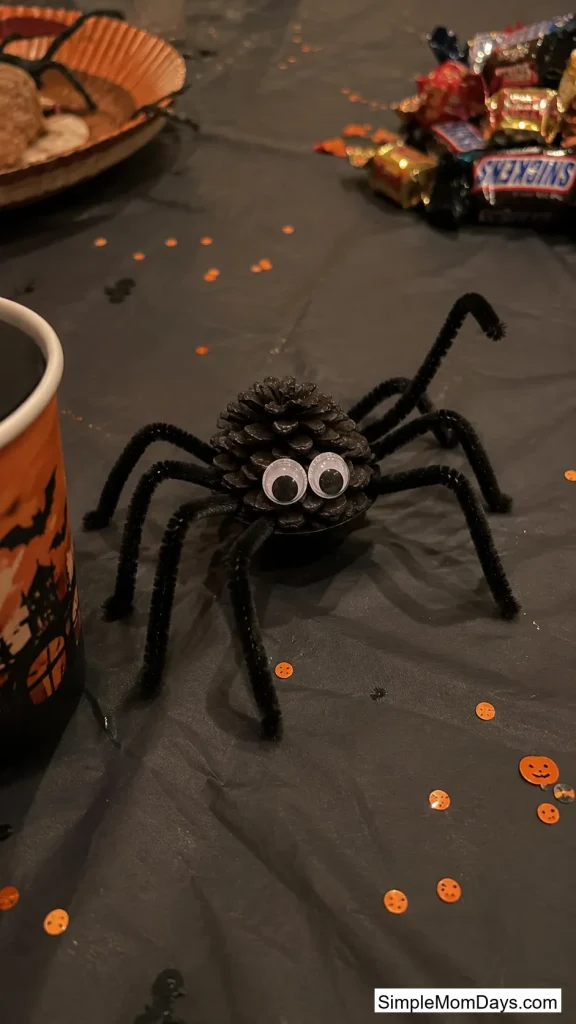
5. Pine Cone Spiders
Bend four black pipe cleaners in half and glue the bends to the underside of the cone so eight legs splay out in each direction, then add two googly eyes near the front.
Bending and positioning eight legs evenly is real fine motor practice, even though it doesn’t feel like a lesson to a kid who just wants a spider.
Kids can control how “creepy” it looks just by how far apart they spread the legs, which turns into its own little design decision.
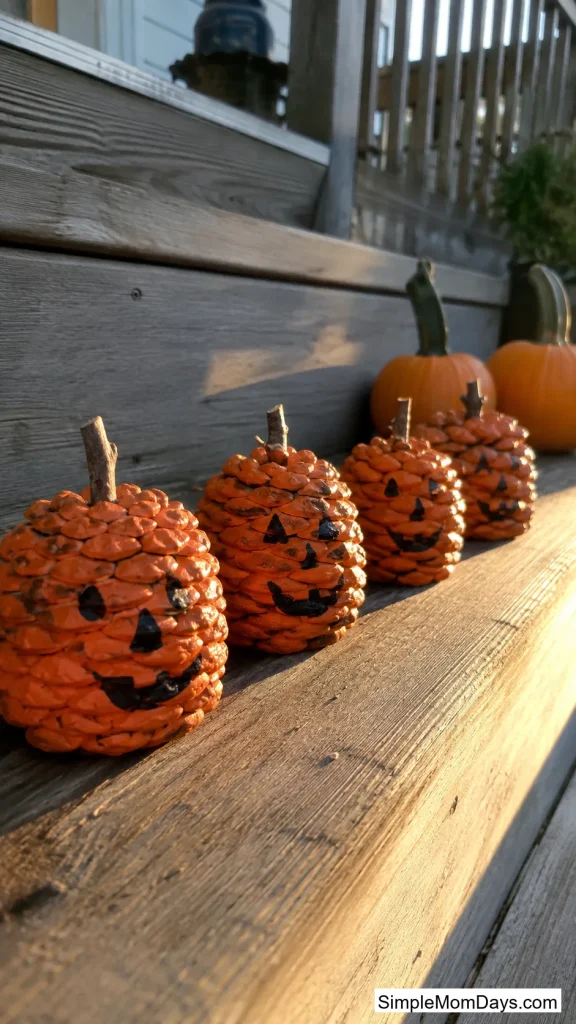
6. Pine Cone Pumpkins
Paint the entire cone orange, let it dry, then glue on a short twig or a piece of brown pipe cleaner at the top for a stem and draw a simple jack-o’-lantern face with a black marker.
Because the paint has to fully coat every scale, this one takes a little longer than the others, but the texture underneath still shows through in a way flat paper pumpkins can’t match.
Group ten or twelve on a mantel or porch step for a patch that didn’t cost a trip to the pumpkin farm.
Christmas & Winter Keepsakes
These hold up well enough to pack away and reuse the following year, which makes them worth the extra ten minutes.
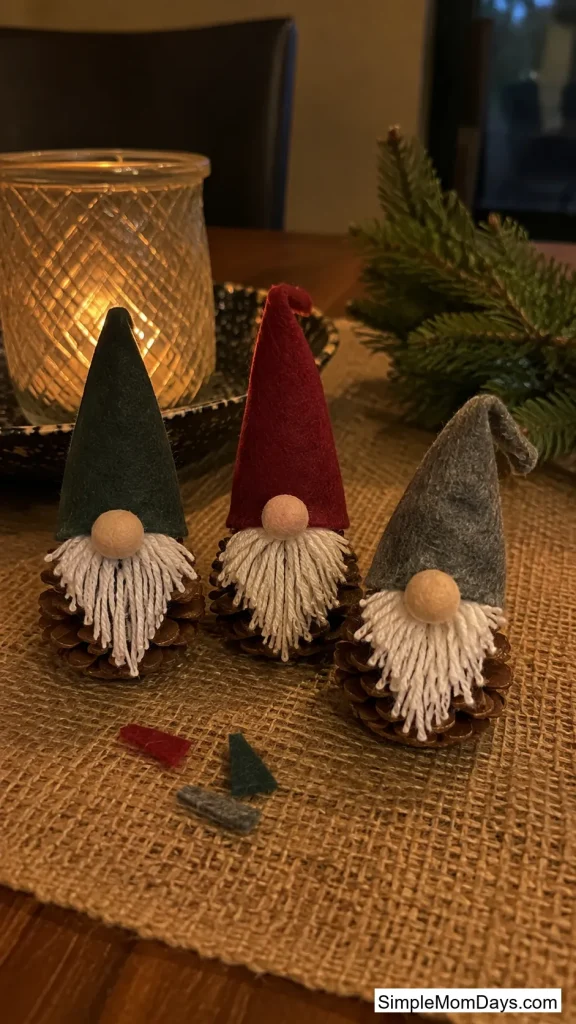
7. Pine Cone Gnomes
Roll a small felt triangle into a cone shape for a hat and glue it to the top of the pinecone, add a pom-pom nose peeking out below the hat’s edge, and finish with a wisp of white yarn or cotton for a beard.
Skipping a face entirely, aside from the nose, is what gives these their classic gnome look, and it also means less precise gluing for younger hands.
A cluster of three or four in different hat colors makes a solid centerpiece for a holiday table runner.
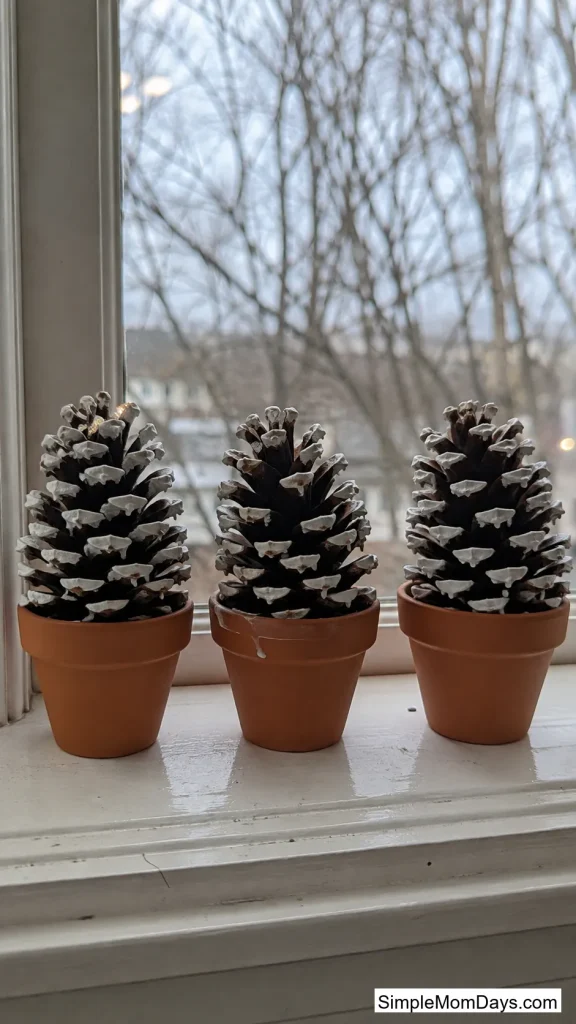
8. Mini Potted Pine Trees
Stand a pinecone upright inside a small terracotta pot (the 2-inch size works well) using a dab of hot glue or a bit of floral foam to hold it steady, then dust the tips of the scales with white paint for a snowy look.
Standing it up changes how it reads entirely — instead of a craft glued flat on paper, it looks like an actual tiny tree, which kids notice right away.
A single dot of glitter glue on each snow-dusted tip catches the light without turning into a full glitter cleanup.
9. Glitter-Dipped Ornaments
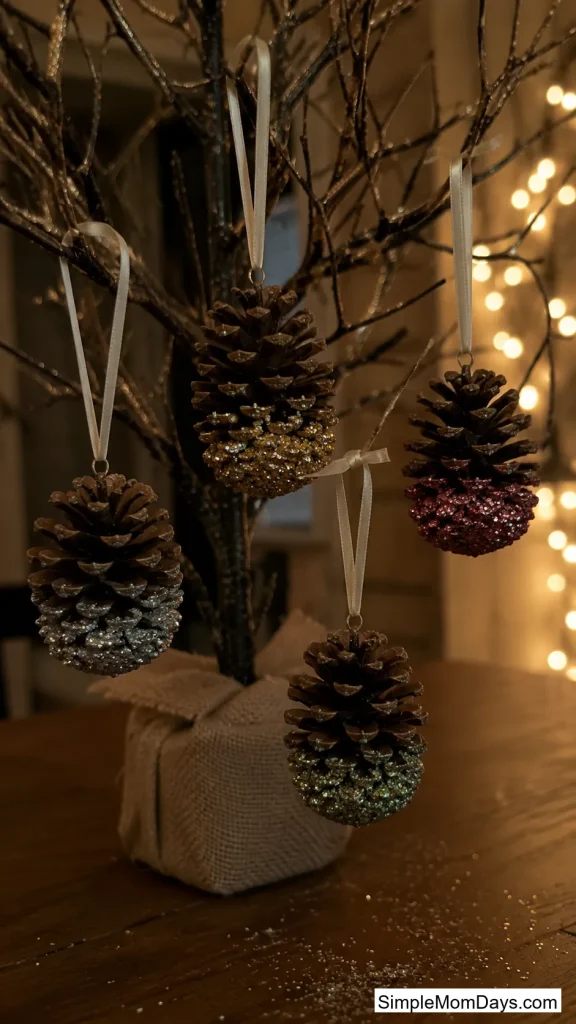
Brush craft glue over the tips of the scales, dip the cone into a shallow dish of fine glitter, and let it dry upside down on wax paper before tying on a loop of ribbon.
The glue only needs to cover the very tips, not the whole cone, so this goes faster than it looks like it should.
String three or four together on one ribbon for a garland instead of hanging them as single ornaments.
Backyard Science Projects
Pine cones are hygroscopic, meaning they physically react to moisture in the air, which makes them one of the only free science tools sitting in your yard.
10. Build a Pine Cone Weather Station
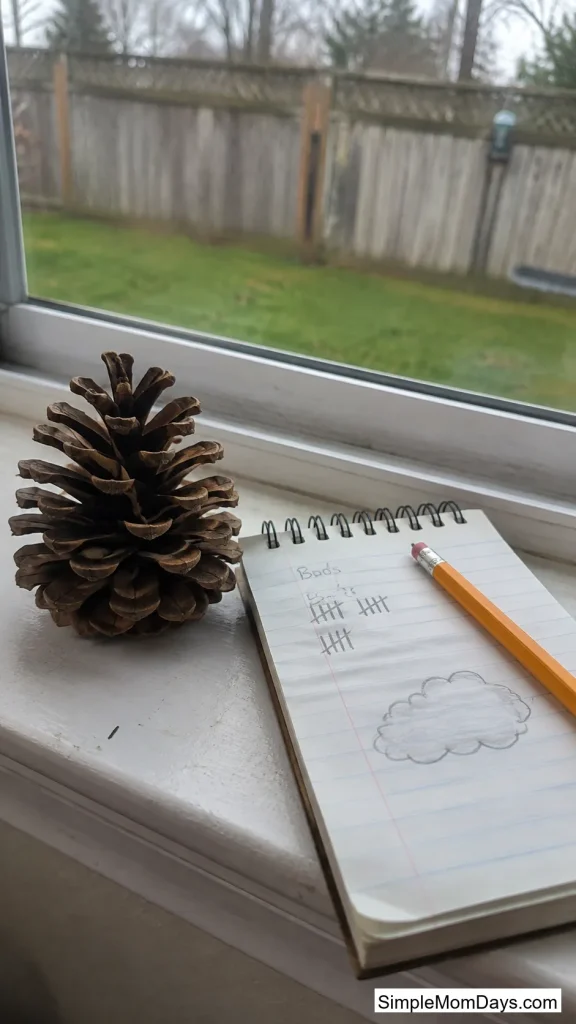
Set an unpainted pinecone on an outdoor windowsill and have kids check it once a day, noting whether the scales are open or closed.
Closed, tight scales usually mean rain is on the way, since the scales curl inward to protect the seeds from moisture. Open, flared scales mean drier air.
Keep a simple paper log next to it for a week and compare the cone’s “predictions” against the actual weather that day.
11. Sink-or-Float Prediction Experiment
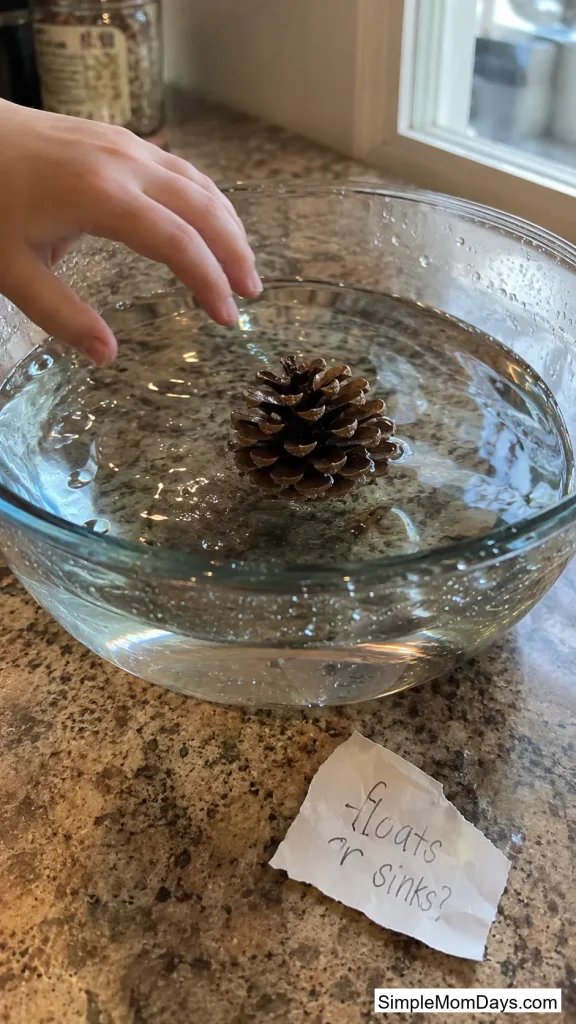
Have kids look at a dry pinecone, guess whether it will sink or float, and write down their guess before dropping it into a clear bowl of water.
It floats at first, which surprises most kids given how solid the cone looks. Leave it in the water overnight and check it again the next morning — the scales close up and it sits noticeably lower.
This works well paired with the weather station activity above, since it’s the same moisture reaction happening on a faster timeline.
12. Sorting & Measuring Station
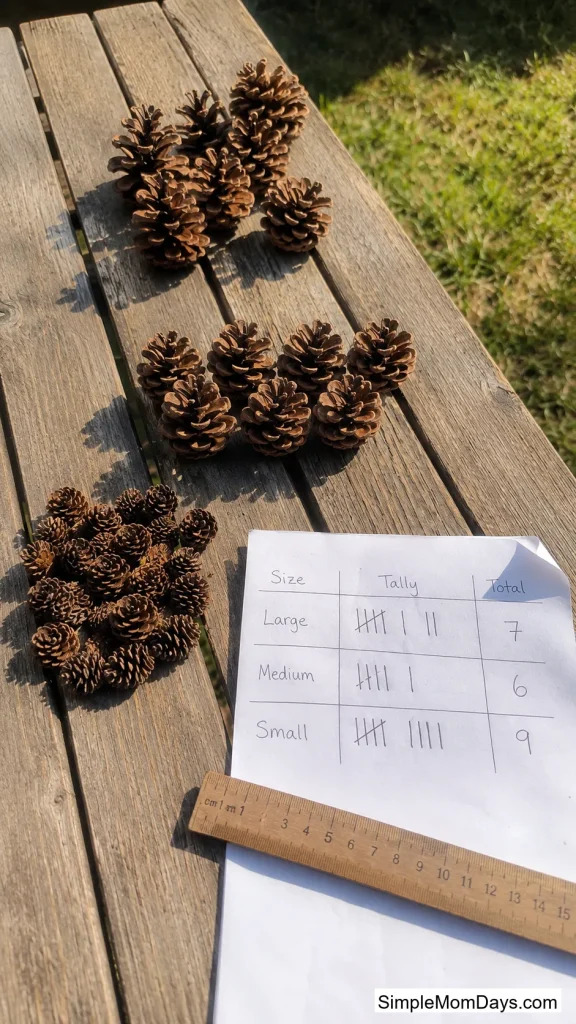
Collect a mixed pile of pine cones from different trees if you can, then have kids sort them by size, color, or how tightly the scales are closed.
Add a small ruler and a simple chart with columns for length and width, and let kids measure each cone and record the numbers themselves.
This one scales easily — a 4-year-old can sort by “big and small” while a second grader can measure to the nearest half-inch.
Early Math & Sensory Play
No painting required for any of these, which makes them good for a lower-mess afternoon.
13. Counting & Matching Mat
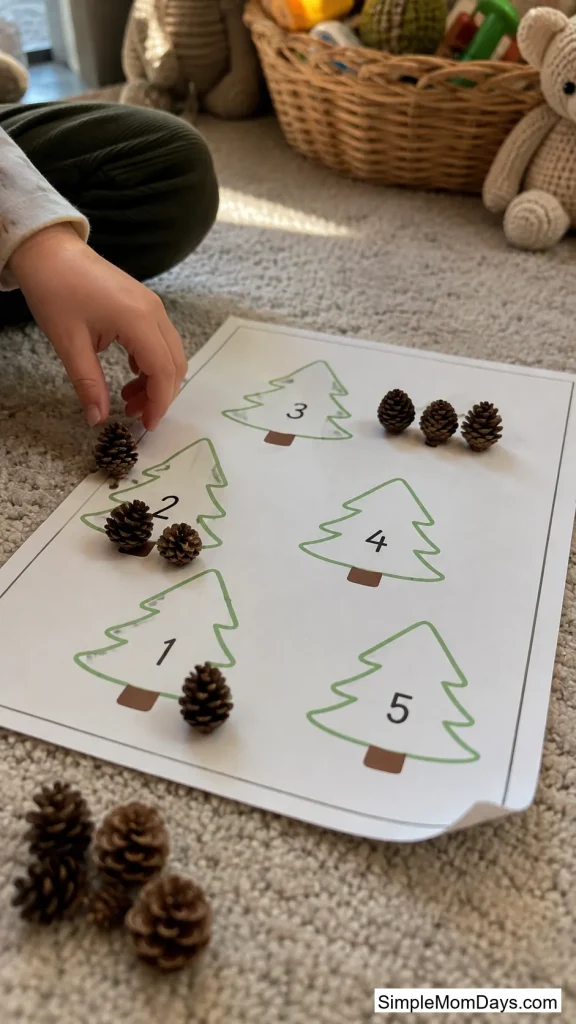
Draw ten simple pine tree outlines on a sheet of cardstock and write a number from 1 to 10 under each one, then have kids place the matching number of small pinecones next to each tree.
It’s a five-minute setup that turns into real one-to-one counting practice, which is one of the harder early math skills for preschoolers to grasp.
Laminate the mat if you want to reuse it — dry erase marker wipes the numbers off cleanly for round two.
14. Textured Sensory Bin
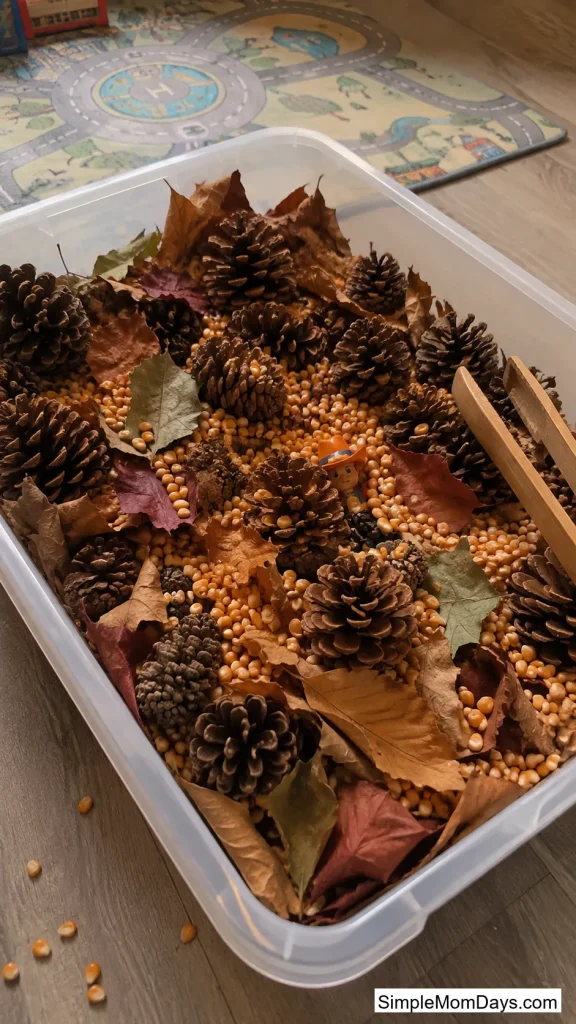
Fill a shallow bin with pinecones, dried corn kernels, and a handful of dried leaves, then hide a few small plastic toys or jewels inside for kids to dig out with tongs or a small scoop.
The mixed textures do more for tactile development than pinecones alone, since kids have to feel the difference between rough, smooth, and papery as they search.
A dollar-store bin and a bag of dried corn from the craft aisle covers the whole setup for around $5.
15. Pipe-Cleaner Weaving
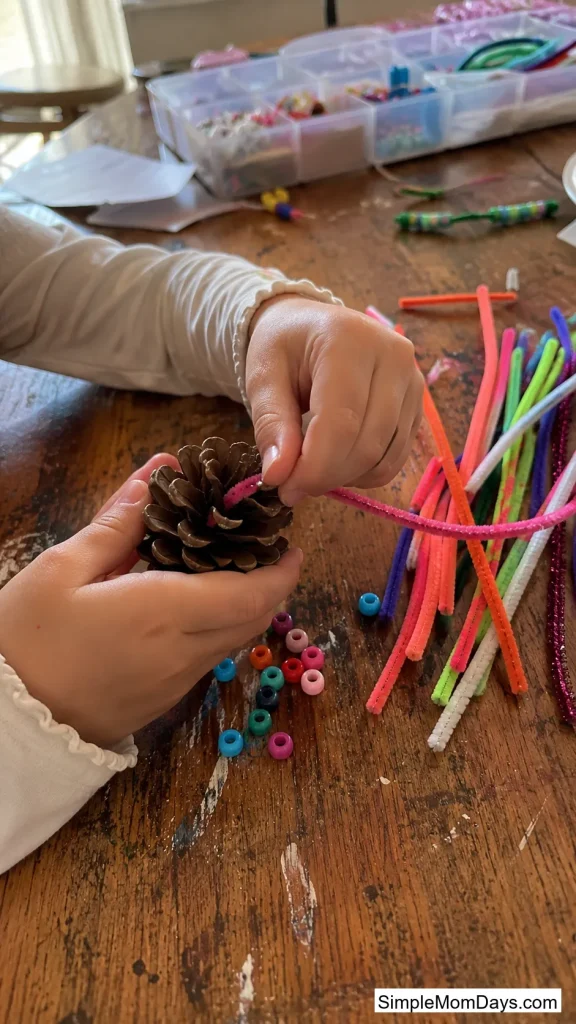
Hand a child a few pipe cleaners and let them weave the ends in and out of the pinecone’s scales, working their way around the whole cone.
The pincer grip needed to thread a stiff pipe cleaner through a tight gap is genuinely good hand-strengthening work, even though it just looks like play.
Kids who finish fast can add beads to the pipe cleaner ends before weaving for an extra step.
Painting & Art Techniques
These three use paint in ways that go beyond just coloring the cone a solid color.
16. Nature Paintbrushes
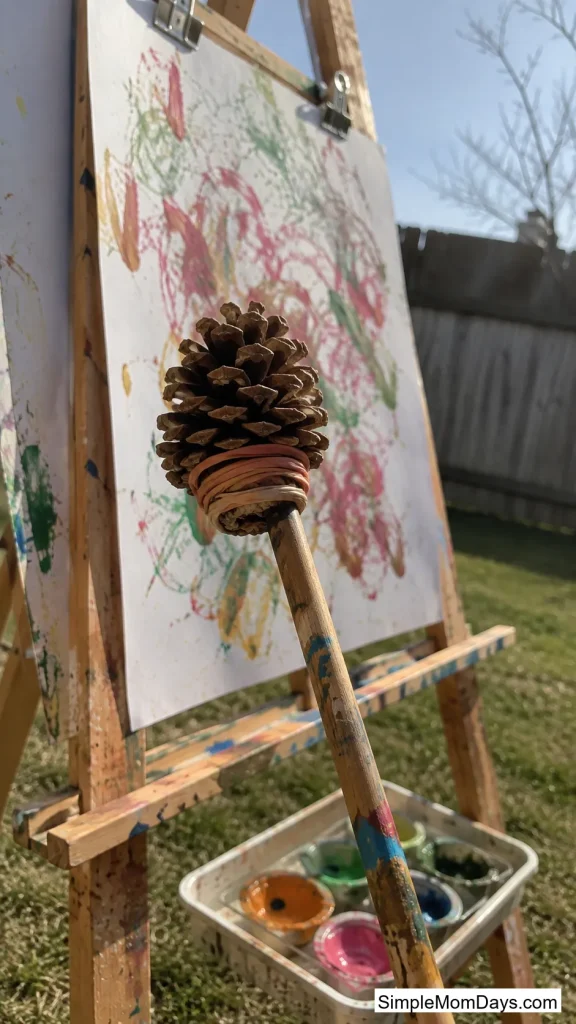
Rubber-band or zip-tie a pinecone to the end of a stick so the wide end faces out, dip it in a shallow tray of paint, and use it as an oversized brush on a big sheet of paper outside.
The uneven scales leave a texture no regular paintbrush can copy, and because it’s outside, nobody has to worry about paint flying off the bristles.
This one works especially well taped to an easel or a large roll of paper pinned to a fence.
17. Paint-Roll Box Art
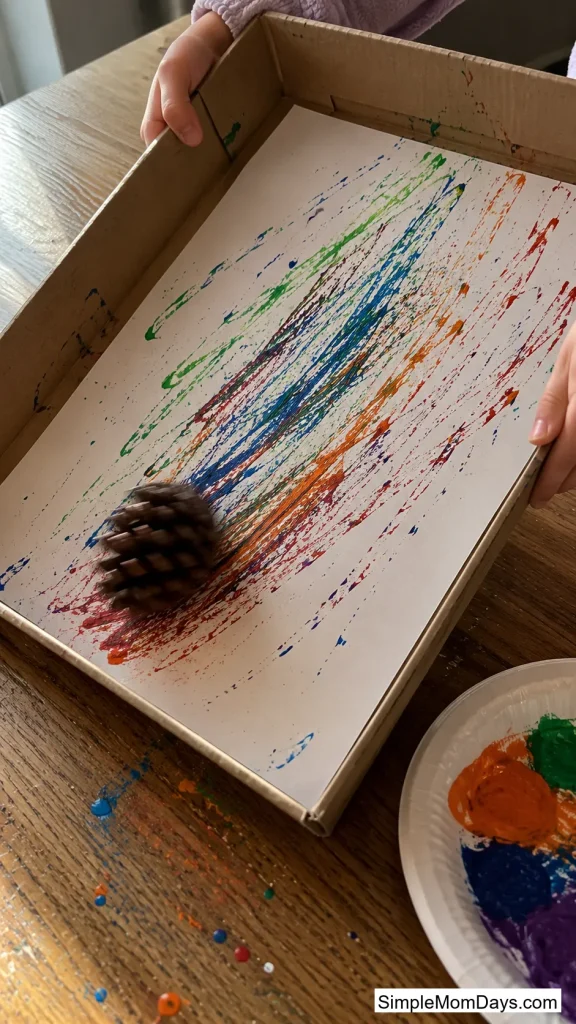
Line a shallow cardboard box with a sheet of paper, drop in two or three paint-dipped pinecones, and have kids tilt and shake the box so the cones roll paint trails across the page.
The tracks each cone leaves are never quite the same twice, since the bumpy shape rolls unevenly instead of in a clean line.
Use two or three colors at once for a busier, more layered result.
18. Ombre Dip-Dye Pine Cones
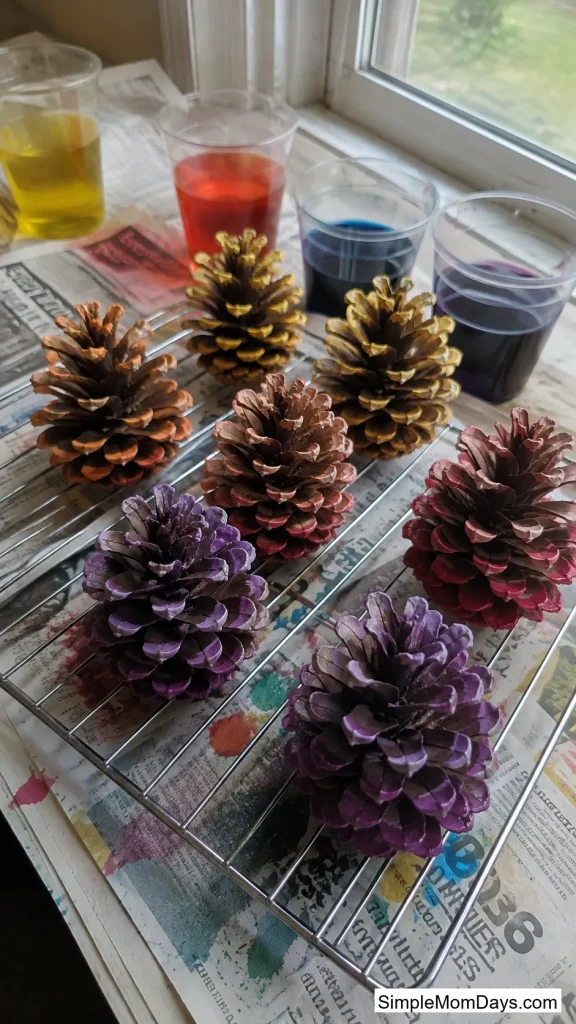
Mix a few cups of diluted liquid watercolor or food coloring at different strengths, then dip the bottom third of a pinecone in the lightest shade, followed by just the very tip in the darkest.
Letting each layer dry for a few minutes before the next dip is what keeps the colors from bleeding together into mud.
This one takes more patience than most, so it fits older kids or tweens better than a preschool group.
Nature Projects Worth Keeping
A short final stretch for the pine cones that end up doing more than sitting on a shelf.
19. Pine Cone Stamp Printing
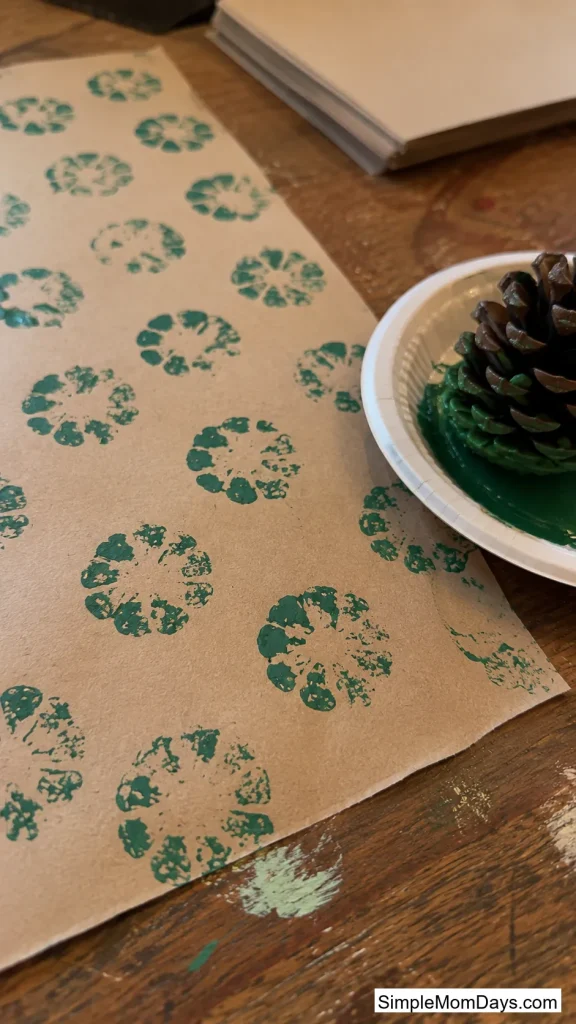
Dip the flat base of a large pinecone into a shallow dish of paint and press it repeatedly onto plain kraft paper to build a repeating pattern.
Every stamp comes out slightly different depending on how much paint is left, which gives the finished sheet a hand-made look a store-bought stamp can’t fake.
A full sheet makes surprisingly good DIY gift wrap for the holidays.
20. DIY Pine Cone Fire Starters
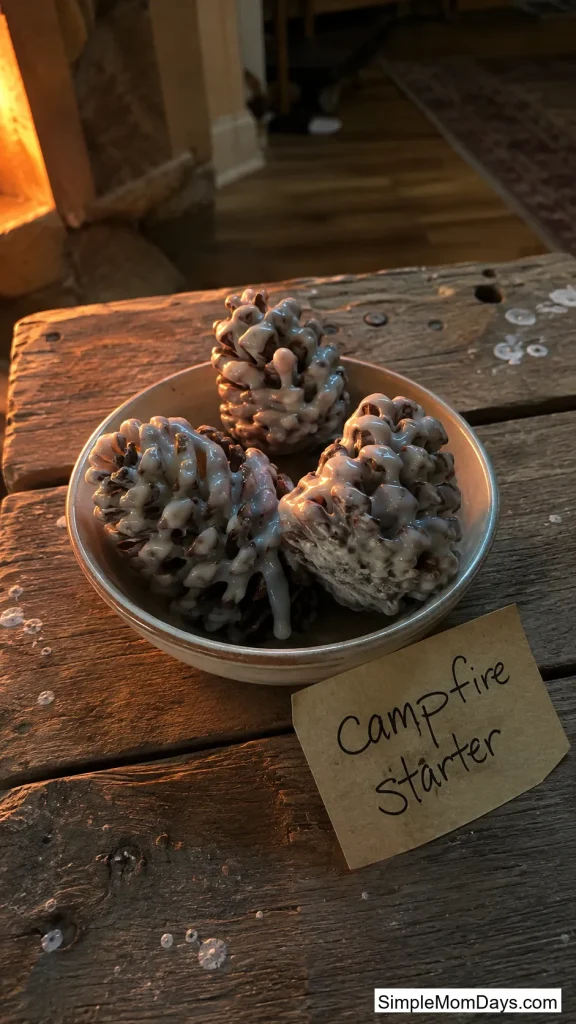
Melt old candle stubs or wax pellets in a double boiler on the stove (adult-only step), dip a dry pinecone in until it’s fully coated, and set it on wax paper to harden.
A drop of cedar or pine essential oil in the melted wax adds a scent that makes these worth setting out in a bowl even before they’re used for their actual job.
Best for kids 8 and up who can handle the dipping step while an adult manages the hot wax — great for a family camping trip or as a small gift with a tag reading “campfire starter.”
21. Pine Cone Bird Feeders
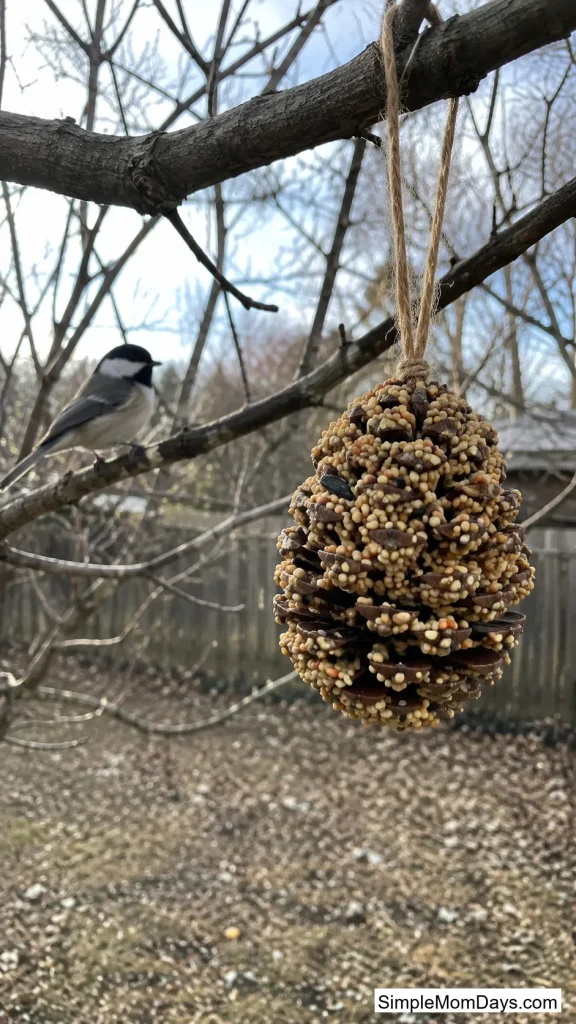
Coat a pinecone in peanut butter (or sunflower seed butter for a nut-free version), roll it in birdseed until it’s fully covered, and hang it from a tree branch with a loop of twine.
It’s the one project on this list that keeps working after the craft is done — birds start showing up within a day or two, especially once the weather turns cold and food gets scarcer.
Hang two or three at different heights in the yard so kids can watch which birds go for which feeder.
Twenty-one is a lot of options, and you don’t need all of them in one afternoon. Pick two or three that match what your kids are into right now, keep the rest of the cones in a bag in the garage, and pull them back out when the next rainy Saturday hits.