

This post contains Amazon affiliate links. As an Amazon Associate, I earn from qualifying purchases at no extra cost to you. I only recommend products I'd genuinely suggest to a friend.
Every October my camera roll fills up with screenshots of other people’s nails. Pumpkin manis are the one seasonal look I never skip, because they work from mid-September straight through Thanksgiving without feeling like a costume.
The problem is that most pumpkin nail roundups show you the same three things: an orange jack-o’-lantern, a French tip, and a plaid accent nail. Done, next year, repeat.
This list goes wider. You’ll find velvet cat-eye pumpkins, chrome stamps on bare nails, white Casper pumpkins, a 3D builder gel version, and plenty of quick options you can pull off at your kitchen table with a bobby pin and ten minutes. Save the ones you like and bring them to your next appointment, or grab a fine brush and try them yourself.
⚡ IN A HURRY?
Quick Picks for Fall Nail Days
Short on time? These are the essentials worth grabbing — everything else in the post is inspiration, but start here.
- Pumpkin Press-On Nails — a full salon-style pumpkin set in about ten minutes, no drying time and no steady hand required.
- Pumpkin Nail Stickers — press one on, seal with top coat, and nobody can tell you didn’t paint it freehand.
- Fall Gel Polish Set — burnt orange, caramel, and brown in one box covers almost every design on this list.
- Magnetic Cat-Eye Gel Polish — the velvet pumpkin look everyone’s asking their nail tech for, doable at home with the little magnet wand included.
- Nail Art Brush Set — the thin liner brush is what makes stems, vines, and jack-o’-lantern faces look clean instead of blobby.
- Matte Top Coat — one swipe turns any glossy pumpkin design into that suede finish all over Pinterest right now.
Easy Pumpkin Nails You Can Do Tonight
No nail tech, no steady artist’s hand. These four are the ones I’d hand to a beginner.
1. One Tiny Pumpkin on Milky Nails
Paint every nail a sheer milky white, then add a single small pumpkin on one ring finger. That’s the whole design, and it’s the one I get the most compliments on.
The restraint is what sells it. A full set of pumpkins reads as Halloween decor by November 1st, but one little pumpkin floating on a clean base still looks intentional at a Thanksgiving dinner. It also hides mistakes well, since you only have to get one pumpkin right.
Use a dotting tool or the head of a bobby pin for the body, then drag a tiny brown stem with a toothpick. Two minutes of actual art.

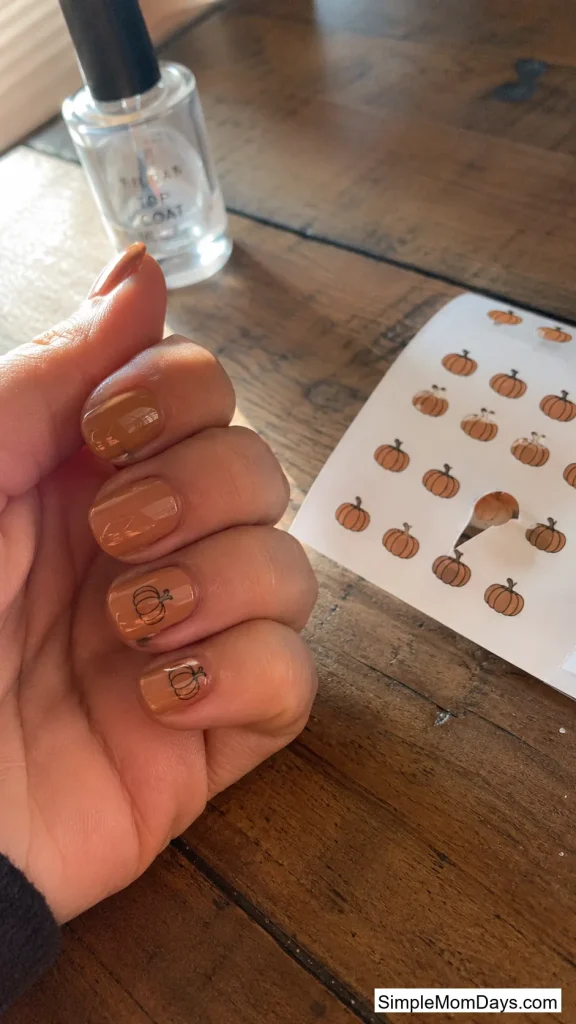
2. Pumpkin Sticker Shortcut Mani
Stickers get treated like cheating, and I’ve stopped caring. Paint a nude or soft caramel base, place one pumpkin sticker per accent nail, and seal everything under a thick top coat so the edges don’t lift.
The sealing step is the difference between “obviously a sticker” and “wait, you painted that?” Once the sticker sits under gel or a good top coat, it flattens out and reads as hand-painted from a normal viewing distance.
A sheet of decent water-slide or peel-off pumpkin stickers costs a few dollars and does both hands with plenty left for touch-ups mid-season.
3. Burnt Orange Micro French
Micro French tips are the skinny version of the classic French, a line maybe two millimeters thick, and they’re everywhere this fall. Swap the white for burnt orange and the whole look turns seasonal without a single pumpkin painted on it.
If you want the pumpkin literal, add one micro pumpkin at the base of the thumb nail as a signature. The thin line is honestly easier to freehand than a full French smile line, because a slight wobble is less visible at that scale.

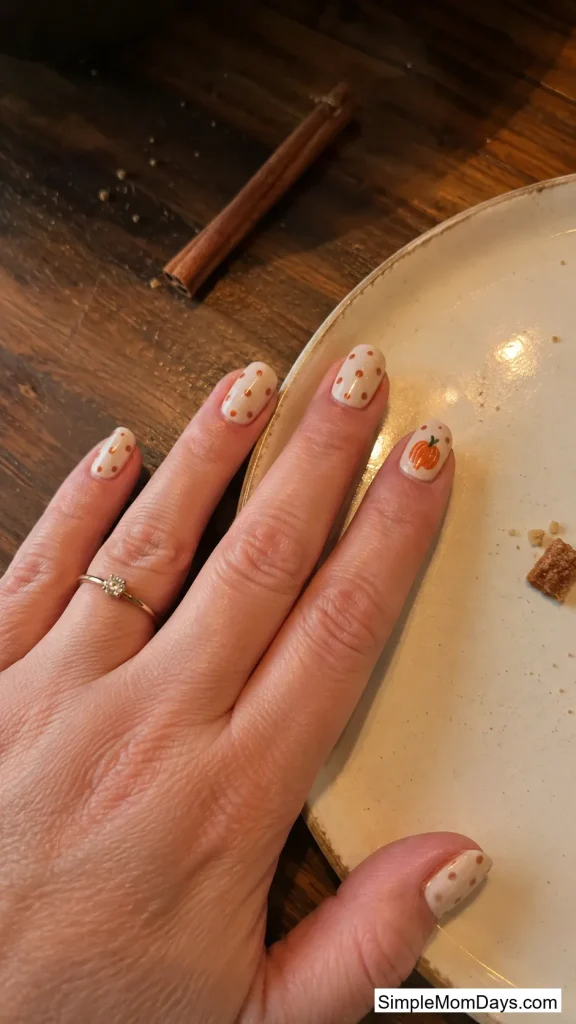
4. Pumpkin Polka Dots
Polka dots came back hard this year, and they translate to fall with almost no effort. Do rust-orange dots on a cream base across most nails, then let one accent nail carry a small pumpkin so the dots have a reason to be there.
Dots are the most forgiving nail art that exists. Every one is made with a single press of a dotting tool, so there’s no line work to mess up. Space them unevenly on purpose, since a slightly scattered pattern looks more expensive than a rigid grid.
The Trendy Finishes Everyone’s Wearing Right Now
These four borrow the finishes dominating salons this season and point them at pumpkins.
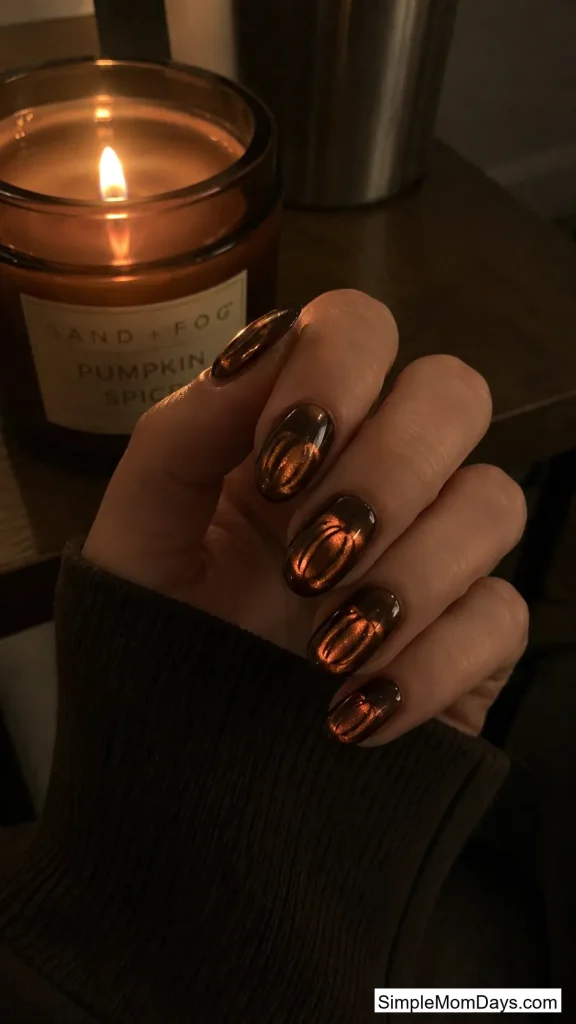
5. Velvet Cat-Eye Pumpkins
Magnetic cat-eye polish is the biggest nail trend of the year, and it was practically made for pumpkin season. The magnet pulls the shimmer into a soft glowing stripe, so a copper or bronze cat-eye pumpkin looks like crushed velvet.
Paint the pumpkin shape in magnetic polish, hover the magnet wand over it for a few seconds before curing, and the glow settles right into the curve of the pumpkin. On a deep brown or black base, the effect is moody in the best way.
This one needs gel and a lamp, so it’s either a salon request or a small home-gel investment.
6. Chrome Pumpkin Stamps on Nude
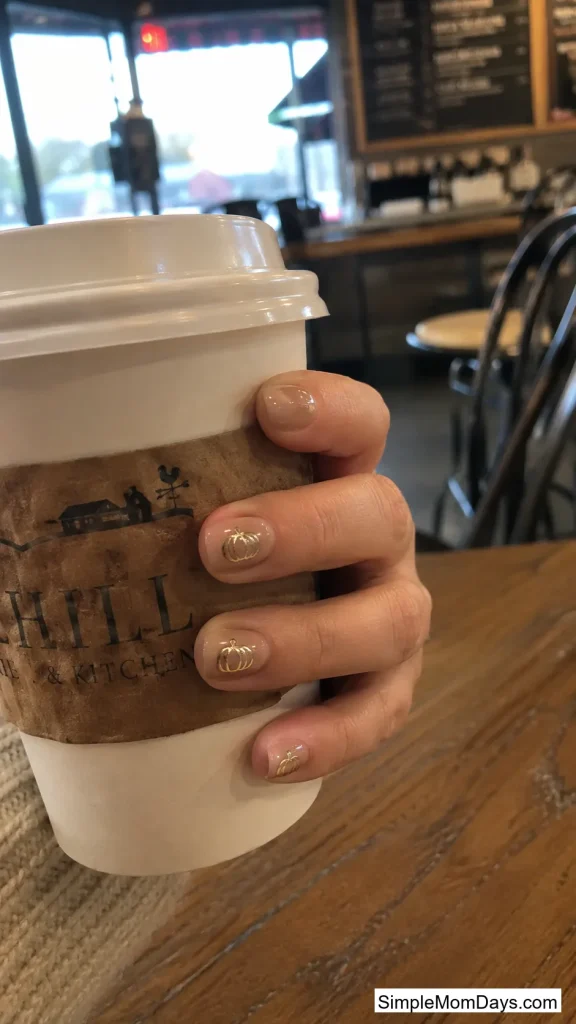
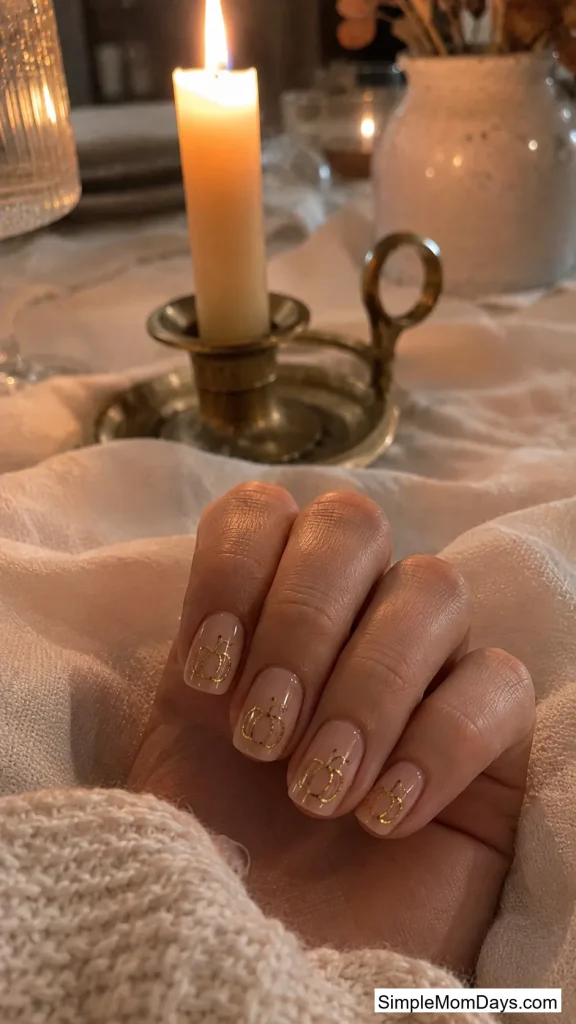
Quiet luxury, pumpkin edition. Keep the base a pinky nude, then stamp or paint small pumpkins in gold or copper chrome across a few nails.
The metallic pumpkins catch light every time you move your hands, which does more work than a bright orange ever could. It’s the design I’d wear to a work event in October, festive enough to notice, subtle enough that nobody thinks you’re in costume.
Chrome powders rub on over tacky gel, so this is another lamp design. The press-on world has caught up though, and chrome pumpkin sets exist ready-made.
7. Aura Glow Pumpkins
Aura nails put a soft airbrushed halo of color in the center of each nail, fading out toward the edges. Do the halo in warm orange over a sheer base and each nail glows like a lit jack-o’-lantern from across the room.
What I like about the aura version is that it captures pumpkin energy with zero actual pumpkins. It’s abstract enough for anyone who finds themed nail art too cute, and it photographs unbelievably well in low light.
At home, a makeup sponge dabbed in the center gets you surprisingly close to the airbrush effect.

8. Glazed Pumpkin Shimmer
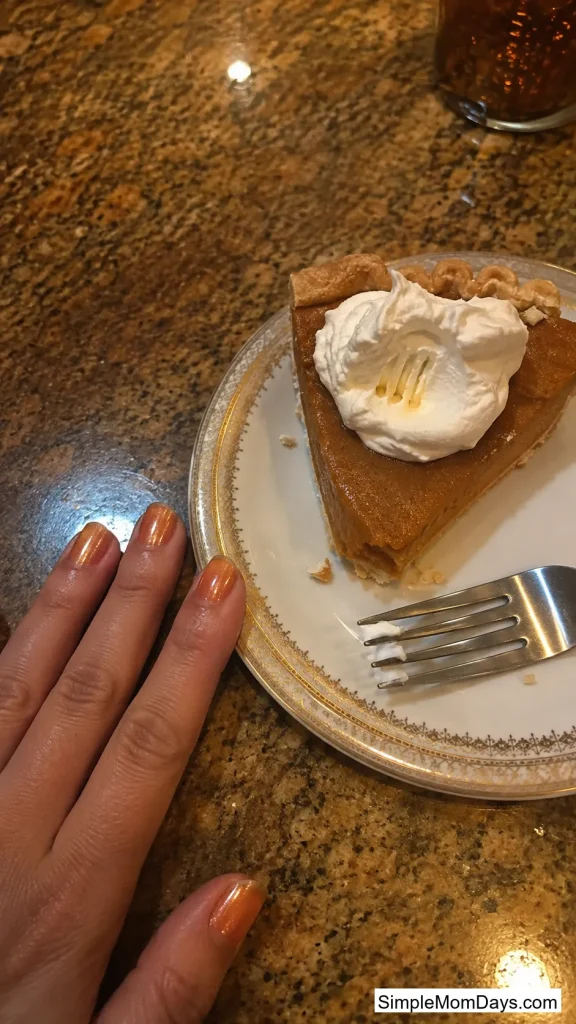
Take the glazed donut nail idea, warm it up. A sheer caramel-orange base with a fine pearl chrome rubbed over the top gives you nails that look like the top of a pumpkin pie fresh out of the oven.
This is a whole-hand wash of color rather than a drawn design, so it works on the shortest natural nails where detailed art gets cramped. It also grows out gracefully, since there’s no line at the cuticle to betray week three.
Neutral and Cozy Pumpkin Manis
Orange isn’t required. These lean on the muted side of the pumpkin patch.
9. Heirloom Pumpkin Palette
Walk past the classic orange pumpkins at the farm stand and look at the weird ones: sage green, dusty blue-grey, cream, blush. Paint each nail a different one of those shades, then add one small cream pumpkin as the accent.
This palette is why the design outlives Halloween. Sage and blush read as tasteful fall neutrals through November, and the muted mix flatters basically every skin tone. It’s also the set to pick if your wardrobe runs beige and you don’t want your hands shouting.

10. Casper White Pumpkins
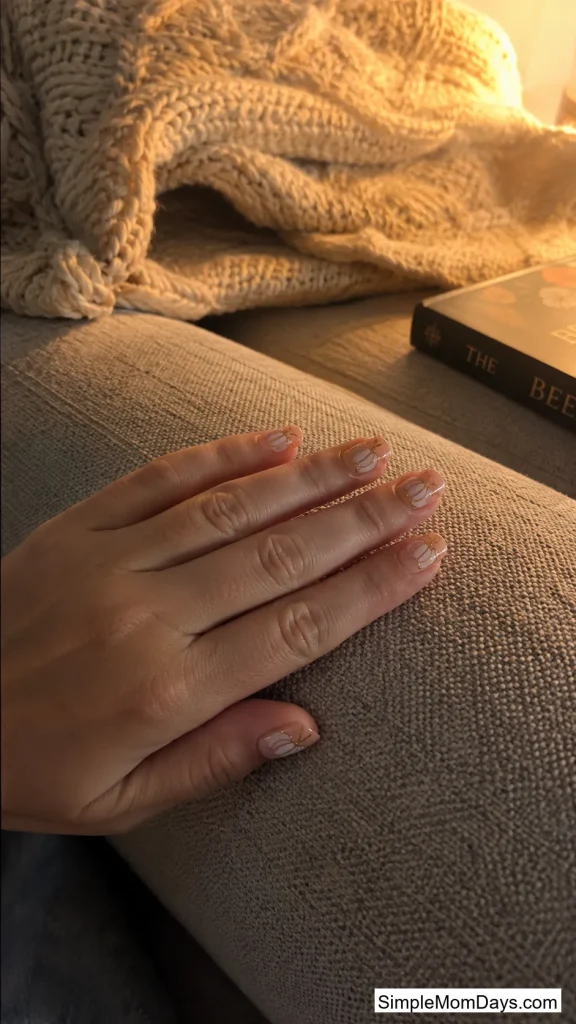
White pumpkins outlined in thin gold look ghostly and expensive at the same time. Keep the base sheer nude, paint the pumpkins in soft white, then trace the ridges and stem in gold liner.
The gold outline is doing the heavy lifting here. Without it, white-on-nude disappears; with it, each pumpkin pops like a little illustration. This is the version I’d suggest for anyone whose office frowns on loud nails, since from a distance it just reads as a delicate gold-detail mani.
11. Mocha Brown Pumpkin Tips
Chocolate brown is the color of the season, full stop. Do brown French tips, then tuck a tiny caramel pumpkin beside the smile line on two nails.
Brown-on-brown pumpkins are sneaky. They add the seasonal detail without the orange, so the mani coordinates with tan boots and every fall coat you own. If your tips chip, the color is dark enough to touch up invisibly at home.

12. Tortoiseshell Pumpkin French
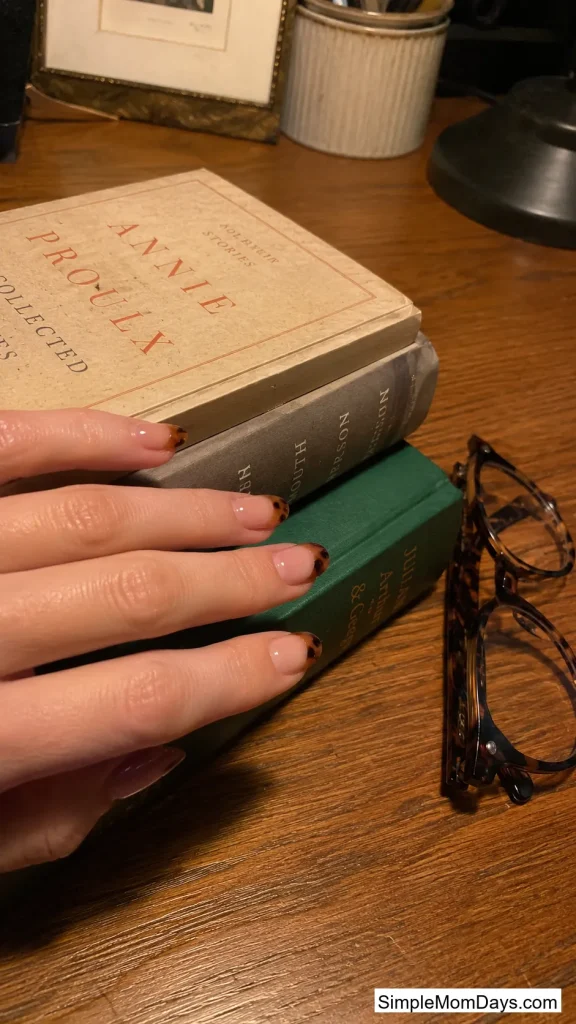
Tortoiseshell print moved from sunglasses to nails and stuck. Do the amber-and-brown tortie pattern as French tips only, keep the base bare, and shape one tip into a subtle pumpkin silhouette if your tech is up for it.
The pattern is built from blobs of sheer amber gel with darker spots dropped in while wet, so “messy” is literally the technique. Even a wobbly attempt looks right. Confined to the tips, it stays wearable instead of busy.
Halloween-Ready Pumpkin Nails
For the two weeks a year when subtle is the wrong answer.
13. Mismatched Jack-o’-Lantern Faces
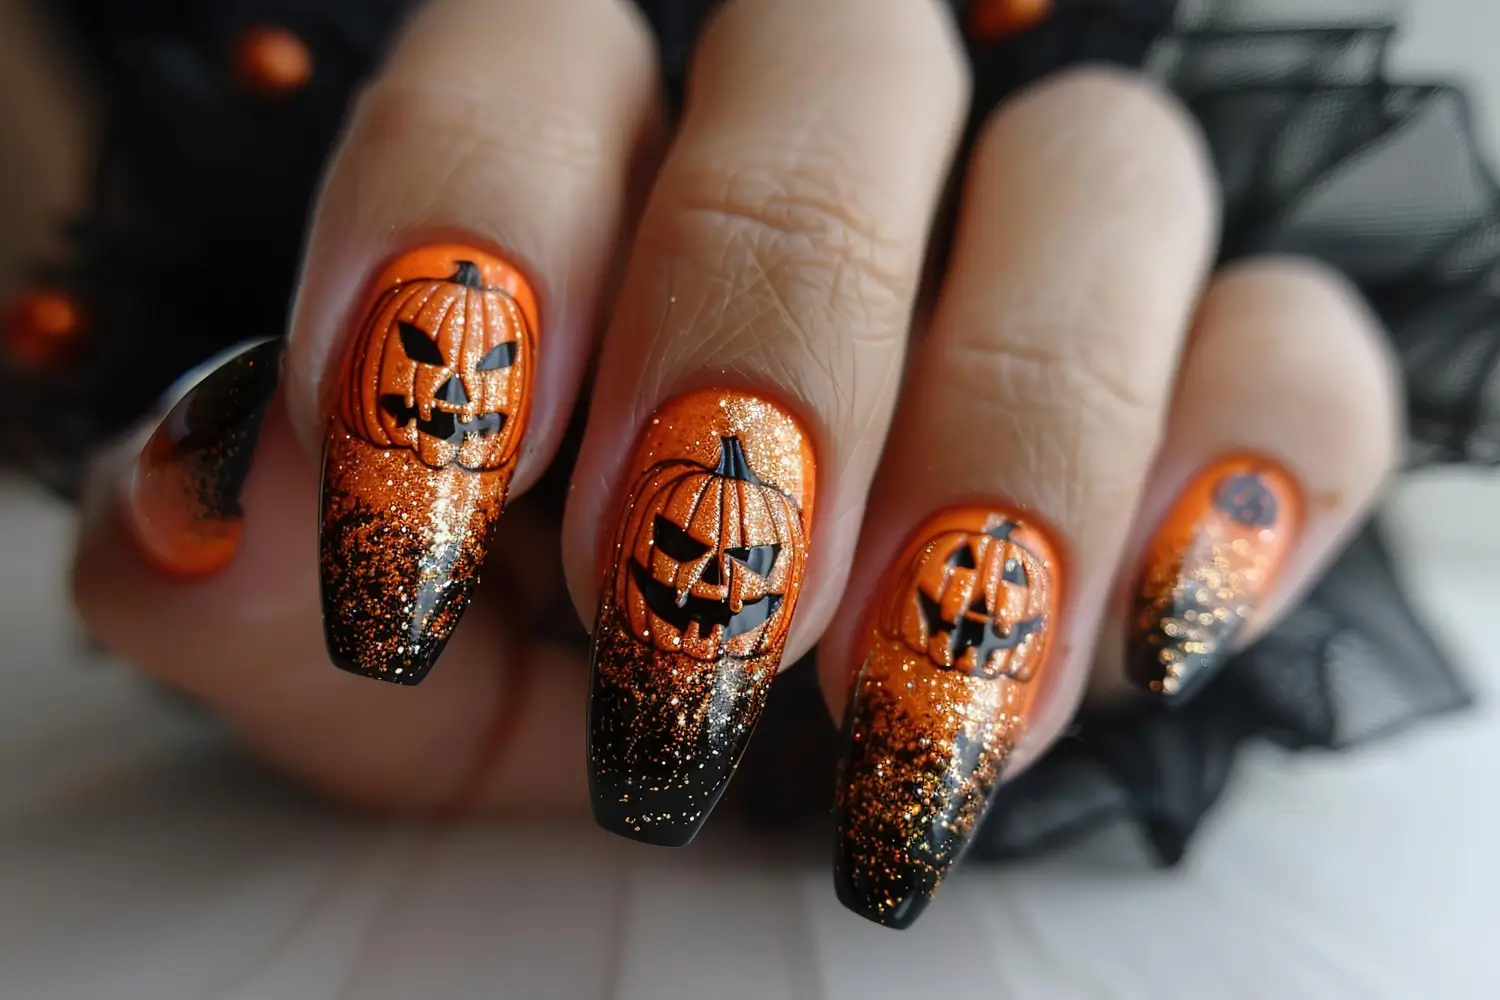
Jack-o’-lanterns are the obvious pick, so make them interesting: give every nail a different face. One winking, one screaming, one unimpressed, one with a single snaggle tooth.
The mismatched faces are what people actually stop and look at, the way nobody inspects five identical pumpkins but everyone reads a row of expressions like a comic strip. Black liner polish with a fine brush handles the faces; keep each one to three or four strokes maximum.
Do the faces on orange for classic, or on a nude base for the pared-back version that survives the office.

14. Matte Black with a Floating Pumpkin
Paint everything matte black, then drop one small, detailed orange pumpkin in the center of each nail like it’s floating in the dark. High contrast, slightly eerie, very striking.
Matte finish is the secret ingredient. Glossy black plus orange can tip into sports-team territory, but the suede texture makes the same colors look editorial. A matte top coat over regular black polish gets you there without buying new colors.

15. Pumpkin and Spiderweb Split Set
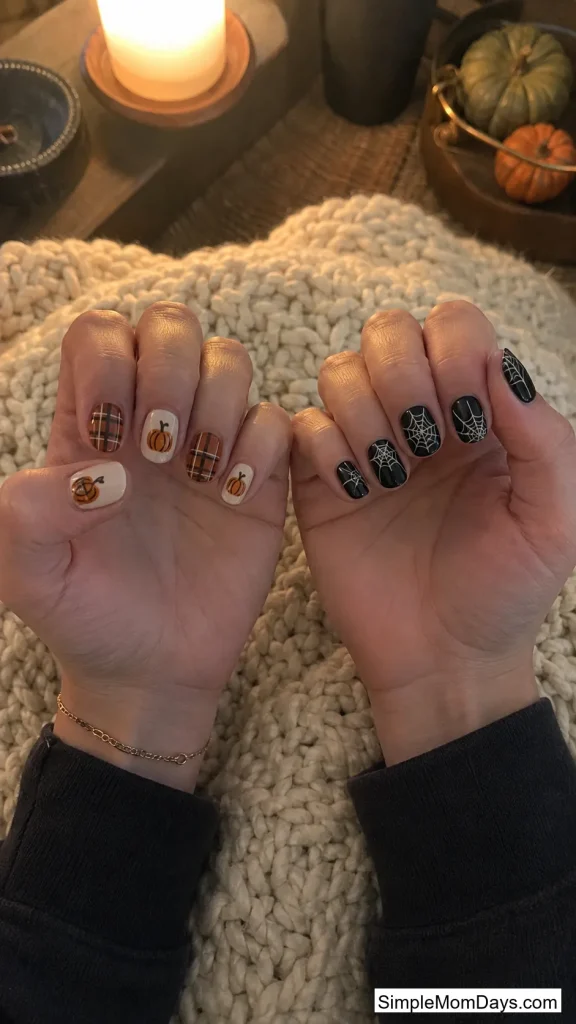
Split the theme across your hands: pumpkins and warm plaid on one, thin white spiderwebs on black on the other. Mismatched hands are having a real moment, and Halloween is the easiest excuse to try it.
Webs are simpler than they look. Three straight lines fanning from one corner, then two curved lines connecting them, done. Start the web in the corner of the nail rather than the center and it’ll look deliberate even if your curves wobble.
16. Melting Jack-o’-Lantern Drips
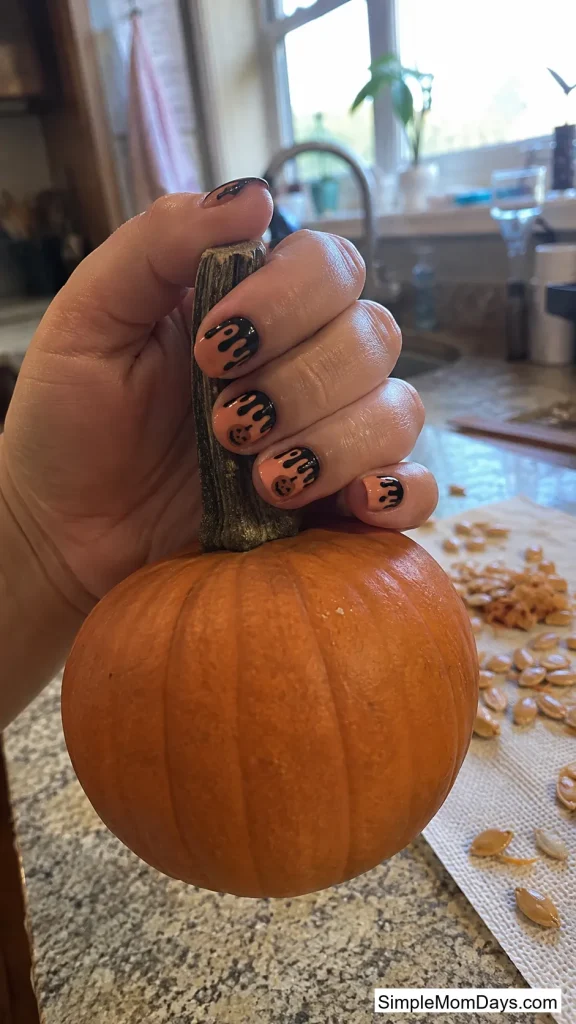
Paint a cream or pale orange base, then run black drips down from the cuticle like the pumpkin is melting, and tuck a tiny carved face between the drips on one or two nails. Creepy, but in a cartoonish way that stays cute.
Drips forgive imperfection by design. Uneven lengths and wonky rounded ends are exactly what dripping goo does, so this is one of the rare detailed designs where shaky hands are an asset. A dotting tool pulled downward makes each drip in one motion.
Playful and Coquette Pumpkin Looks
The soft-girl corner of the pumpkin patch: pinks, bows, and daisies.
17. Pastel Pumpkin and Bow Coquette
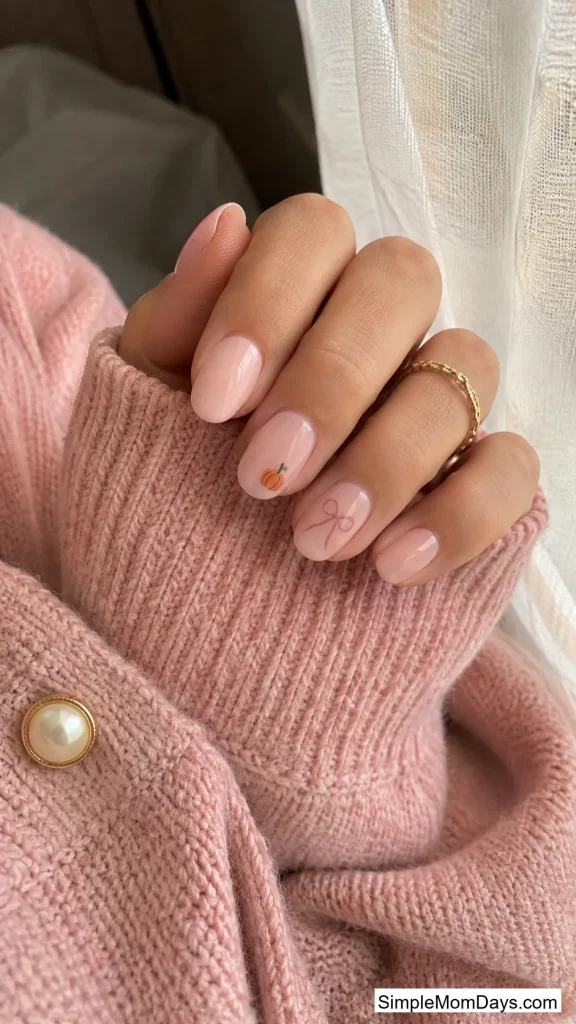
Baby pink base, one tiny peach pumpkin, one thin ribbon bow. The coquette bow trend refuses to die, and pairing it with a pastel pumpkin gives it a reason to stick around through fall.
Keep both elements small and off-center, sitting near the cuticle rather than filling the nail. The empty space is what keeps it looking sweet instead of crowded. Pink Halloween nails have been climbing on Pinterest for a couple of years now, and this is the easiest entry point.
18. Pumpkin and Daisy Picnic Nails
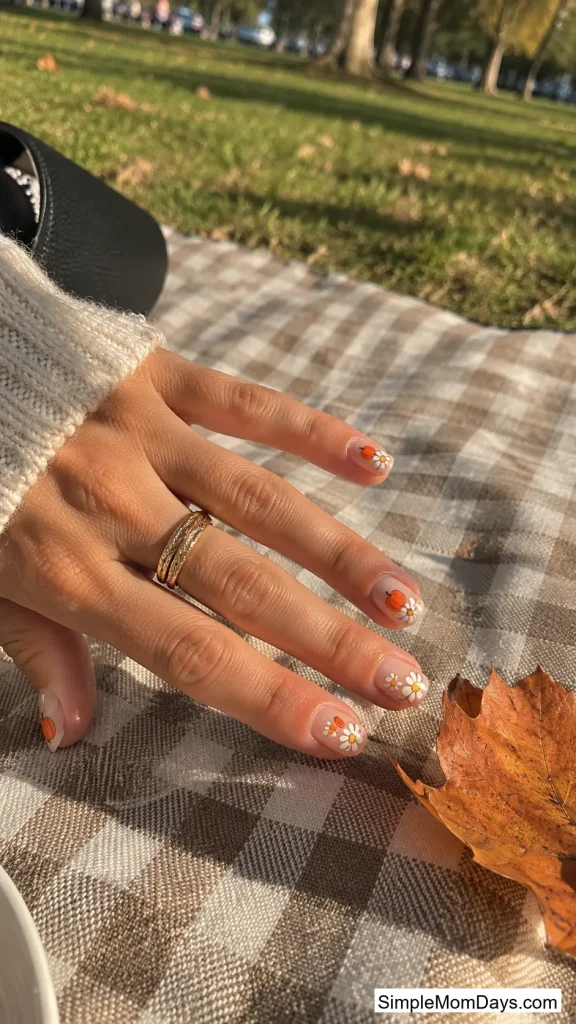
Alternate tiny pumpkins with little white daisies across a milky base, a different micro design on each nail. It lands somewhere between a September picnic and a storybook illustration.
Daisies are five dots around a yellow center, which means the “hard” flower in this set is not actually hard. This is a strong pick for early fall, when it’s technically pumpkin season but still 75 degrees and full-on Halloween nails feel premature.
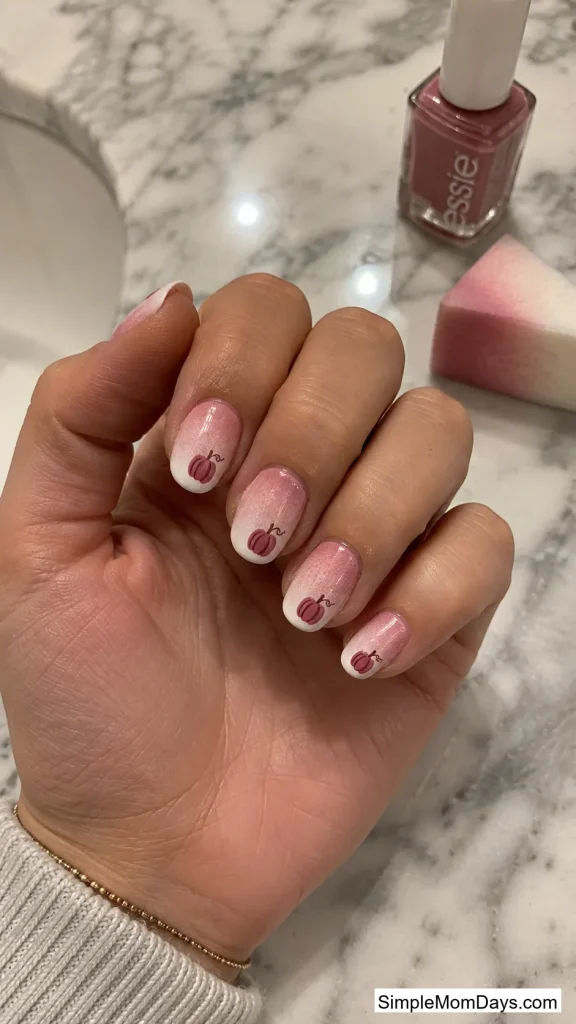
19. Pink Gradient Pumpkins
Sponge a soft pink-to-white gradient on each nail, then paint small deep-rose pumpkins over the top. The gradient gives the design depth that a flat base can’t, and the whole set glows.
Gradient sounds advanced and isn’t. Paint two stripes of color on a makeup sponge, press it onto the nail a few times, and the sponge texture blends the seam automatically. Clean up the edges with polish remover on a small brush and seal with a glossy coat.
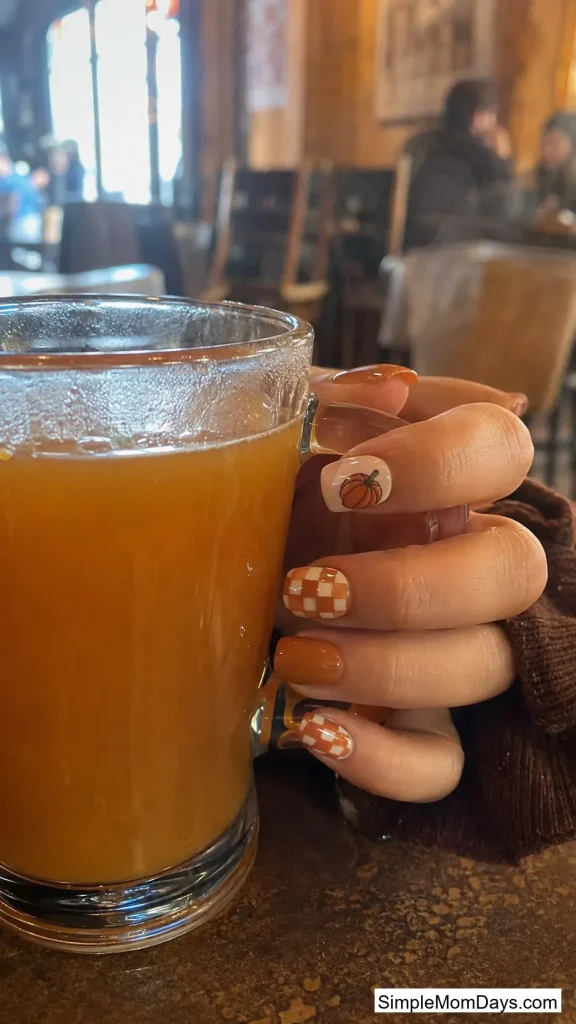
20. Checkerboard Pumpkin Accent
Cream-and-orange checkerboard on two accent nails, solid caramel on the rest, one small pumpkin sitting on a plain nail so the theme is unmistakable. Checker print has hung around for several seasons because it’s bold without needing any artistic talent.
Paint the squares slightly imperfect and hand-drawn rather than taped-off sharp. The wonky-checkerboard look is genuinely the trend right now, which is convenient for those of us who were going to paint wonky squares anyway.
Statement Sets Worth a Salon Trip
The show-off tier. Screenshot these for your nail tech.
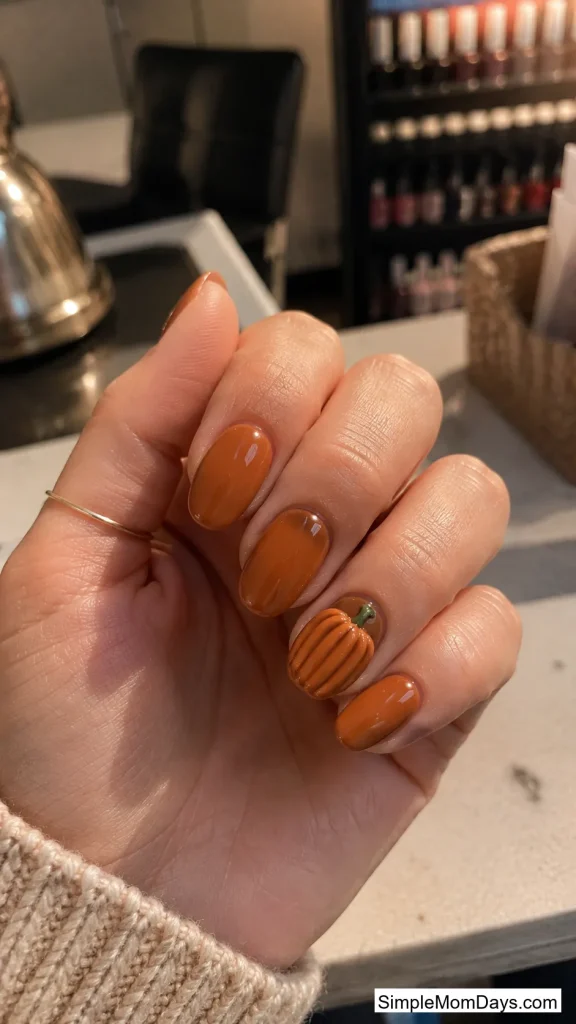
21. 3D Builder Gel Pumpkin
A pumpkin you can feel: builder gel sculpted into a raised, ridged pumpkin on one accent nail, cured, then painted and glossed. The dimension catches shadows and looks startlingly real in person.
This is firmly a salon design, since sculpting gel takes practice and a lamp. Keep it to one nail per hand and leave the rest simple, because a raised element on every finger snags on hair, sweaters, and toddlers. One sculpted pumpkin on a plain caramel set is the sweet spot.
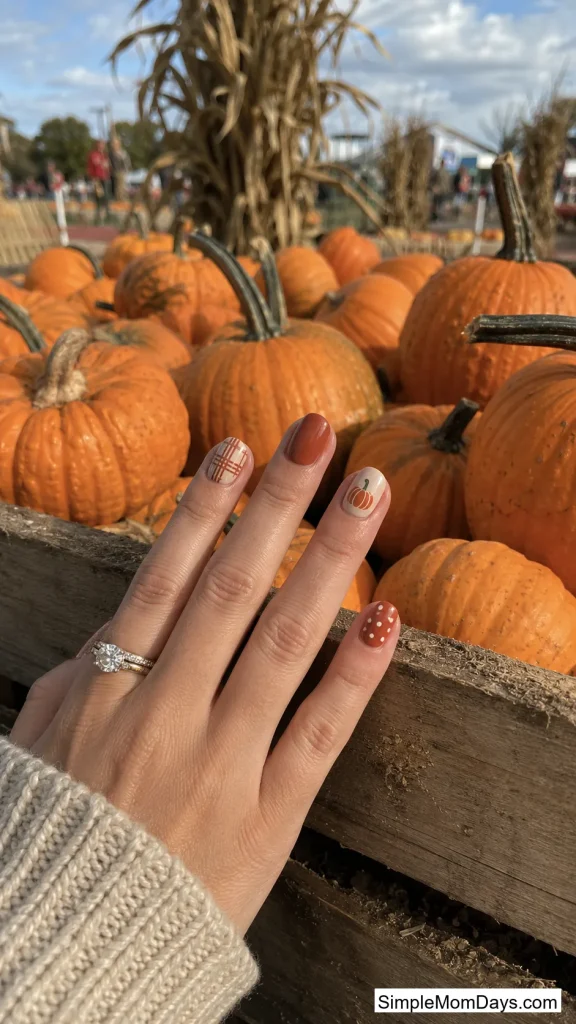
22. Pumpkin Patch Skittle Set
A skittle set gives every nail its own design under one palette: one plaid, one solid rust, one tiny pumpkin, one polka dot, one cat-eye shimmer. Think of it as a sampler of this entire post on one hand.
The trick is limiting the palette to three or four shades so ten different designs still read as one deliberate set. Skittle manis are also the practical choice for the indecisive, and I say that with love, as someone who has held up two swatch sticks for ten full minutes.
23. Gold Foil Outline Pumpkins
Skip the fill entirely. On a bare or sheer base, draw pumpkins as thin gold outlines only, then press a few flakes of gold foil along the lines so they glint.
Negative-space designs like this are the elegant end of pumpkin nails, closer to fine-line jewelry than Halloween decor. The bare base means no grow-out line and no chips to obsess over, so this set quietly lasts three weeks while looking barely-there fancy the entire time.
Final Thoughts
Twenty-three options and not one of them requires you to be a nail artist. If you’re new to this, start with the sticker mani or the single tiny pumpkin on milky nails, and work up from there.
My honest advice: pick two. One quiet design for September and October weekdays, one loud jack-o’-lantern moment for the week of Halloween itself. Your nails will match the season the whole way through, and you’ll actually get to wear both before the pumpkin spice runs out.