
Air dry clay does not need an oven, a kiln, or a heat gun to finish a Halloween project. You knead it, shape it, and leave it on a windowsill for a day or two. That alone makes it one of the least stressful Halloween crafts you can hand a kid, especially compared to carving pumpkins or gluing glitter onto anything.
Most “Halloween clay ideas” lists cycle through the same six things: a ghost draped over a cup, a jack-o-lantern face, a bat, a skeleton, a witch hat, a spider. Kids can only make so many ghosts before the shine wears off. This list leans into what kids already like doing with clay — pressing in fingerprints, clipping things onto bags and pencils, mixing up silly hybrid creatures — so there’s more range here than the usual roundup.
A few basics before diving in: white clay is easiest to paint once it’s dry, most brands set in 24 to 48 hours depending on thickness, and a toothpick or an old butter knife works fine as a sculpting tool if you don’t own a proper clay kit. Acrylic paint and a matte sealer spray finish most of these off nicely, though several ideas below skip paint entirely and use colored clay straight out of the pack.
Trick-or-Treat Bucket and Party Extras
These are made to actually get used the night of Halloween, not just sit on a shelf afterward.
1. Popcorn-Bucket Charms
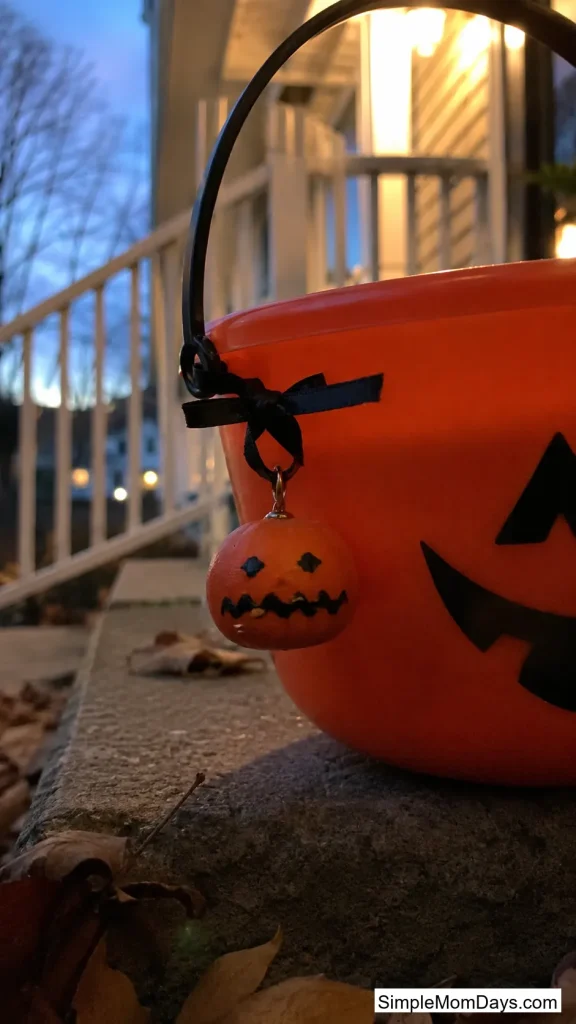
Roll a marble-sized ball of orange or black clay, flatten one side, and press a small hole through the top with a straw before it dries. That hole is where a piece of ribbon or a keyring loop threads through later. Kids can press a simple face into the front with a toothpick — two dot eyes and a jagged mouth reads as “monster” without needing real detail work.
Once it’s dry and painted, tie it onto the handle of a trick-or-treat bucket or a pillowcase so it’s easy to spot in a dark yard full of identical black buckets. It also works clipped onto a backpack zipper long after Halloween is over.
A batch of five takes about 20 minutes of hands-on time and works for kids as young as 4, since the shape doesn’t need to be exact to look good.
2. Mini Gourd Place-Card Holders
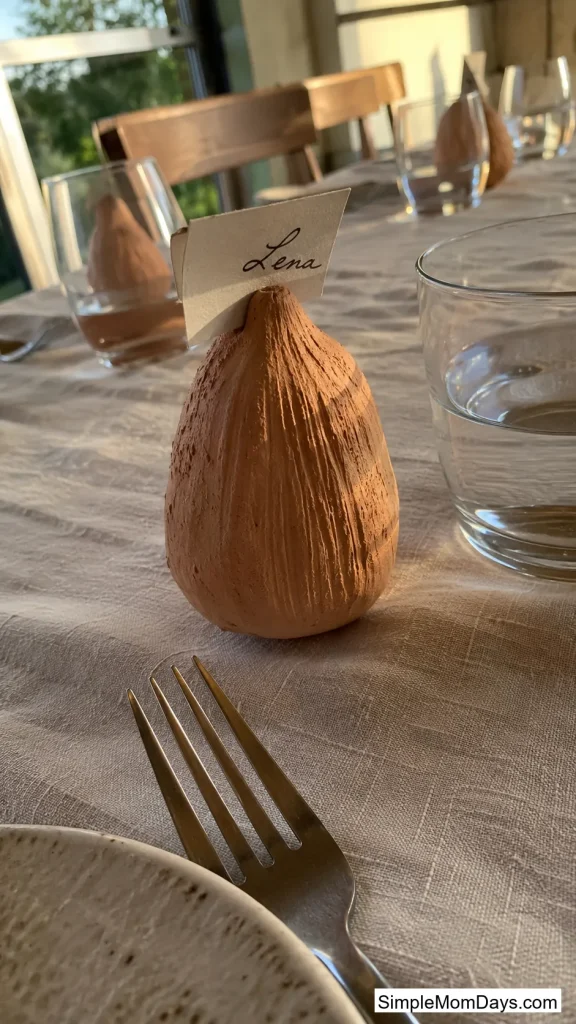
Instead of the usual carved jack-o-lantern face, these are small lumpy gourd shapes — oval, slightly pinched at one end — with a thin slit cut across the top wide enough to hold a folded name card. No face at all, just texture. Rolling a fork gently over the surface before it dries gives a ridged, real-gourd look.
They’re a nice fit for a Halloween dinner or a classroom party where kids are assigned seats, and they double as a subtle centerpiece scattered down the middle of the table in green, white, and pale orange.
This one needs an adult to cut the card slit cleanly with a butter knife before the clay firms up, so it’s more of a 6-and-up project with help.
3. Googly-Eye Candy Jar Toppers
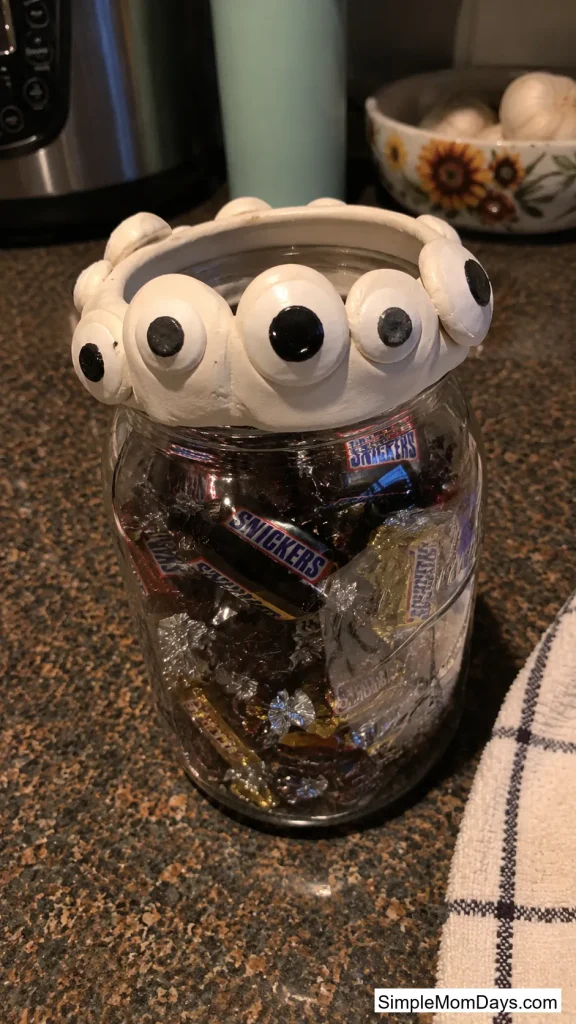
Take an empty jam jar or mason jar, and instead of decorating the glass, make a clay ring that sits on top of the existing lid like a collar. Press in a row of mismatched circle eyes — different sizes, slightly overlapping — so the jar looks like it’s staring back at whoever opens it for candy.
The uneven, too-many-eyes look is part of the charm here, and it’s a good project for a kid who wants to keep adding “just one more eye” past the point of realism.
Once it’s dry, hot glue (an adult’s job) holds the clay ring onto the lid permanently, so the jar can be reused as a candy dish year after year.
4. Candy Corn Stacking Rings
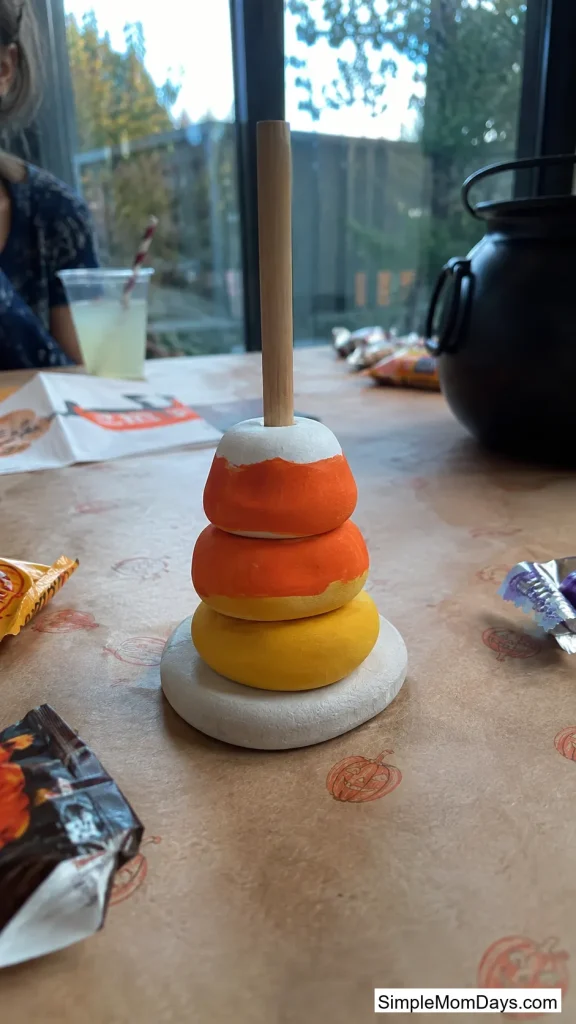
Roll three graduated balls of clay in white, orange, and yellow, flatten each into a rounded triangle, and stack them so it reads as a single piece of candy corn — but scaled up to the size of a stacking-ring toy, with a hole through the center of each layer.
Set out a few of these on a dowel stuck in a base of clay or foam, and they turn into a stacking game for a Halloween party table instead of just sitting there as décor.
This is one of the few ideas here that doubles as an actual toy afterward, which makes it worth the extra step of getting the center holes lined up while the clay is still soft.
Wearable Halloween Clay
A quick note before this section: air dry clay is lightweight but breaks if dropped on a hard floor, so these work best as clip-ons and charms rather than anything meant for rough play.
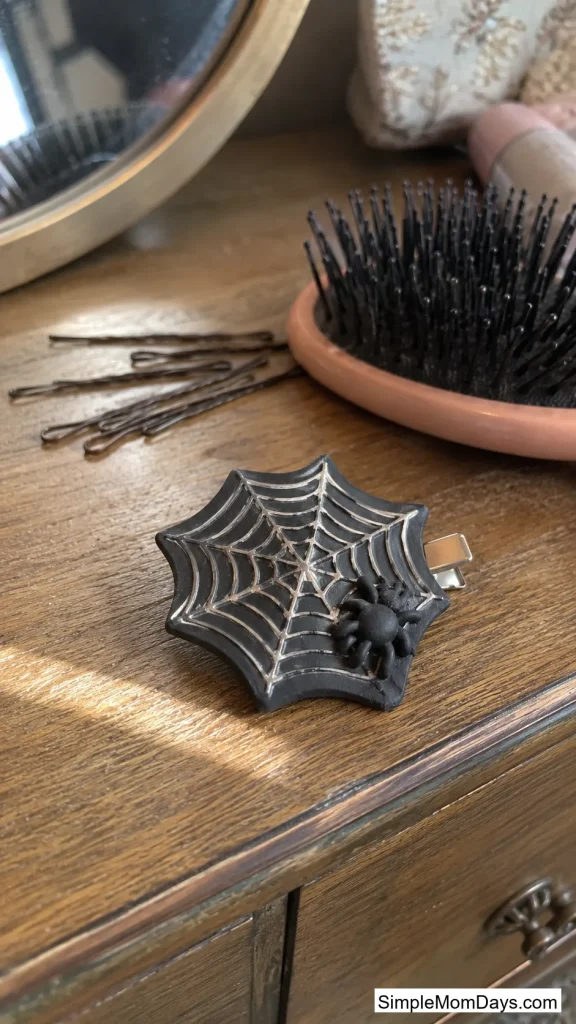
5. Spiderweb Hair Clips
Roll out a thin, flat clay circle and use a toothpick to press radiating lines from the center out to the edge, then connect them with curved cross-lines — the same pattern as an actual web, just simplified. Let it dry flat so it doesn’t warp.
Glue the finished web onto a plain metal hair clip once both pieces are ready, and it turns into a costume accessory a kid can wear well past October 31st with any black outfit.
Adding a single tiny clay spider off to one side of the web, rather than dead center, makes the piece look less symmetrical and more like a real web that’s been walked through.
6. Glow-in-the-Dark Moon and Bat Charm Necklace
Glow-in-the-dark air dry clay is sold in craft stores right alongside the regular kind, and it looks completely ordinary — pale yellow — until the lights go off. Shape a small crescent moon and a bat silhouette, each with a hole punched near the top for a jump ring.
These charge up by sitting near a lamp or in sunlight for a few minutes, then glow for a while in a dark room, which makes them genuinely fun for a kid to test out rather than just look at.
String both charms on a cord or thin chain, and it works as a costume piece or just a fun everyday necklace a kid picks out themselves.

7. Clip-On Candy Corn Earrings
For kids who want “Halloween jewelry” but aren’t old enough for pierced ears, small candy corn shapes glued onto plastic clip-on earring backs (sold cheap in craft stores) solve that without an actual piercing. Keep each piece under an inch tall so they’re not heavy on the ear.
This pairs well with the hair clips above. Make both in one sitting, and a kid has a full matching Halloween accessory set for a party or trick-or-treating.

8. Trick-or-Treat Bag Nameplate Tags
A flat clay oval or bat-shaped tag with a kid’s name carved into it — using alphabet stamps if you have them, or just a toothpick — clips or ties onto a treat bag handle. It’s a practical safety detail for a crowded Halloween event as much as it is a craft.
Punch the hole for the string before the clay dries, not after. Air dry clay is much harder to drill through once it’s fully set, and it cracks more easily than it should.

Fingerprint and Handprint Keepsakes
These trade the usual Halloween figurine for something a parent actually wants to keep — a record of how small a kid’s hands were this particular October.
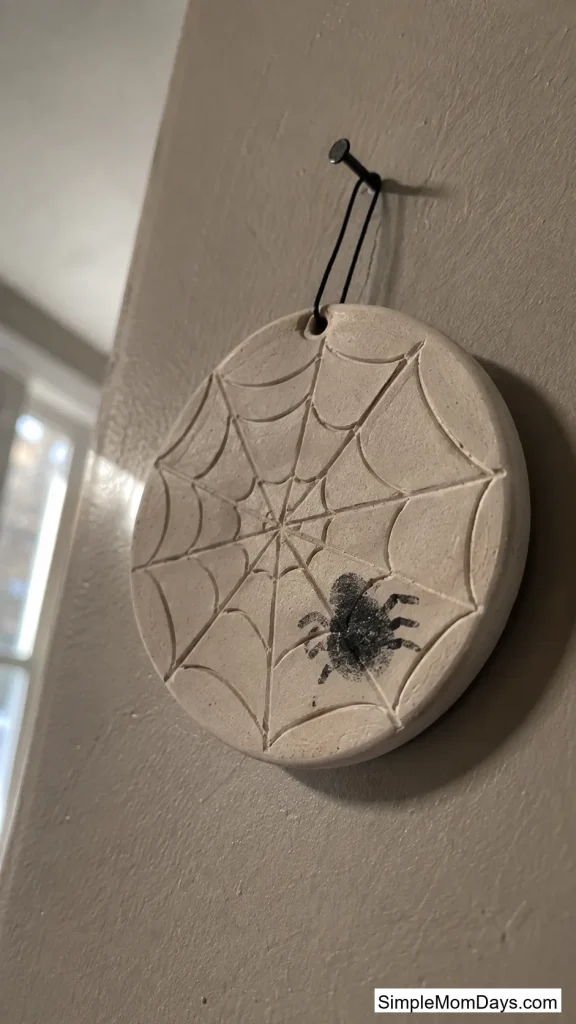
9. Fingerprint Spiderweb Keepsake
Roll out a flat clay circle, carve a spiderweb pattern into it the same way as the hair clip above, and have the kid press a single black-painted fingertip onto the web to leave a spider-shaped smudge. One fingerprint reads as a spider body immediately, without any extra shaping.
This works well as a small round plaque to hang on a wall or prop on a shelf, and it holds up better over the years than the wet fingerprint ornaments a lot of families do for other holidays.
A parent’s hand only needs to help score the web design. The fingerprint part is entirely the kid’s, even for a 2- or 3-year-old.
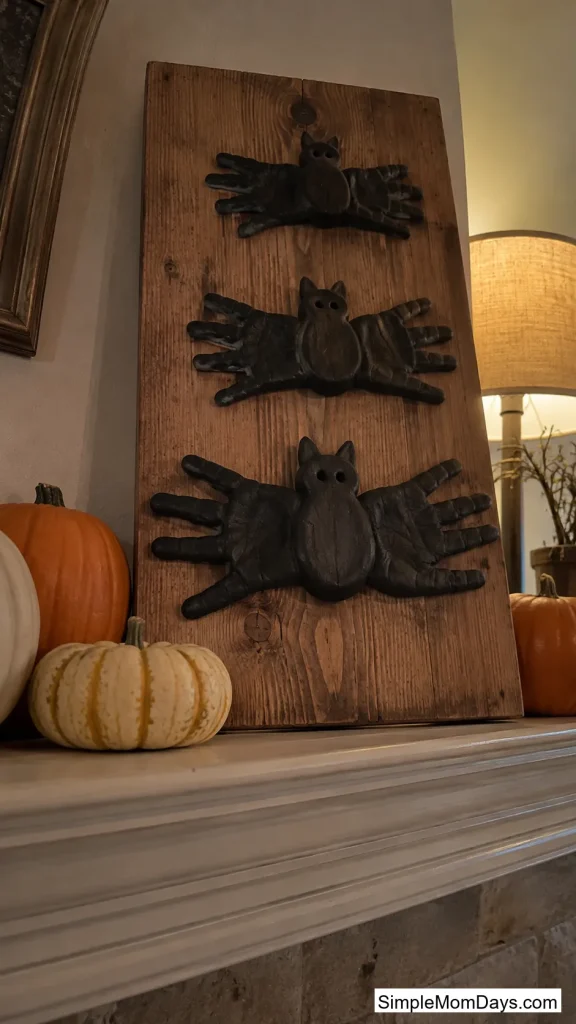
10. Handprint Bat Colony Plaque
Press a kid’s whole hand flat into a slab of black clay, then use the outline as a rough guide to trim the shape into a single stretched-out bat with the fingers forming the wing points. It looks less like a craft-store bat and more like an actual keepsake, because the proportions are the kid’s own hand.
For siblings, a set of three or four different-sized handprint bats mounted together on one board reads as a little bat colony — a nice project to revisit every year to see how much the handprints have grown.
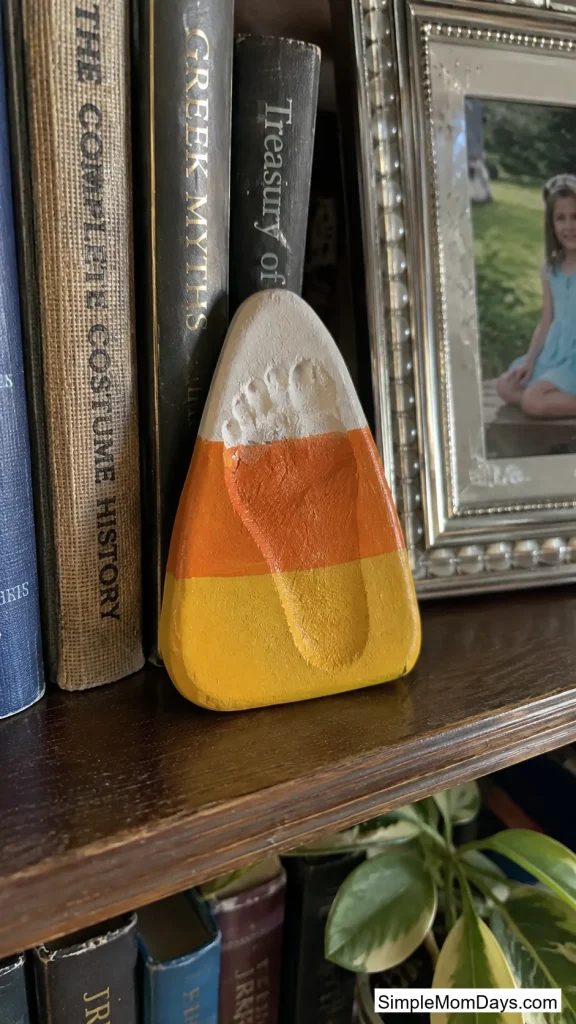
11. Footprint Candy Corn Keepsake
This one uses a foot instead of a hand. Press a bare foot into a flattened slab of white or orange clay, then trim the outline into a rounded triangle so the toe end becomes the point of a candy corn shape. Paint the three candy corn stripes after it’s dry, ignoring the actual footprint shape underneath.
It sounds strange until it’s finished. The footprint gives the shape a slightly lopsided, hand-made outline that a perfectly cut triangle wouldn’t have, and that’s what makes it look intentional rather than sloppy.
Silly Fantasy Creatures
This is the section for kids who’d rather invent something new than copy a Halloween classic off Pinterest.
12. Three-Eyed Pumpkin-Alien Hybrid
Start with a basic pumpkin shape, then skip the usual carved face entirely. Add three mismatched eyes instead of two, a couple of small antennae poking out the top, and a crooked grin. The combination of “pumpkin” and “alien” gives kids permission to ignore realism completely.
This tends to be the item kids spend the longest on, since there’s no “correct” version to match. Every one turns out different depending on how many eyes and antennae a particular kid decides on.
Ages 5 and up can usually handle this solo. Younger kids may need help keeping the antennae from snapping off before the clay sets.

13. Eyeball and Toadstool Potion Jar Toppers
Save a few empty spice jars or small plastic bottles for pretend potion play, then make clay lids shaped like a single bloodshot eyeball or a spotted toadstool cap to sit on top instead of the plastic lid. Food coloring mixed into water makes convincing “potions” to fill the jars underneath.
The toppers don’t need to seal anything. They just balance on top for display, so there’s no fussing with exact measurements to fit a jar mouth.
A row of five or six different jars along a windowsill makes a decent little apothecary shelf for imaginative play that lasts well beyond one afternoon.

14. Wart-Nosed Goblin Peg Dolls
Wrap a ball of green clay around the top of a wooden peg doll (craft stores sell these in bags of 10 for a couple dollars) and shape a lumpy, oversized nose with one or two tiny wart bumps stuck on. A few dots for eyes and it’s done — no hands or feet to worry about, since the peg doll body handles that.
A set of five or six with slightly different nose shapes and expressions makes a decent little goblin family for imaginative play, and they’re sturdier than most clay figures since the wooden peg base keeps them from tipping over.

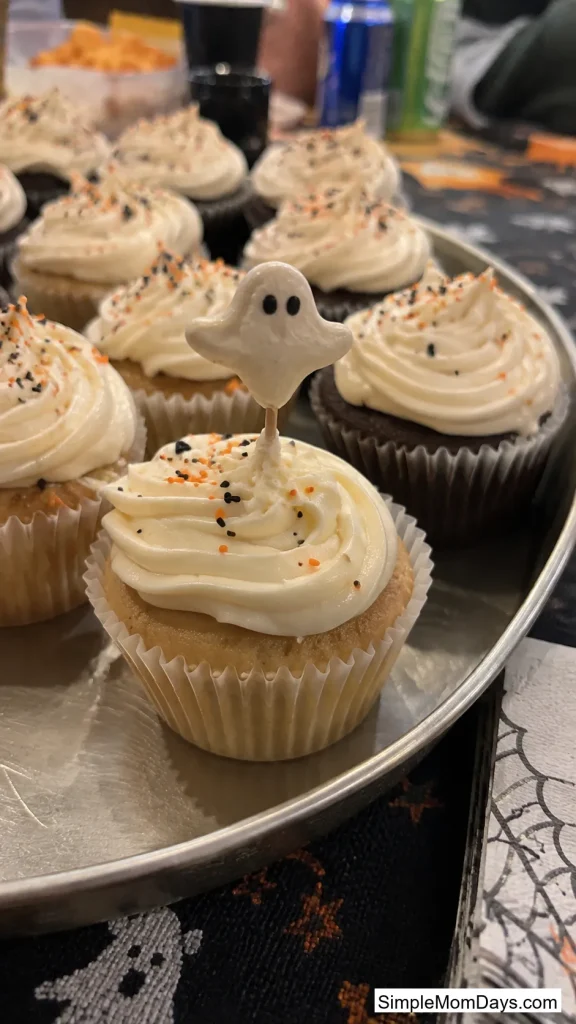
15. Ghost Cupcake Toppers
Shape a small, simple ghost — round top, a few draped points at the bottom — flat enough to glue onto a toothpick once it’s dry and painted. These get pushed into cupcake frosting right before serving and pulled back out before anyone eats one, so the clay itself never touches food directly.
Making a full batch of 12 or 24 toppers ahead of time is realistic for a classroom party, since each one only takes a couple of minutes once a kid gets the hang of the basic shape.
Keep the toppers away from younger siblings once the cupcakes are out. They look enough like candy from across a table that a toddler might reach for one.
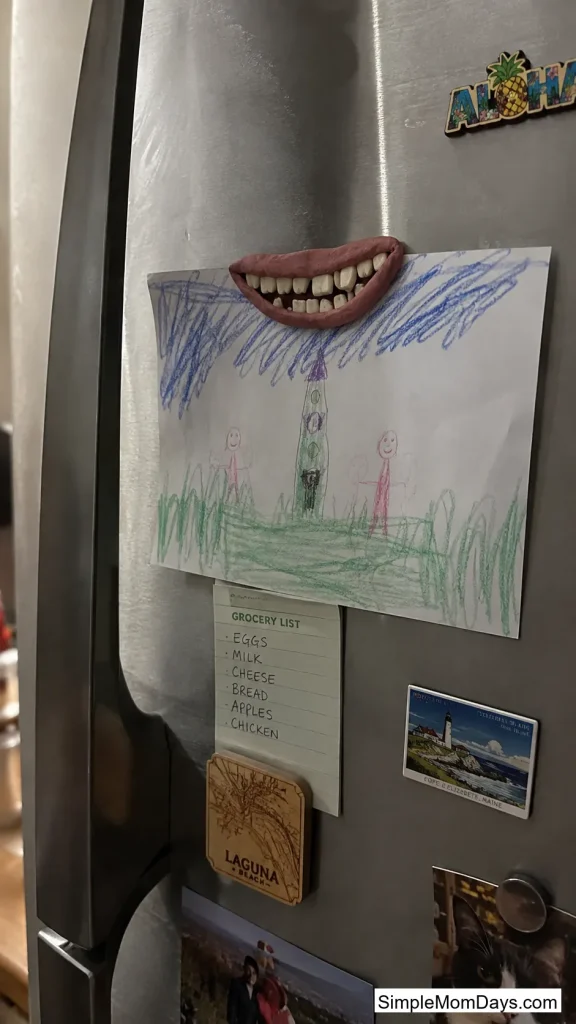
16. Monster Mouth Magnets
A flattened oval of clay with a wide, jagged-toothed mouth cut into it — imagine a coin slot with zigzag teeth on both sides — becomes a monster mouth magnet once a small magnet is glued to the back. Add two eyes above the mouth, or skip them for a simpler “just a mouth” look.
These end up on the fridge holding up artwork and permission slips well into November, which is more than most Halloween crafts manage.
Fall Nature Crossovers
Halloween lands in the middle of fall, so a few ideas here pull in actual acorns, leaves, and twigs instead of sticking to store-bought clay tools.
17. Acorn-Cap Ghost Ornaments
Real acorn caps, collected on a walk, press neatly onto the top of a small ghost-shaped clay body like a little hat. The texture of the real acorn cap looks better than anything sculpted by hand at this scale.
Punch a hole through the top of the ghost before it dries so it can hang from a branch, a mantel garland, or a mini Halloween tree made from bare branches stuck in a vase.
This one works as a nice bridge project between a nature walk and a craft session, since collecting the acorn caps is half the fun for younger kids.

18. Leaf-Vein Bat Wing Suncatchers
Press a real leaf, vein-side down, firmly into a flat slab of black clay, then peel it away to leave a detailed vein pattern behind. Trim the slab into a bat wing shape while the imprint is still fresh and readable.
Two wings mounted around a small round bat body, hung in a window, catch afternoon light through the thin leaf-vein grooves in a way that plain smooth clay never would.
Any sturdy fall leaf works, though maple leaves tend to leave the clearest vein lines of what’s usually lying around a yard in October.

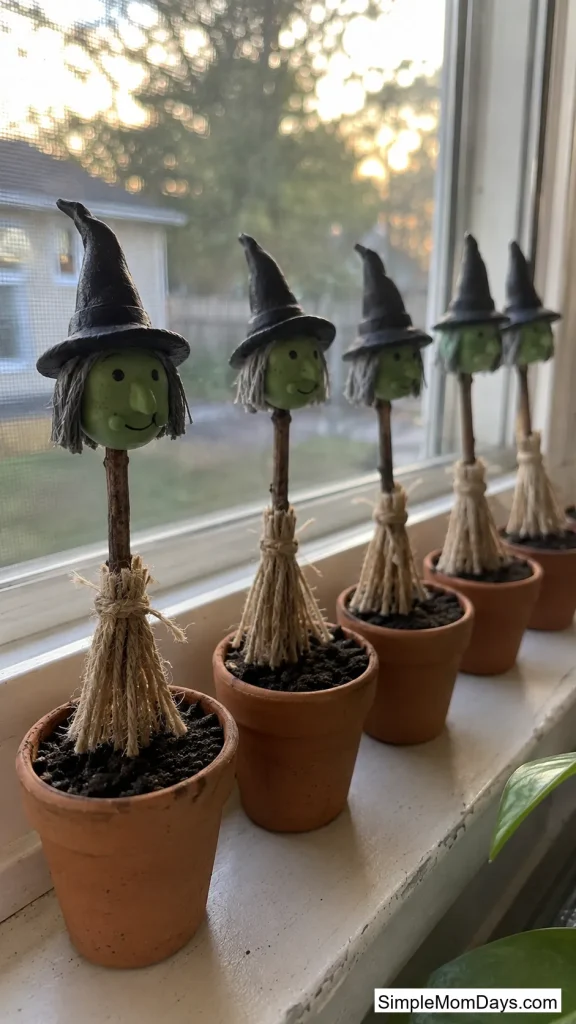
19. Twig Broomstick Mini Witches
A short twig stands in for a broom handle, with a few thin strips cut and frayed at one end using scissors to look like straw bristles, tied on with string. A small clay witch head — pointed hat, green or gray skin tone, a single wart — sits perched on top where the twig meets the bristles.
These stand upright in a small pot of dirt or floral foam, which makes a cluster of five or six look like a tiny witch garden on a windowsill or entryway table.
Functional Pieces for a Kid’s Room
The last few ideas are things a kid actually reaches for after Halloween is over, not just seasonal décor headed for a storage bin in November.
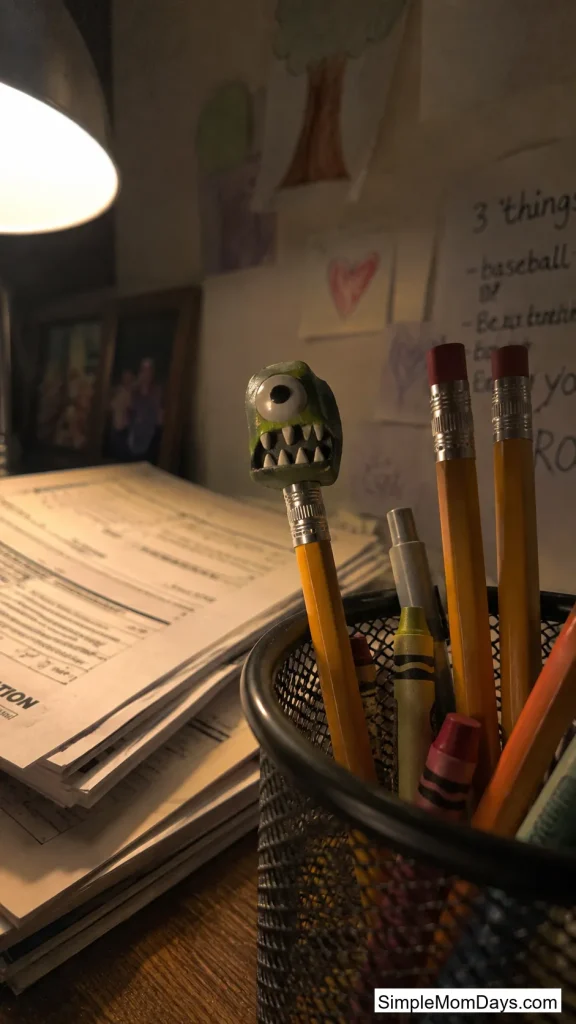
20. Monster-Finger Pencil Toppers
A small clay tube, sized to fit snugly over the eraser end of a pencil, gets a single wide eye and a few jagged teeth added to the front so it looks like the pencil is being swallowed by a tiny monster. Leave the back of the tube open so it slides on and off.
Homework somehow gets less boring with a monster staring back from the top of a pencil, and these survive normal school-bag wear better than most paper or foam pencil toppers do.
A batch of four or five in different colors gives a kid options to swap out through the week instead of committing to just one monster.
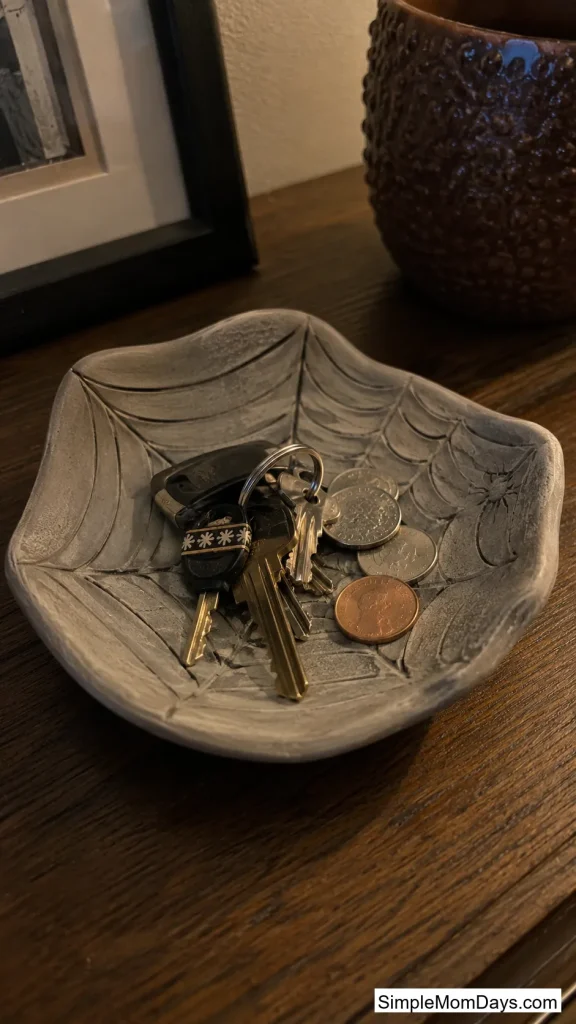
21. Spiderweb-Rim Trinket Dish
Drape a flat circle of clay gently over the outside of a small bowl to get a shallow dish shape, then carve a spiderweb pattern into just the raised rim rather than covering the whole dish. Leaving the center plain keeps it useful for holding actual small items like hair clips or loose change.
This is one of the few ideas on this list that’s genuinely useful year-round, once the Halloween association fades and it just becomes “that dish by the door” for keys and coins.
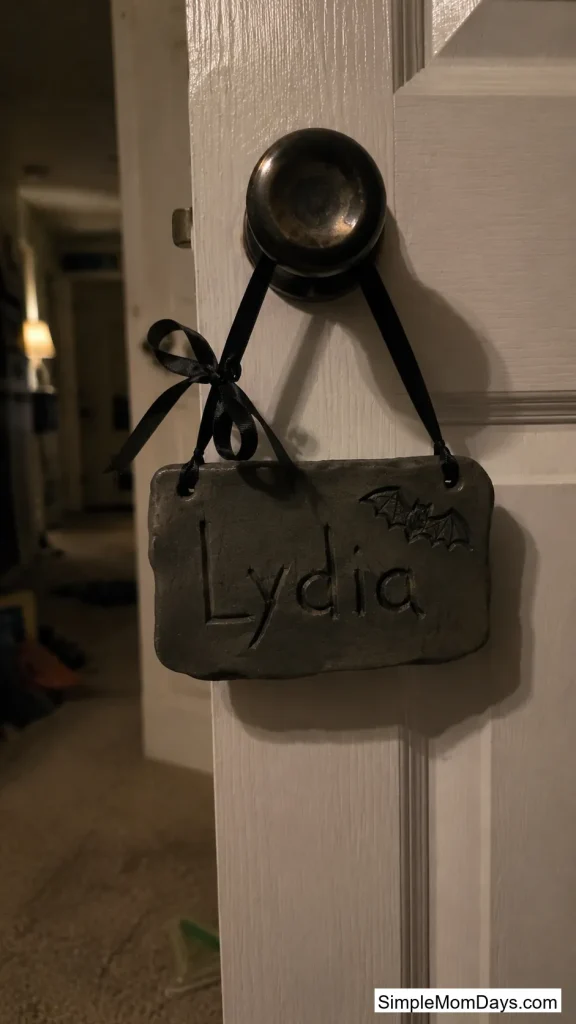
22. Halloween Door Sign for a Bedroom
A flat rectangular clay slab, wide enough to fit a kid’s first name carved across it in bold letters, gets a small Halloween detail tucked in one corner — a single bat, a crescent moon, whatever the kid picks — rather than a full scene crowding the whole sign.
Punch two holes at the top before it dries so it can hang from a ribbon on a bedroom doorknob, and it works as a nameplate long after the Halloween decoration part of it stops mattering.
This is a nice one for a kid to give as a gift to a sibling or a friend, since swapping in a different name each time takes only a couple of minutes.
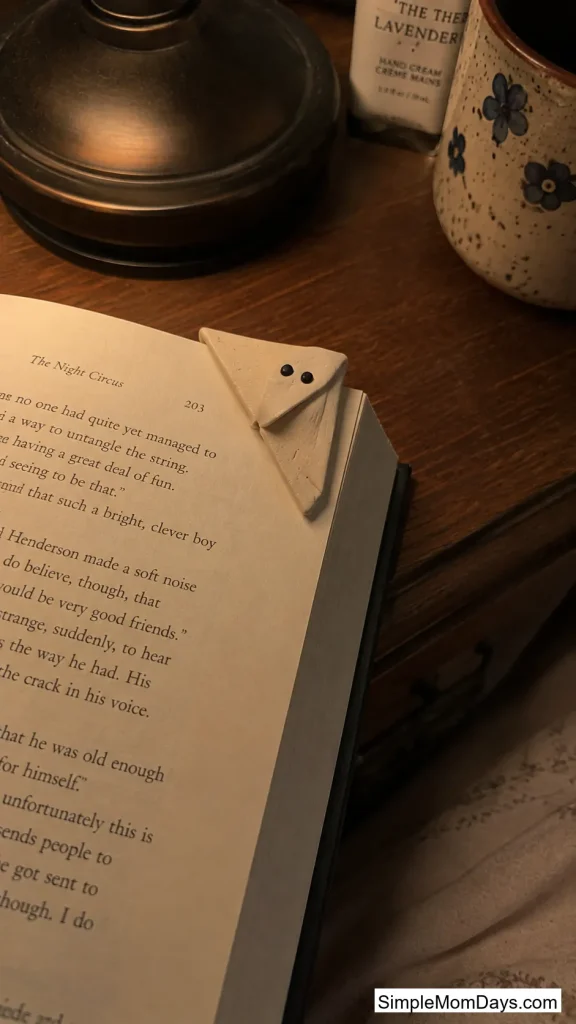
23. Vampire-Cape Corner Bookmarks
A small triangle of clay, thin enough to slip over the corner of a book page, gets two dot eyes near the point and a folded clay collar shape behind it to suggest a vampire cape flaring out. Slide it onto a page corner to mark a spot, with the cape visible from the edge of the closed book.
Because it just slips over a corner rather than gluing onto the page, the same bookmark works across different books, and a kid can make a whole set — one per vampire, if they want a small collection instead of a single bookmark.
Final Thoughts
Halloween air dry clay projects don’t need to end on October 31st. A handmade nameplate sign or trinket dish keeps getting used well into winter, and glow-in-the-dark charms and pencil toppers tend to outlast the actual holiday by months.
Pick two or three ideas that match how much time you actually have this week, rather than trying to work through all 23 in one sitting. A rushed batch of ten mediocre ghosts is a lot less fun for a kid than three projects they’re genuinely proud of.