


A carved pumpkin doesn’t have to just sit on the porch. Pour in baking soda and vinegar and it turns into a foaming chemistry lab. The same goes for that stash of extra candy, the tonic water in the fridge, and the leftover glow sticks from the school carnival. Halloween hands you a pile of spooky, sticky, glowing raw material, and a surprising amount of real science hides inside it.
This list covers 25 experiments split across six categories: acid-base chemistry, glow-in-the-dark science, states of matter, body and decomposition science, candy chemistry, and engineering builds. Most use things already in the pantry or a quick trip to the craft store. Ages run from preschool through middle school, with notes on which ones need an adult handling the pouring, the heat, or the microwave.
A handful of these involve dry ice or an open flame, and those are flagged clearly below. Everything else is a spread-a-towel-and-let-them-loose kind of mess.
Classic Chemical Reactions
Baking soda and vinegar show up in half of every Halloween science list, and there’s a reason for that. Kids see the reaction the second it happens, no waiting around, no special equipment needed.
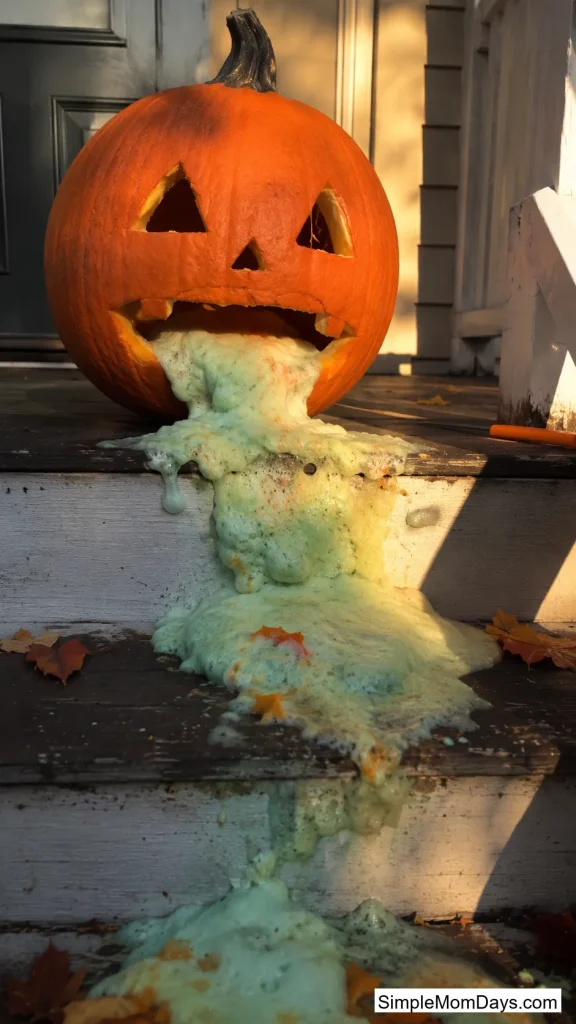
1. Puking Pumpkin Eruption
Hollow out a small pumpkin, squirt in dish soap, add a few drops of green or orange food coloring, then spoon in baking soda. Pour vinegar on top and the pumpkin “pukes” a stream of colorful foam over its own carved mouth.
The vinegar and baking soda react to release carbon dioxide gas, and the dish soap traps those gas bubbles into thick foam instead of letting them escape as flat fizz. Kids can predict how high the foam will climb before they pour, then check their guess.
Do this one outside or on a baking tray. It works for kids as young as 3, and a $4 mini pumpkin is plenty for several rounds if you rinse it out between eruptions.
2. Bubbling Witch’s Cauldron Potion
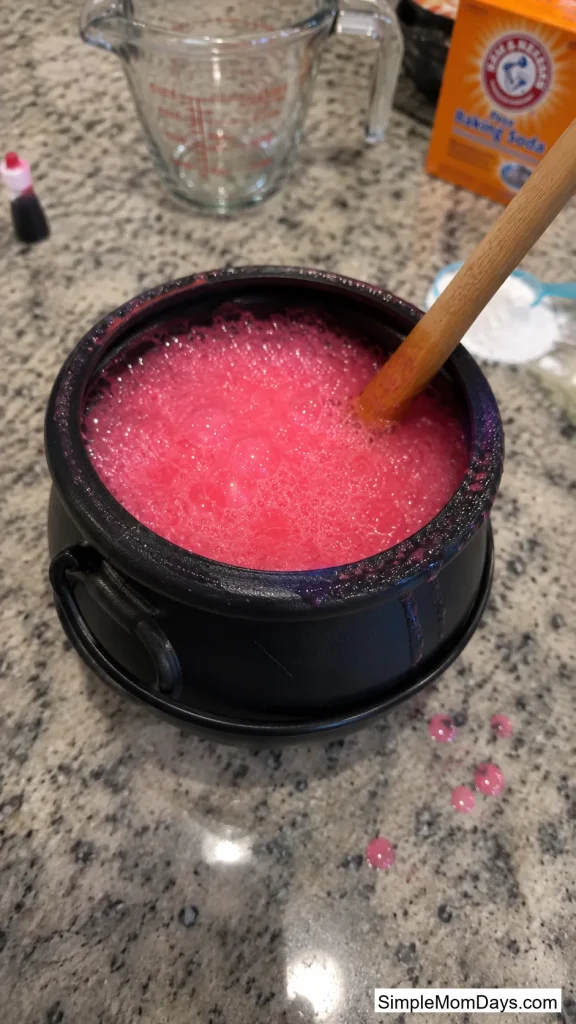
Steep red cabbage in hot water for ten minutes, strain out the leaves, and you’ve got a natural pH indicator that shifts from purple to pink or blue depending on what’s mixed into it. Pour it into a small black cauldron or bowl.
Add vinegar and the potion turns bright pink. Add a spoonful of baking soda solution instead and it shifts toward blue-green. Kids get to see acids and bases changing color in real time, which is a step up from the usual foam-and-fizz version.
Cabbage juice stains a little, so an old shirt or an apron is worth having on hand. This one suits kids around 6 and up who can handle measuring cups without spilling everywhere.
3. Dancing Gummy Worms
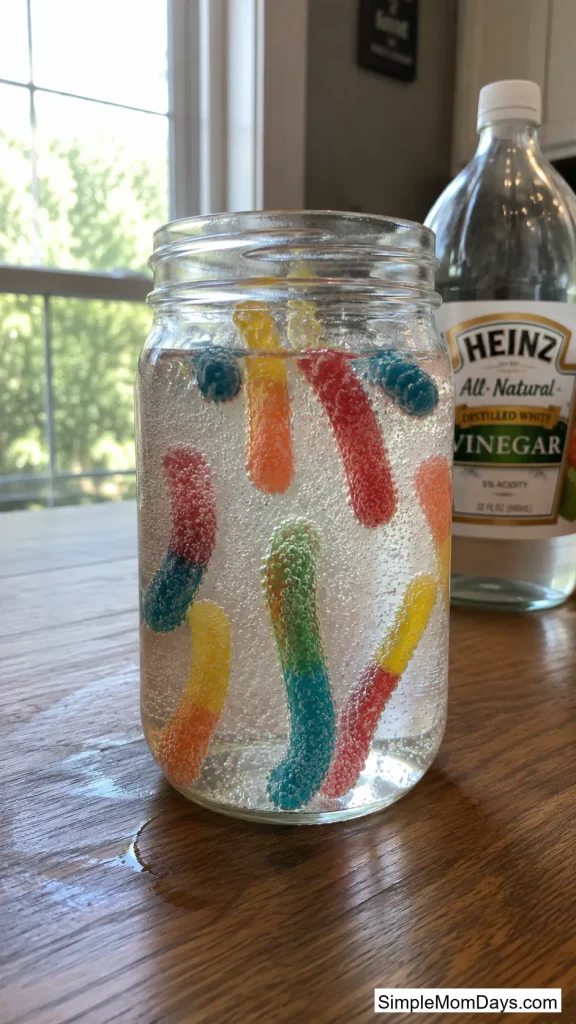
Drop a handful of gummy worms into a clear jar filled with equal parts water and vinegar, then stir in a spoonful of baking soda. Carbon dioxide bubbles cling to the worms’ sticky surface and lift them toward the top, then release and let them sink again.
The result looks like the worms are wiggling and swimming on their own, which is exactly the kind of low-effort “wow” that keeps younger kids watching for ten straight minutes. It’s contained, so cleanup is just pouring the jar out.
This works well as a quiet-table activity for ages 4 and up, since there’s no eruption to manage, just a jar to watch.
4. Monster Balloon Inflation
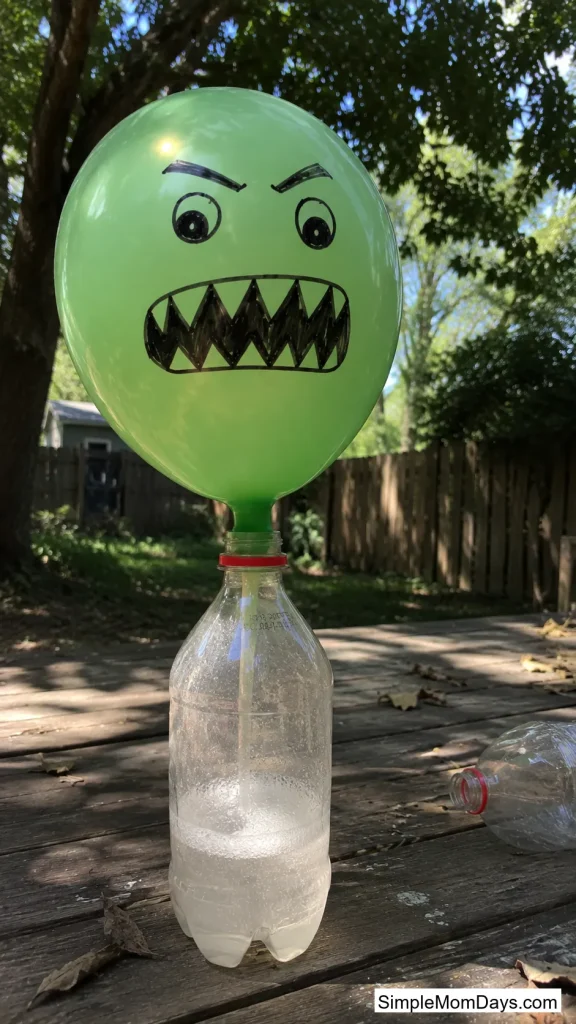
Stretch a balloon over the mouth of an empty plastic bottle. Add a few spoonfuls of baking soda into the balloon itself, pour vinegar into the bottle, then lift the balloon upright so the baking soda drops in.
The carbon dioxide produced by the reaction has nowhere to go but into the balloon, inflating it without anyone blowing a single breath. Draw a monster face on the balloon beforehand with a permanent marker and it inflates into a full-sized creature in front of them.
Kids around 5 and up can manage the setup themselves with a little help holding the balloon steady.
5. Fizzing Potion Science Station
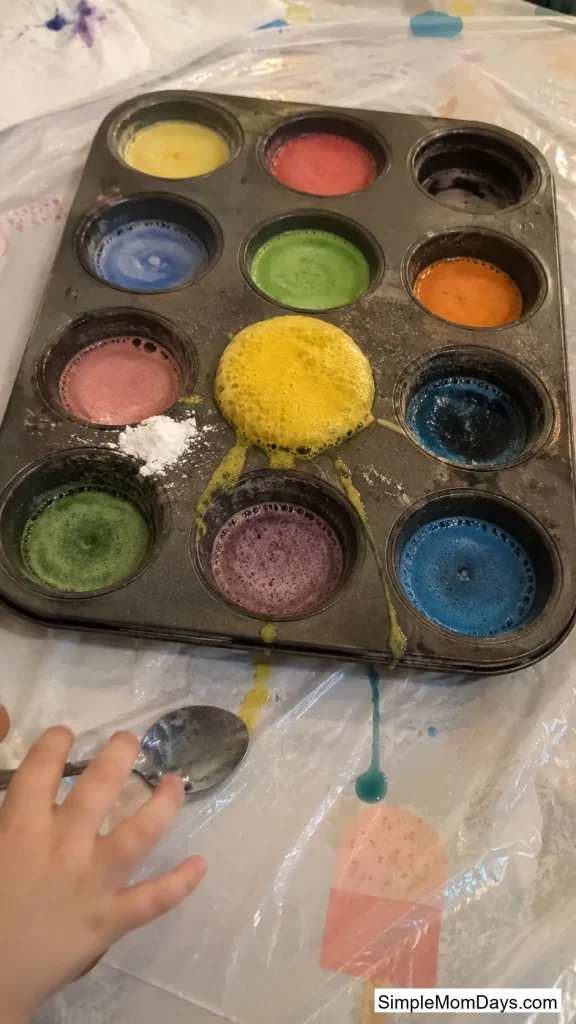
Set out small cups of water, oil, dish soap, and food coloring, plus containers of baking soda and salt. Let kids combine them freely in a muffin tin or ice cube tray and observe what fizzes, what separates, and what just sits there.
This one skips the script. Instead of following steps, kids run their own mini experiments and start noticing patterns, like which combinations always produce bubbles and which never do.
Cover the table first. It’s an open-ended station best suited to ages 5 and up working with some supervision nearby.
Glow-in-the-Dark and Blacklight Science
A basic UV blacklight runs about $15 to $25 and turns an ordinary kitchen into a glow lab for the rest of the season. These experiments explore fluorescence, the process where a material absorbs UV light and gives it back as visible light.
6. Glowing Tonic Water Ghosts
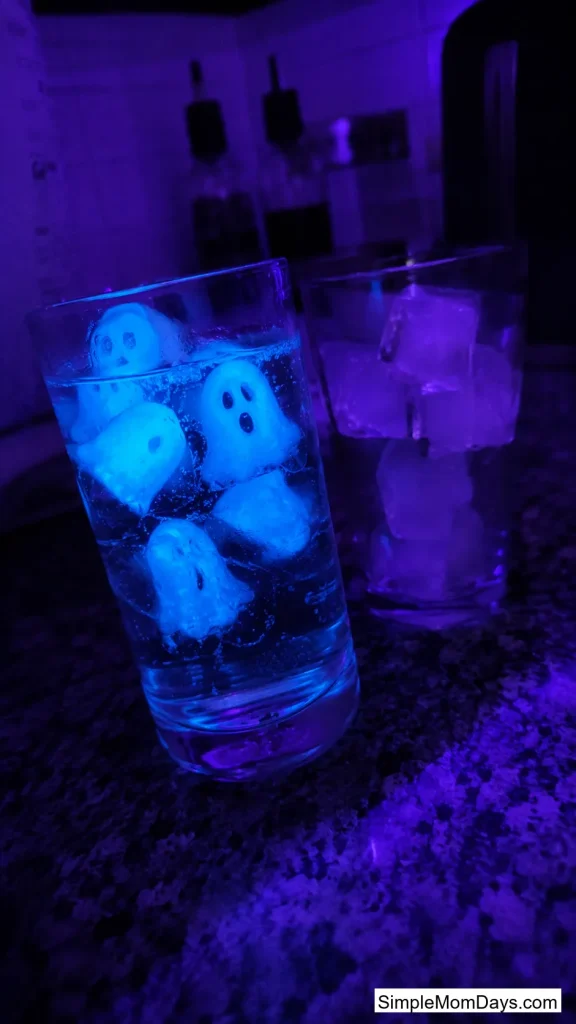
Pour tonic water into a ghost-shaped ice cube tray and freeze overnight. Once the lights go out and the blacklight comes on, the cubes glow bright blue while regular water cubes next to them stay dark.
Tonic water glows because it contains quinine, a compound that fluoresces under UV light. Drop a few cubes into a clear glass of soda or lemonade and the whole drink lights up, which makes for a good side-by-side comparison against a drink made with plain ice.
Quinine is food-grade, so this is safe for kids to handle and even drink, and it works for basically any age with adult supervision around the freezer and the blacklight.
7. Glow-in-the-Dark Slime
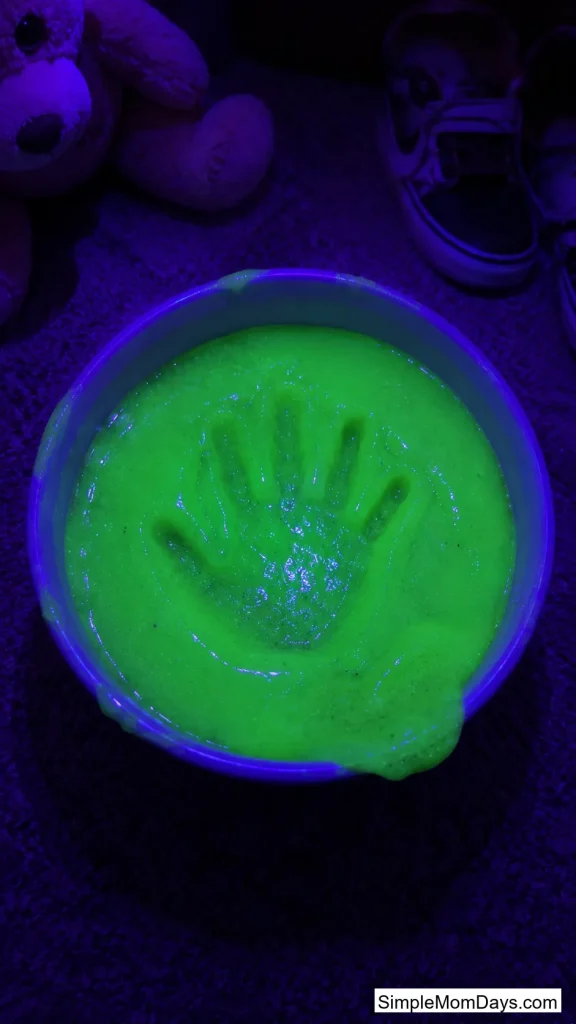
Mix white school glue with a small amount of contact lens solution and a pinch of baking soda until it pulls together into slime. Knead in glow-in-the-dark paint or a spoonful of powder from a craft store before it fully sets.
The borate ions in the contact solution link the glue’s long polymer chains together, turning liquid glue into something stretchy and semi-solid. Charge the slime under a lamp or the blacklight for a minute and it glows for several minutes in the dark.
This is a hands-on favorite for ages 4 and up, though younger kids will need help with the mixing ratios.
8. UV Blacklight Scavenger Hunt
Turn off the lights, switch on the blacklight, and send kids around the house with a checklist of things to test: white t-shirts, laundry detergent stains, certain rocks, a highlighter, even olive oil, which glows a dull red thanks to leftover chlorophyll.
Not everything fluoresces, and figuring out why is the actual point. Have kids sort their findings into a “glows” and “doesn’t glow” chart, then guess what the glowing items have in common before explaining phosphors and fluorescence.
This works especially well for ages 7 and up who can read and track a checklist independently.

9. Glowing Highlighter Crystal Garden
Soak a pipe cleaner shape in water mixed with ink pulled from a few yellow highlighters, then suspend it in a jar of hot water saturated with alum or borax. Over two to three days, crystals form along the pipe cleaner.
Once the crystals have grown, a blacklight makes them glow with the same fluorescence as the highlighter ink that seeded them. It’s a slower experiment than most on this list, which makes it a good one for teaching patience alongside crystallization.
Best suited to ages 8 and up, since it involves handling hot water and checking progress daily.

10. Glow-in-the-Dark Bubbles
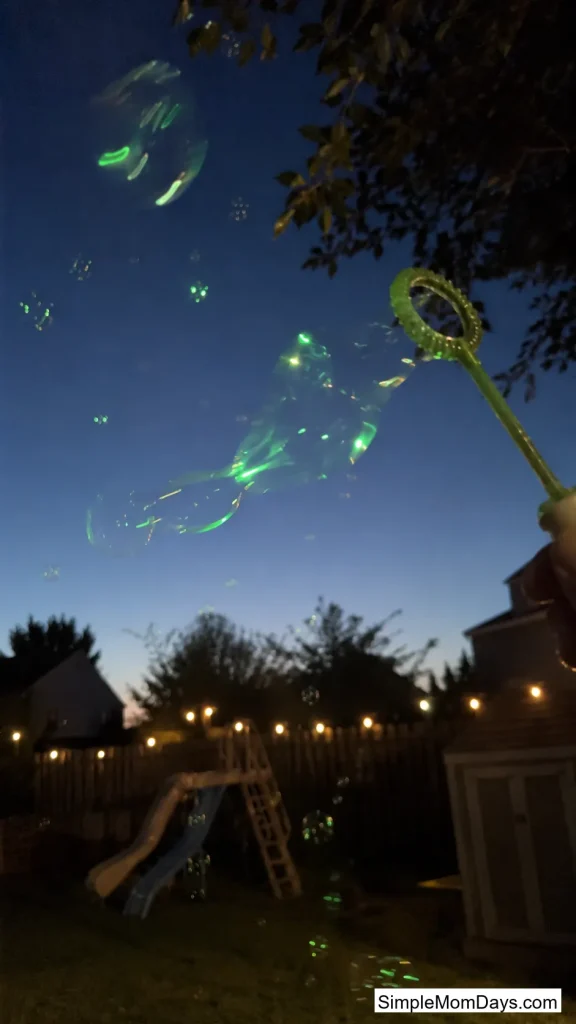
Mix washable glow-in-the-dark paint into regular bubble solution at roughly a one-to-one ratio, then take it outside once it’s dark. Blown under a blacklight or near a glow stick, the bubbles drift through the air lit up like tiny glowing orbs.
It’s simple, but there’s something about glowing bubbles at dusk that gets a bigger reaction than almost anything else on this list.
Do this one outdoors, since the paint mixture can drip and stain a carpet. It suits any age that can already blow regular bubbles.
Spooky States of Matter
These four dig into how matter changes between solid, liquid, and gas, using ice, dry ice, and a little bit of fire.
11. Frozen Monster Hands
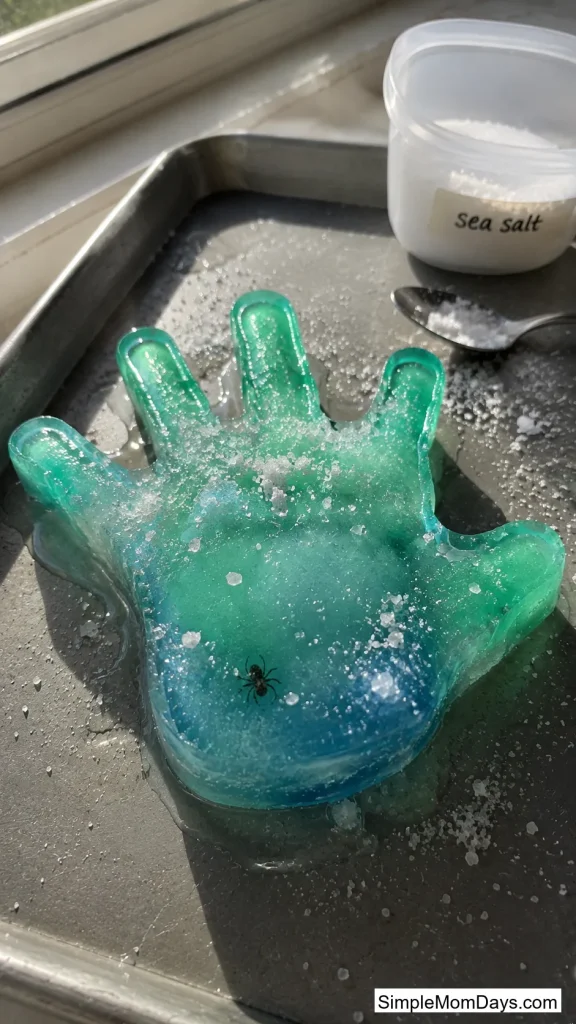
Fill a latex glove with water, a few drops of food coloring, and small plastic toys or Halloween trinkets. Tie it off and freeze overnight, then peel the glove away to reveal a solid, icy hand.
Set the hand on a tray with a container of salt nearby and let kids sprinkle it directly onto the ice. Salt lowers the freezing point of water, so it melts the ice faster than plain warm air would, speeding up the hunt for the treasures trapped inside.
This works for nearly any age, and it doubles as a lesson in freezing point depression once kids notice the salted spots melting first.
12. Dry Ice Fog Cauldron
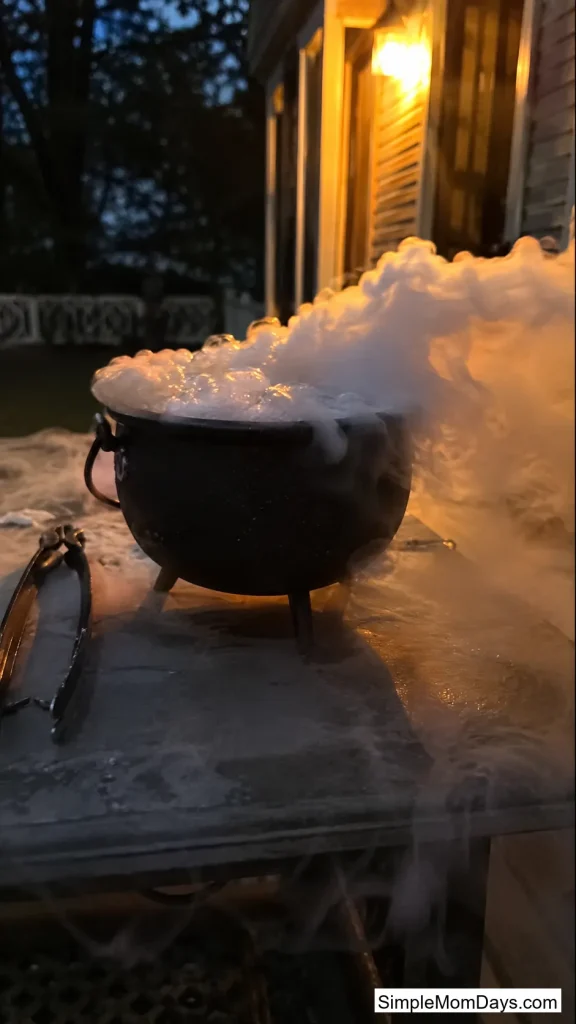
Drop a chunk of dry ice into a cauldron or bowl of warm water and watch thick fog roll over the sides. Dry ice sublimates, meaning it passes straight from a solid to a gas without ever becoming liquid, and that gas is what forms the fog.
Add a drop of dish soap to the water first and the fog gets trapped inside rising bubbles instead of just spilling over the rim, which makes for a better photo and a clearer look at the gas escaping.
Adults only should handle the dry ice itself using tongs or gloves, since direct skin contact can cause burns. Keep the room ventilated and treat this as a supervised demonstration rather than a hands-on activity for younger kids.
13. Flying Ghost Tea Bags
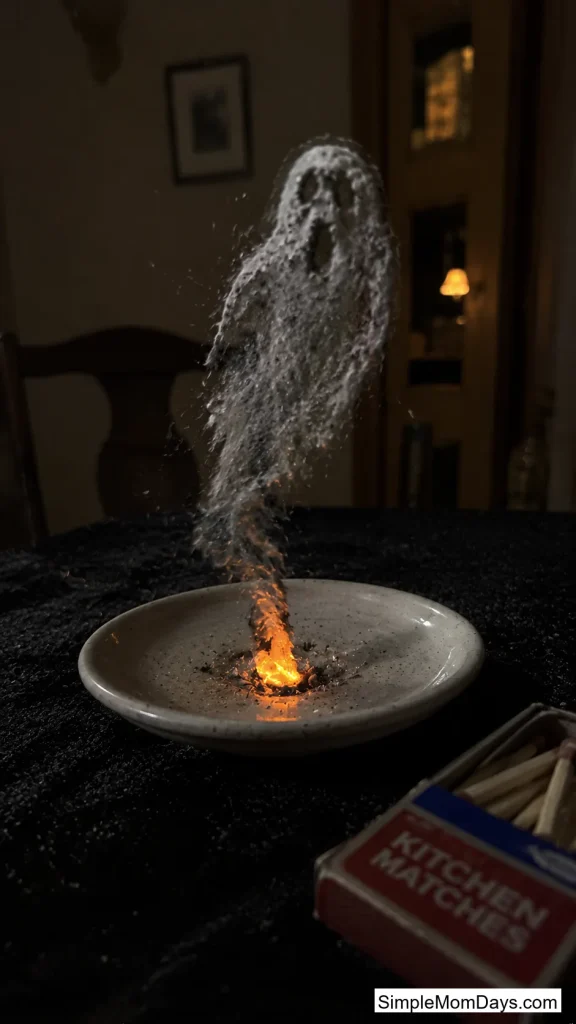
Empty a tea bag, unfold it into a cylinder, and stand it upright on a heatproof plate. An adult lights the top, and as it burns down, the lightweight ash structure catches the rising heat and lifts off the plate like a tiny ghost taking flight.
What’s actually happening is convection: the burning paper heats the air around it, that hot air rises, and the remaining ash is light enough to ride along with it.
This one involves an open flame and needs an adult to do the lighting, with kids watching from a safe distance. It’s a better fit for ages 8 and up who can follow fire-safety instructions.
14. Skeleton Ice Excavation
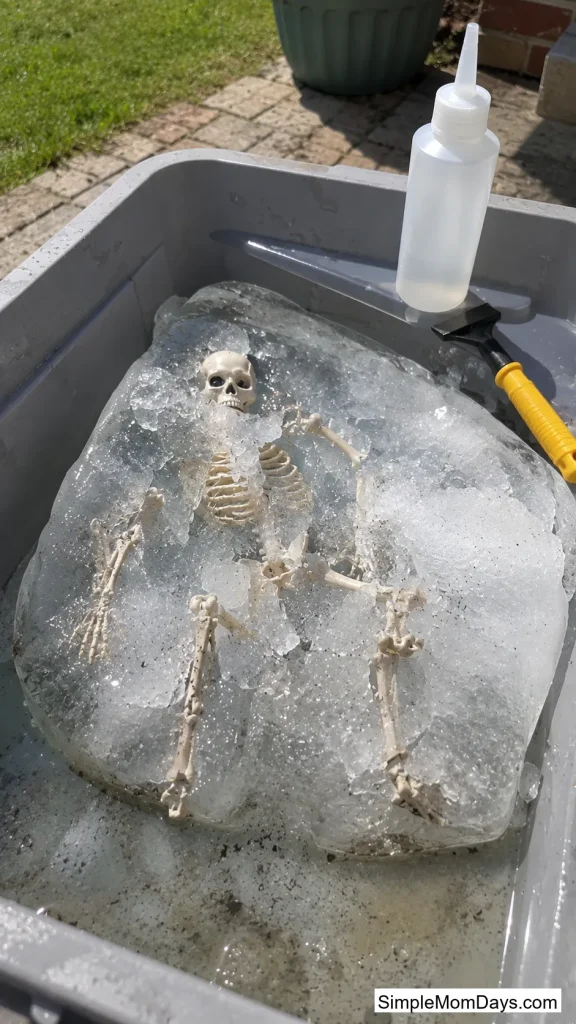
Freeze a few small plastic bones, spiders, or skeleton toys inside a large container of water, ideally over a day or two so the block freezes solid all the way through. Give kids warm water in a squeeze bottle, a sprinkle of salt, and a small plastic tool to chip away at the ice.
It’s part patience, part fine-motor practice, and part phase-change lesson, since kids can compare how much faster warm water and salt work than just picking at the ice with a spoon.
Great for ages 4 and up, and it holds attention far longer than most experiments on this list, often 20 minutes or more.
Creepy Body and Decomposition Science
These explore what happens to living things over time, from a dissolving eggshell to a slowly rotting pumpkin.
15. Naked Egg Eyeball
Submerge a raw egg in a jar of vinegar and leave it for 24 to 48 hours. The acid dissolves the calcium carbonate shell completely, leaving behind a rubbery, translucent membrane that still holds its egg shape and bounces slightly if dropped from a short height.
For a spookier finish, soak the “naked” egg in tonic water for a few more hours. The membrane absorbs enough quinine to glow faintly blue under a blacklight, turning a plain science demo into something that actually looks like a glowing eyeball.
Handle it gently over a tray, since the membrane is fragile. This suits ages 6 and up who can wait out the multi-day timeline.

16. Mummified Apple
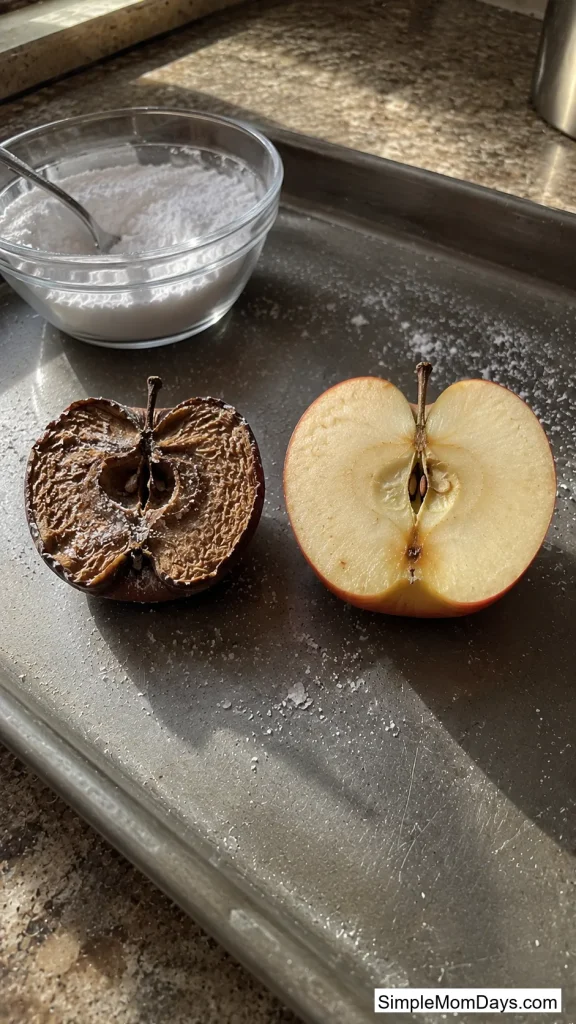
Slice an apple in half. Bury one half completely in a mix of baking soda and salt, similar to the natron ancient Egyptians used for mummification, and leave the other half exposed to open air. Check both every few days.
The buried half dries out and shrinks without much mold, since the salt-and-soda mixture pulls moisture away fast enough to stop decay in its tracks. The exposed half browns, softens, and eventually molds. Comparing the two side by side over a week makes preservation a lot more concrete than just reading about it.
A good pick for ages 7 and up doing a school project, since it pairs naturally with a bit of ancient history.
17. Rotting Pumpkin Decomposition Jar
Cut a small pumpkin into chunks and seal a few pieces in a clear jar. Leave it somewhere out of direct sun and have kids check on it daily, sketching or photographing what they see.
Over one to two weeks, mold spreads, the pumpkin flesh collapses, and the whole thing shifts color and texture as microorganisms break it down. It’s slower and less flashy than most experiments here, but tracking the changes in a simple journal turns it into a real observation exercise.
Keep the jar somewhere kids can check it without disturbing it, and expect a strong smell by the end. Best for ages 6 and up who can handle daily journaling.

18. Homemade Fake Blood Chemistry
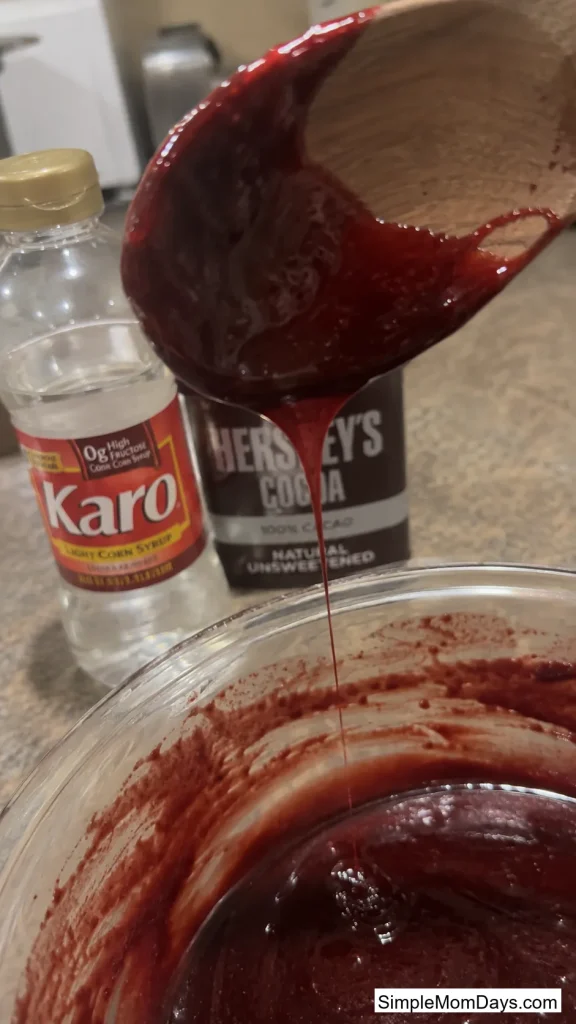
Mix corn syrup with red and a touch of blue food coloring, then stir in a spoonful of cocoa powder to darken it and a little cornstarch to thicken the texture. Adjust each ingredient until the color and consistency look convincingly gory.
Kids get to test how viscosity changes as they add more cornstarch, and how color mixing works as they balance red against blue and brown. It’s genuinely useful too, since the finished batch works for costumes and Halloween decorating.
Corn syrup stains fabric, so mix over a covered surface. Works for any age that enjoys a bit of gross-out fun.
Candy Lab Science
Halloween candy left in the pantry makes for surprisingly good lab material, and using it up this way beats letting it go stale.
19. Skittles Color Diffusion Plate
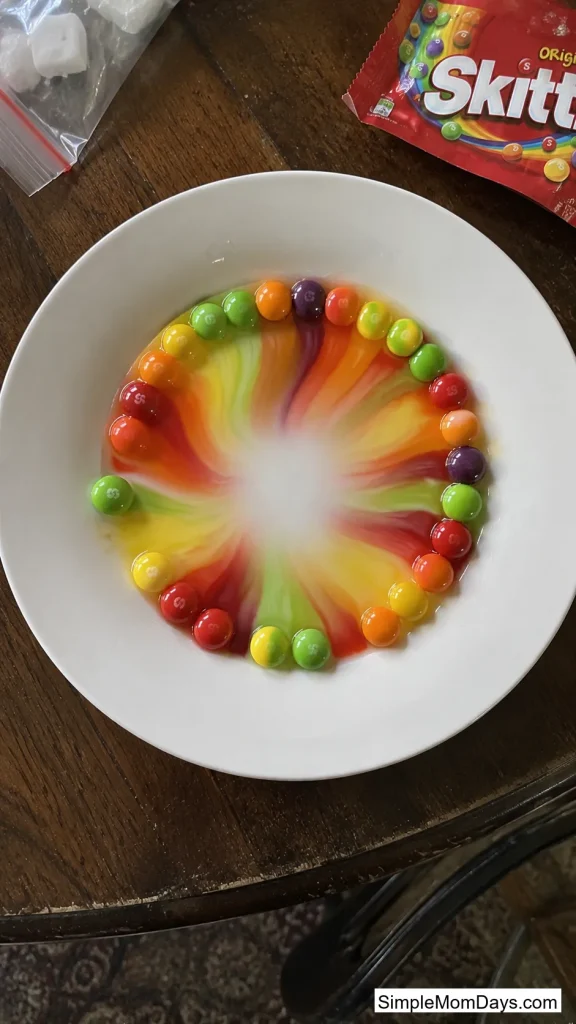
Arrange Skittles in a ring around the edge of a plate, sorted by color. Pour warm water into the center and wait without touching anything.
The color coating dissolves and streaks toward the middle of the plate, where the colors meet but don’t fully blend, since the sugar molecules are diffusing through the water at roughly the same rate from every direction. It’s one of the fastest experiments on this list, taking effect within a minute or two.
Works for nearly any age, including toddlers who just want to watch the colors move. A $2 bag of Skittles covers several rounds.
20. Candy Corn Density Tower
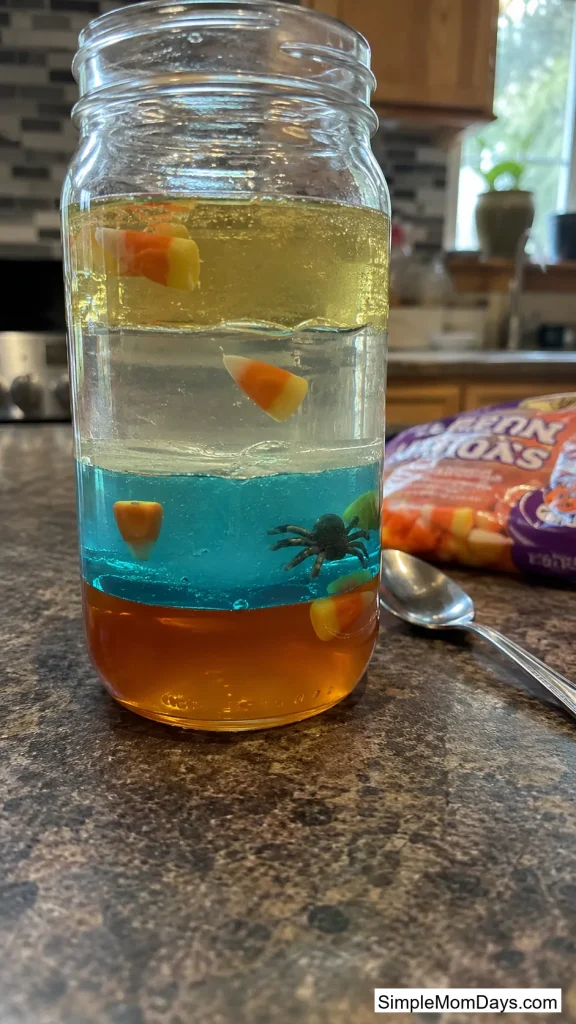
Layer honey, dish soap, water, and vegetable oil into a clear jar, pouring slowly so each liquid settles into its own band instead of mixing. Drop in candy corn, mini marshmallow pumpkins, and a few gummy spiders.
Each item sinks until it hits a liquid dense enough to hold it up, so the candy corn might rest between the honey and the dish soap while a lighter gummy spider floats near the oil layer. Kids can guess where each item will land before dropping it in.
A good pick for ages 6 and up who can pour carefully. It also makes a striking jar to leave out as Halloween decor afterward.
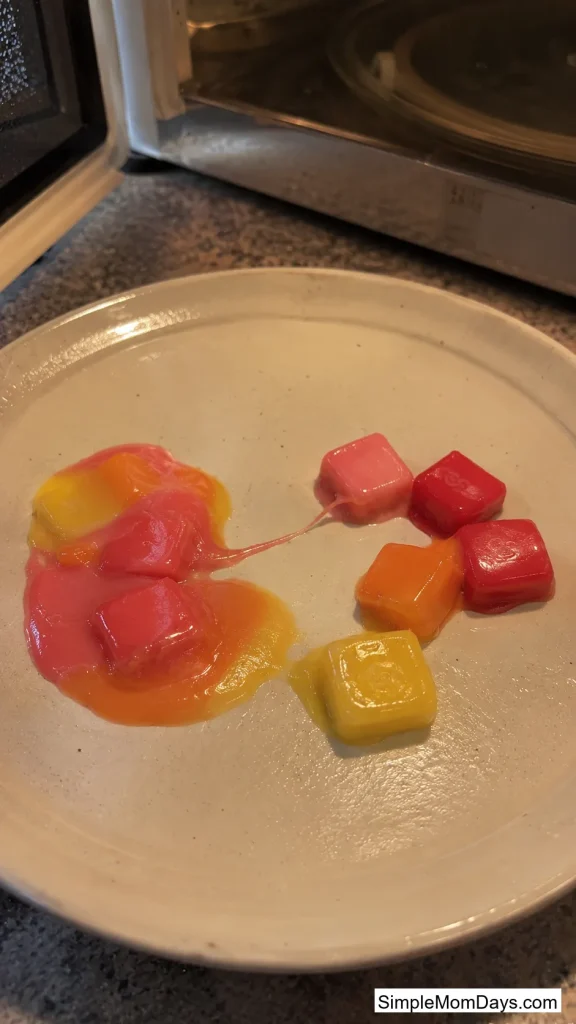
21. Starburst Meltdown
Unwrap a few Starburst candies and place them on a microwave-safe plate. Heat in five-second bursts, checking between each one, until the candy softens and starts to lose its shape.
Starburst is mostly sugar, corn syrup, and fat, and watching it shift from solid to a stretchy, half-melted state is a hands-on look at how heat changes a material’s structure without changing what it’s made of. Let kids compare a barely warmed piece against one that’s gone fully soft.
An adult should run the microwave and let the candy cool before anyone touches it, since melted sugar holds heat far longer than it looks like it would.
22. Gummy Bear Osmosis Growth
Drop one gummy bear each into separate cups of plain water, salt water, and sugar water, then leave them overnight. In the morning, measure each one against its original size.
The gummy bear in plain water swells the most, since water moves into the bear through osmosis to balance out the concentration difference. The salt water bear barely grows, and sometimes shrinks slightly, because the salt pulls water in the opposite direction.
Have kids record their measurements in a simple chart. Ages 6 and up can usually manage the ruler and recording themselves.

Engineering and Building Challenges
These trade chemistry for construction, working through the same design-test-improve process real engineers use.
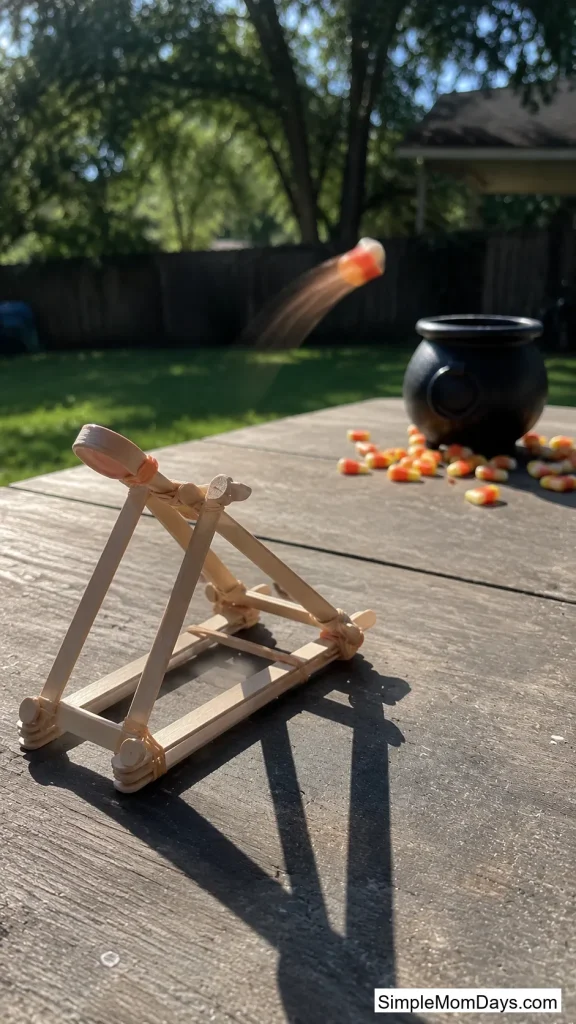
23. Candy Catapult Launch
Stack a handful of craft sticks and secure both ends with rubber bands, then attach a plastic spoon to one end using another rubber band as the pivot. Load a piece of candy corn into the spoon, pull back, and let go.
Set up a cauldron or bucket a measured distance away as a target and have kids track how many shots it takes to land one inside. Changing the number of stacked sticks or the pivot point changes the launch distance, which turns this into a real design-and-test cycle rather than a one-shot toy.
Best for ages 6 and up, and it doubles easily as a party game with point values assigned to different targets.
24. Cotton Swab Bone Bridge
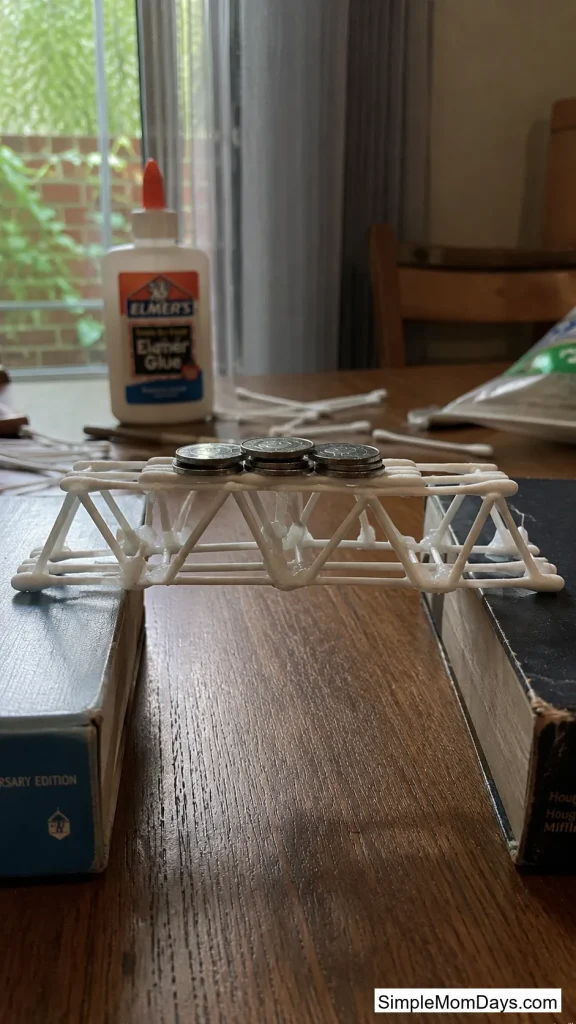
Using only cotton swabs and glue or tape, build a bridge that spans a 12-inch gap between two books or boxes. Once it’s dry, test how much weight it holds by adding small items like erasers or coins one at a time.
Kids quickly discover that a flat row of swabs sags almost immediately, while a triangle or truss pattern distributes weight far better. Rebuilding after a collapse is normal here and usually teaches more than getting it right the first time.
Suited to ages 7 and up who have the patience for a bit of trial and error.
25. Spider Web Balance Bridge
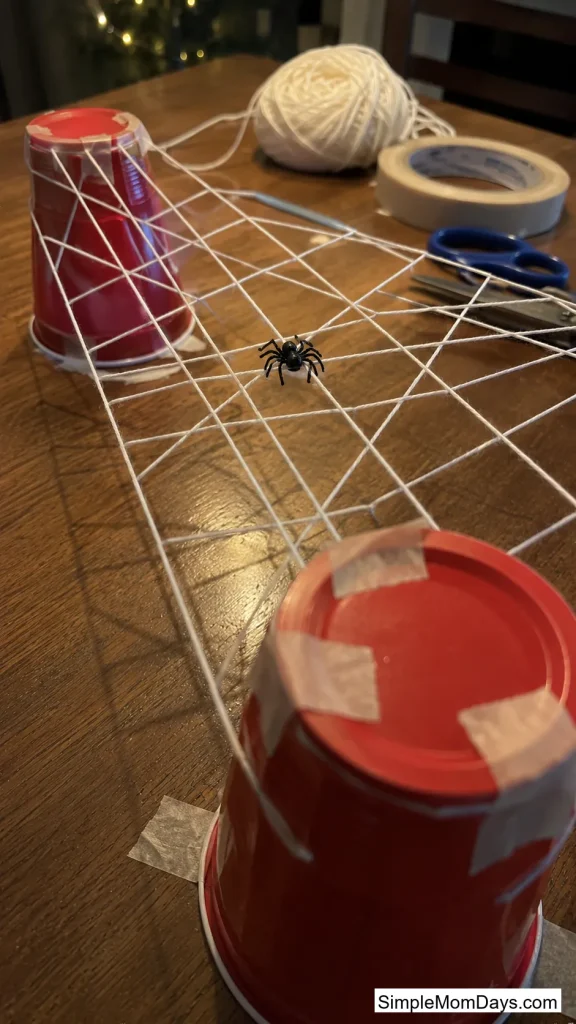
Tape two cups a few inches apart, then string yarn between them in a crisscrossing web pattern, pulling each strand taut before securing it. Once the web is built, test how many small plastic spiders or linking cubes it can hold before a strand gives way.
The tension in each yarn strand is what keeps the structure up, and kids can feel the difference between a loosely strung web and a tightly pulled one just by testing both.
Works well for ages 5 and up, especially as a follow-up to reading a spider-themed picture book.
Final Thoughts
Twenty-five experiments is enough for the entire month of October, not one frantic afternoon. Pick two or three a week leading up to Halloween, group a few of the messier ones for a weekend when you don’t mind cleaning up, and save the fire and dry ice experiments for whenever an adult has the time to run them properly. However you spread it out, most of these use supplies you already have on hand or can grab in one trip to the store.