Every grad party has that one moment. Someone wanders over to the photo display, goes quiet, and just stares. A baby picture next to a senior portrait does that to people. It’s the easiest way to make a party feel personal without spending a fortune on decor that gets thrown away the next day.
The tricky part is that most “photo display ideas” lists recycle the same five setups: a foam board, a string of lights, a pallet. Those work, but if you’ve scrolled Pinterest for more than ten minutes, you’ve seen them a hundred times. Below are 19 ways to show off the graduate’s journey, split by where and how they work best, with a few genuinely different ones mixed in.
Displays That Greet Guests Before They Even Walk In
First impressions matter, and these set the tone before anyone reaches the food table.
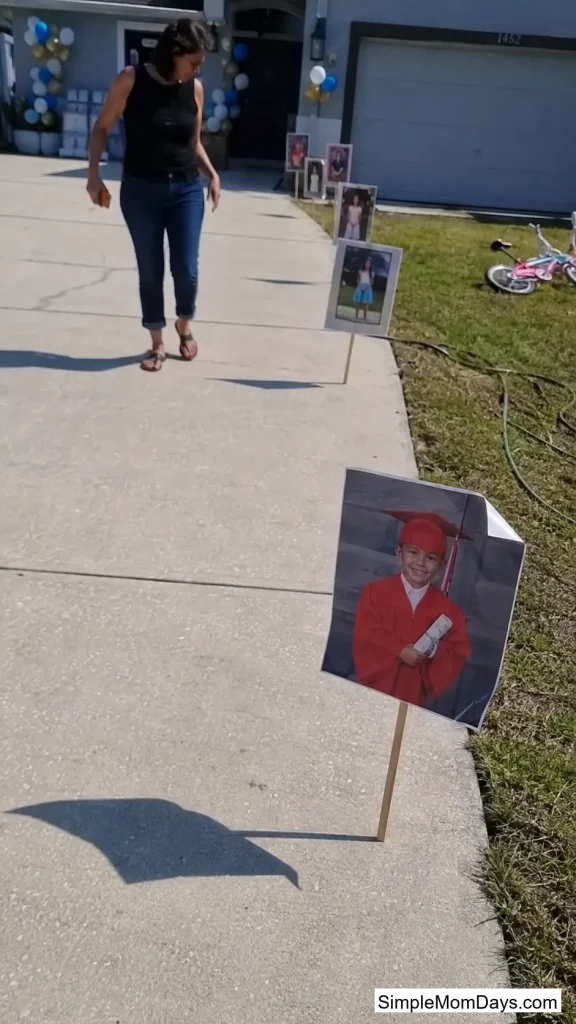
1. A Photo Walk Down the Driveway or Sidewalk
Line the path to your front door with large printed photos, one per year, propped on small stakes or easels. Guests walk through the grad’s entire school career just getting from their car to the party.
It works because it forces people to slow down before they’re distracted by food and conversation. The photos become the first thing anyone talks about, not an afterthought they notice later.
Weigh down each stake with a rock or sandbag if there’s any wind, and skip glossy prints that glare in direct sun.
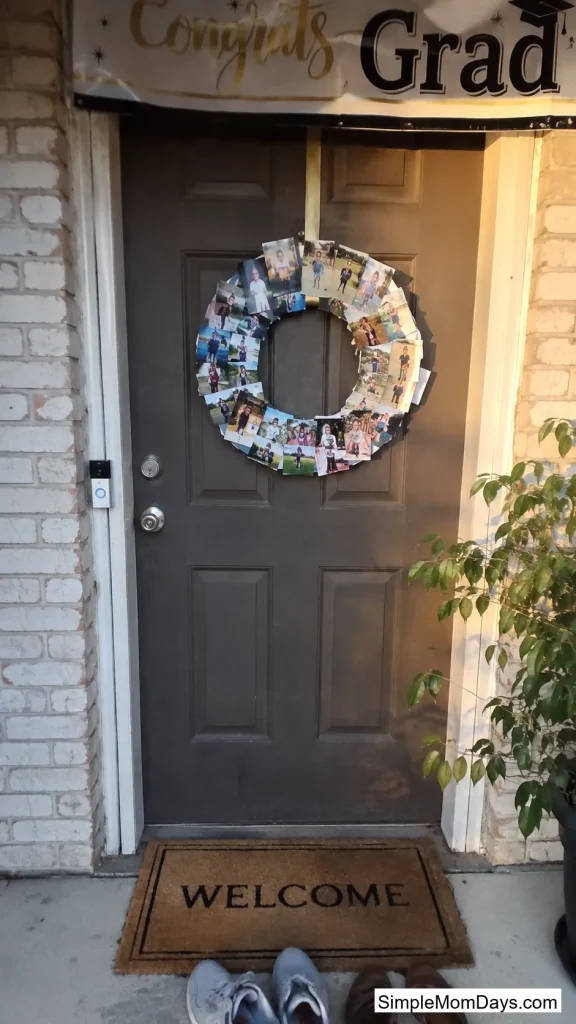
2. A Photo Wreath on the Front Door
Glue small printed photos around a foam wreath form, spacing them evenly so the images read as a circle rather than a random cluster. Hang it on the front door instead of the usual seasonal wreath.
A circle shape reads as “full circle” without anyone needing to explain it. It’s also compact enough to work on an apartment door if the party isn’t in a house.
Mini brad clips hold photos in place better than glue if you want to swap pictures later.
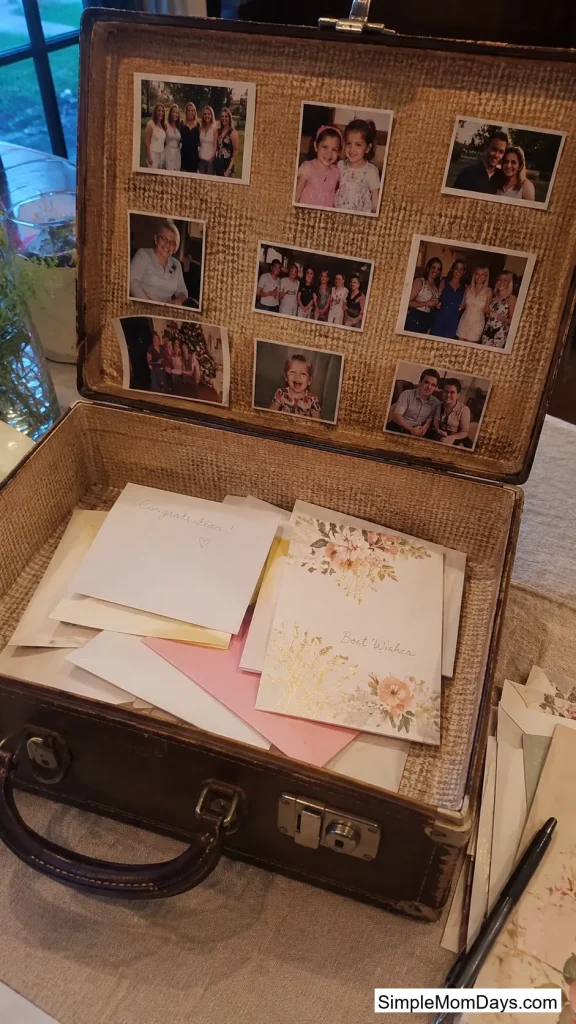
3. A Suitcase Lined With Photos as the Card Station
Open an old suitcase flat on a table and glue photos along the inside lining instead of leaving it plain. Guests drop cards inside, and the open lid doubles as a small photo gallery.
It solves two problems in one object: guests need somewhere to leave cards, and that spot usually sits empty and boring for most of the party. This way it’s doing double duty.
Thrift stores usually have vintage suitcases for a few dollars, and a worn, scuffed one actually looks better here than a new one.
Interactive Stations Guests Actually Participate In
Static displays get looked at once. These get guests involved, which keeps people around them longer.
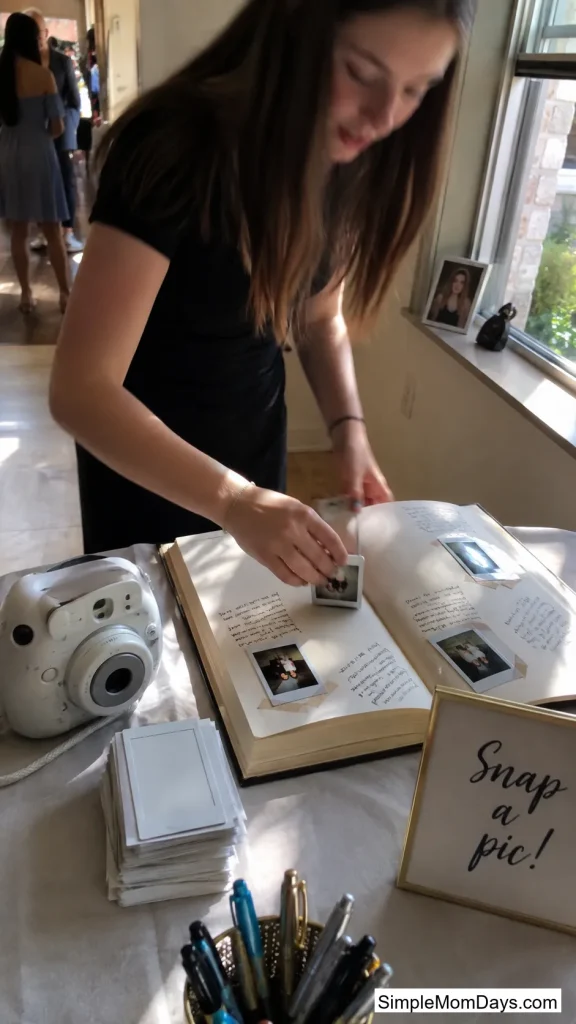
4. A Polaroid Guestbook Station
Set out an instant camera near the entrance and ask each guest to snap a photo of themselves, then stick it into a blank book or onto a board next to a short note. By the end of the night, the grad has a book full of photos and messages instead of just signatures.
It gives guests something to do the moment they arrive, which helps break the ice at parties where not everyone knows each other.
Buy more film than you think you’ll need. A station like this runs through packs fast once people realize it’s there.
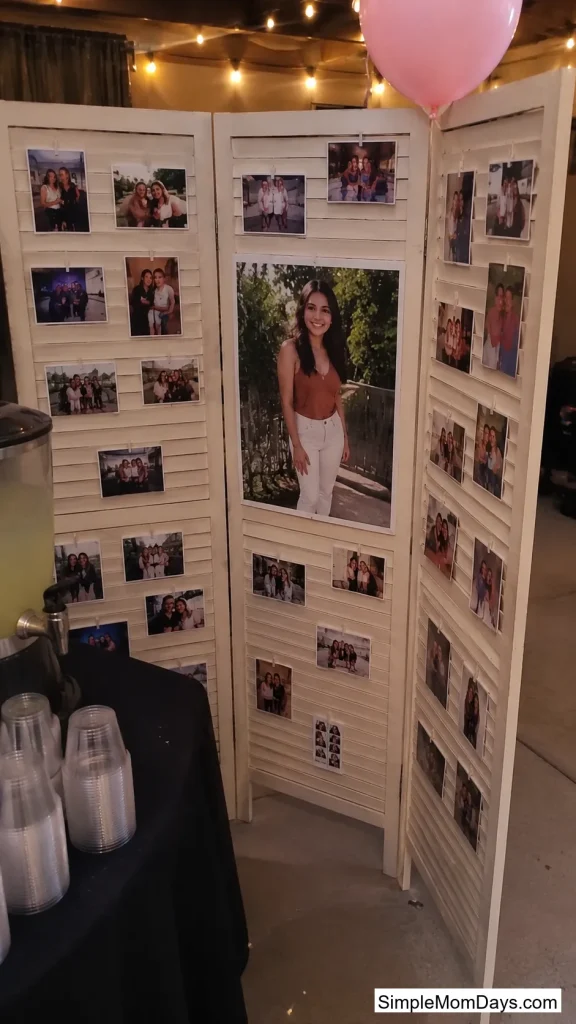
5. A Room Divider Turned Photo Screen
Cover a cheap folding room divider with printed photos, sized larger in the center panel and smaller toward the edges. Place it near the entrance or a drink station where people naturally gather.
A divider stands on its own without needing a wall, string, or tape, which makes it useful for backyard parties or rented venues where you can’t attach anything to a surface.
Fold it flat and store it afterward, which most photo boards can’t do.
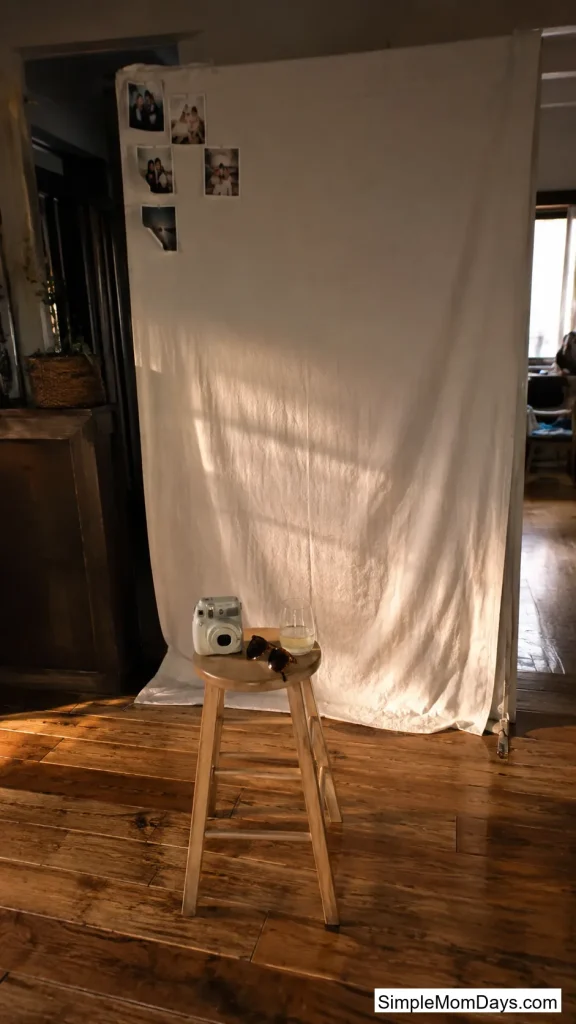
6. An Instant-Camera Backdrop Guests Can Pose In Front Of
Hang a cluster of the grad’s photos on a plain backdrop, then leave a camera nearby so guests can take their own picture in front of it. The backdrop becomes part of every photo taken there for the rest of the night.
Every party has a spot where people naturally take pictures. Building the photo display into that spot means it keeps showing up in everyone’s phone long after the party ends.
Keep the backdrop photos smaller than the guest posing space, or the display competes with the person standing in front of it.
Centerpieces That Do More Than Sit on the Table
These fit on a dinner or dessert table without taking up the space a full board would need.
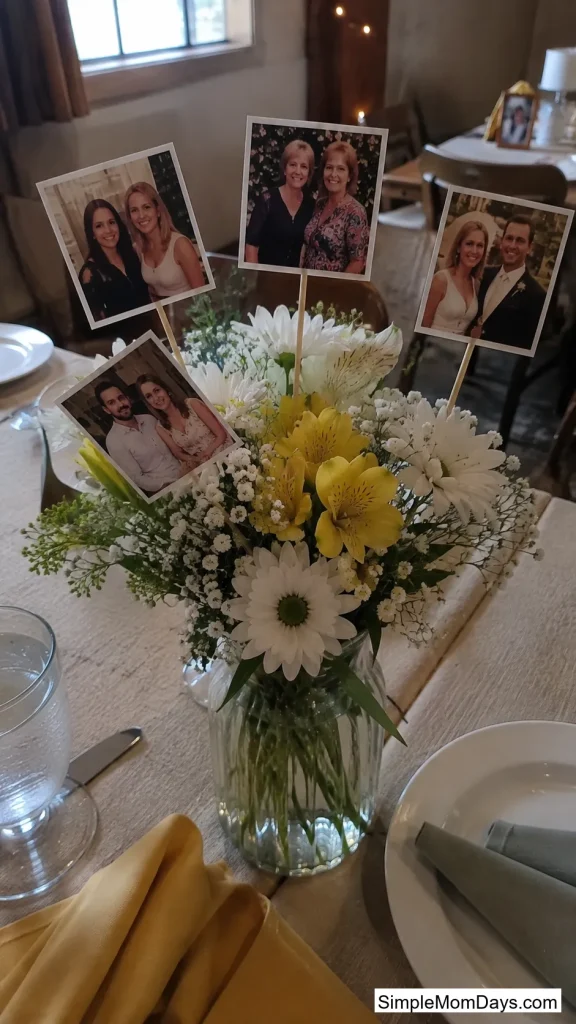
7. Photos on Skewers Tucked Into a Flower Arrangement
Glue small printed photos onto cardstock, tape them to wooden skewers, and tuck them into a vase or floral centerpiece alongside real or artificial flowers. The photos poke up between the stems like part of the arrangement.
It turns a centerpiece guests would glance at once into one they’ll actually pick up and look through, since the photos are right at eye level while they’re seated.
Trim the skewers to different heights so the photos don’t all line up in a flat row.
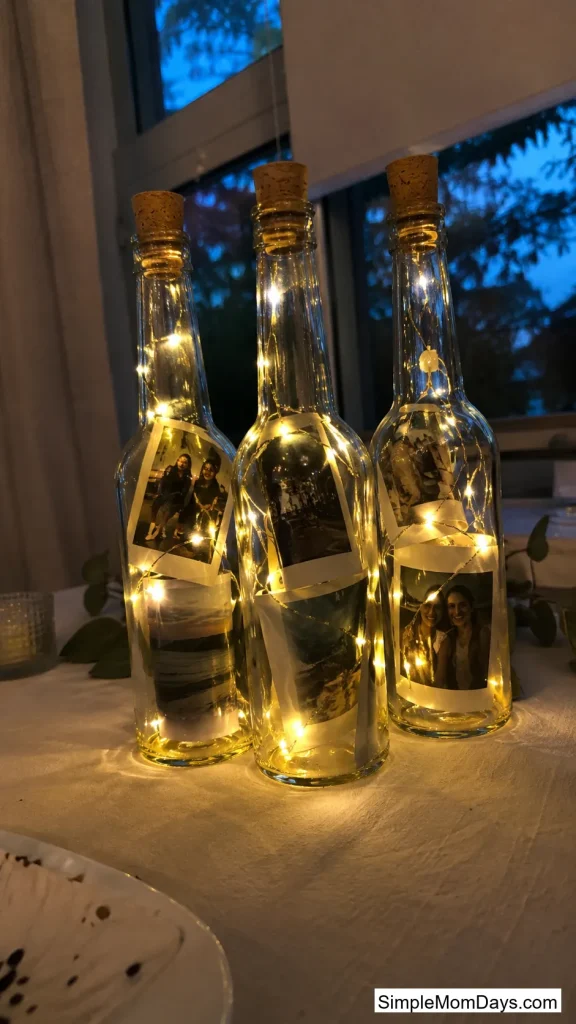
8. Photos Rolled Into Glass Bottles With Fairy Lights
Roll printed photos into slim glass bottles or jars, then tuck a small string of battery-powered fairy lights in alongside them. Cluster three or four bottles together as a centerpiece.
The lights glow through the glass and the curled photo inside, so the display works during the day and after dark without anyone needing to adjust it.
Battery-powered lights matter here. A cord running to an outlet ruins the effect and creates a tripping hazard on a dinner table.
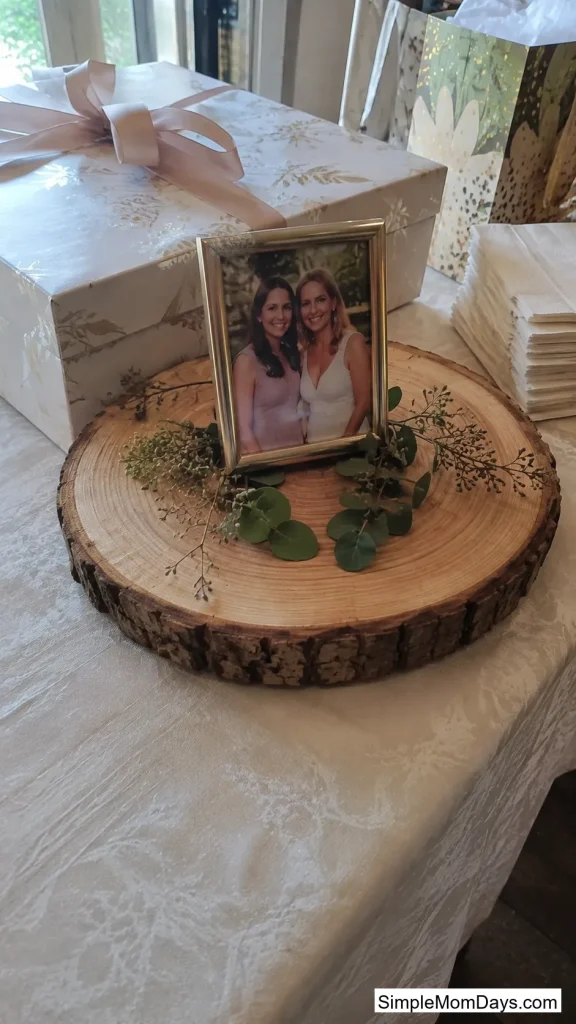
9. A Wood Slice With One Framed Photo on Top
Set a single framed photo — a senior portrait or a favorite childhood shot — on top of a flat wood slice or round cutting board, then surround the base with a few stems of greenery or flowers.
One strong photo does more than a cluttered collage in a spot this small. It works especially well on a gift table or near the cake, where the focus should stay narrow.
Wood slices are usually a few dollars at craft stores, and a slightly uneven, rustic cut looks more intentional than a perfectly smooth one.
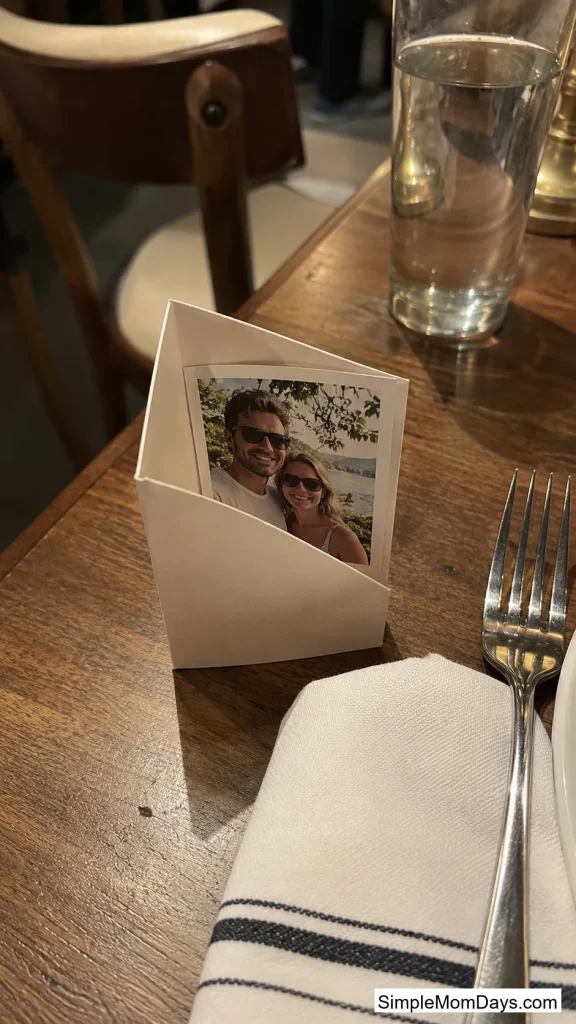
10. Photo Sleeves Made From Folded Cardstock
Fold a strip of cardstock into a small triangular sleeve, slide a printed photo into the front, and set one at each place setting or scattered across the table. They function like place cards but show a photo instead of a name.
Every seat gets its own tiny piece of the display, so even guests sitting far from the main photo board still have something to look at during dinner.
Use a different photo at each seat instead of repeating the same one, so table-hopping guests notice new ones as they move around.
Wall and Structural Displays for a Bigger Visual Statement
When you want the display to be the focal point of a room or backyard, these hold more photos at once.
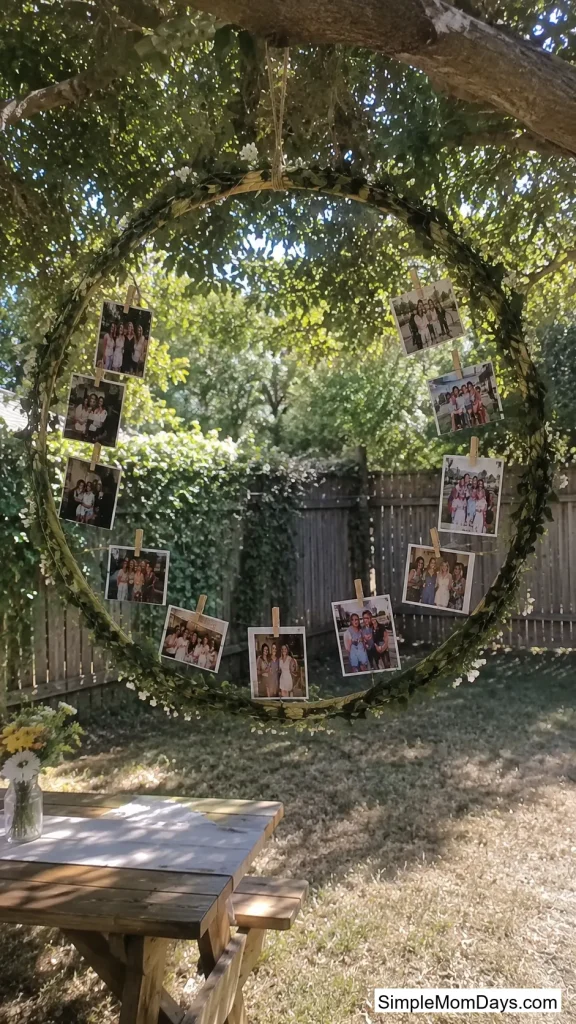
11. A Hula Hoop Photo Garden
Spray-paint a plain hula hoop, wrap it with artificial greenery or ribbon, and clip photos around the inner ring so they hang like petals. Suspend it from a tree branch, pergola, or ceiling hook.
It reads as sculptural rather than flat, which makes it stand out against every board or banner nearby. Hanging it at head height also means guests naturally look up and into it as they walk past.
A fishing line instead of visible string keeps the hoop looking like it’s floating.
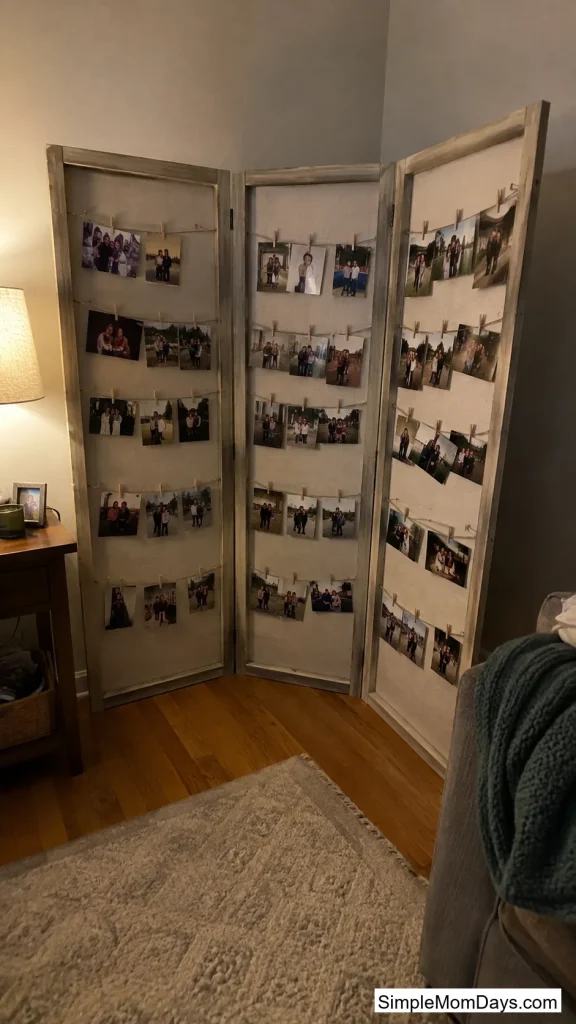
12. Hinged Frames Strung Together Like a Screen
Connect three or four large picture frames with hinges or sturdy ribbon so they fold out like a room divider, then string twine across each frame and clip photos to it. The whole thing stands upright on its own.
It looks more finished than a flat foam board because it has actual depth and can stand freely in the middle of a room, not just against a wall.
Secure the base with a small stand or lean it into a corner if it’ll be somewhere with foot traffic.
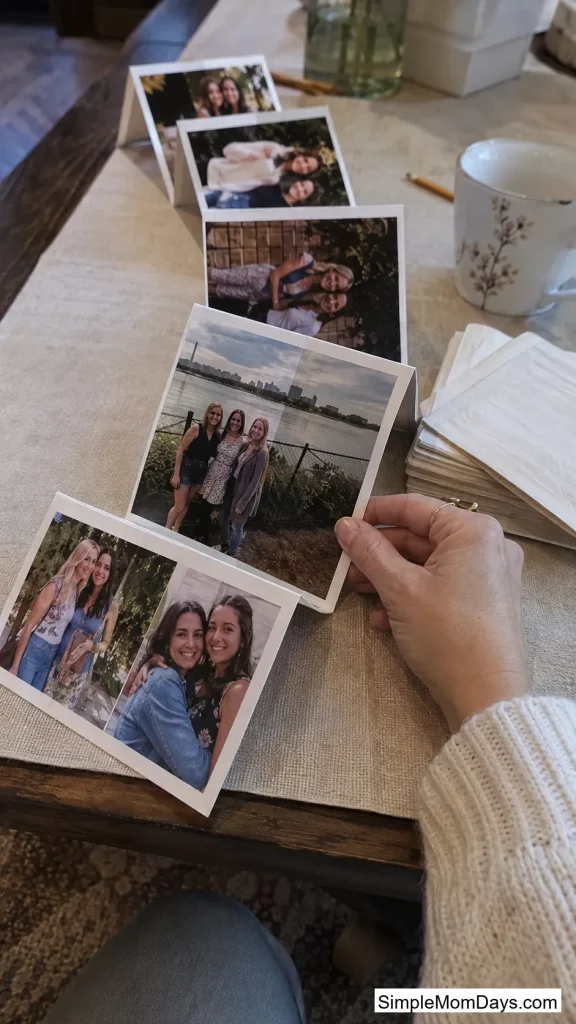
13. An Accordion Fold-Out Photo Book
Order a fold-out accordion print of the grad’s favorite portrait session, then set it open on a table so it stretches out like a fan of connected images. Guests can flip through the whole thing without you needing to build anything.
It holds a full photo session in one compact object instead of needing wall space or a frame for every single shot, which makes it a good pick for smaller apartments or tight venue tables.
These usually ship printed and ready, so it’s one of the few ideas here with zero setup beyond unboxing it.
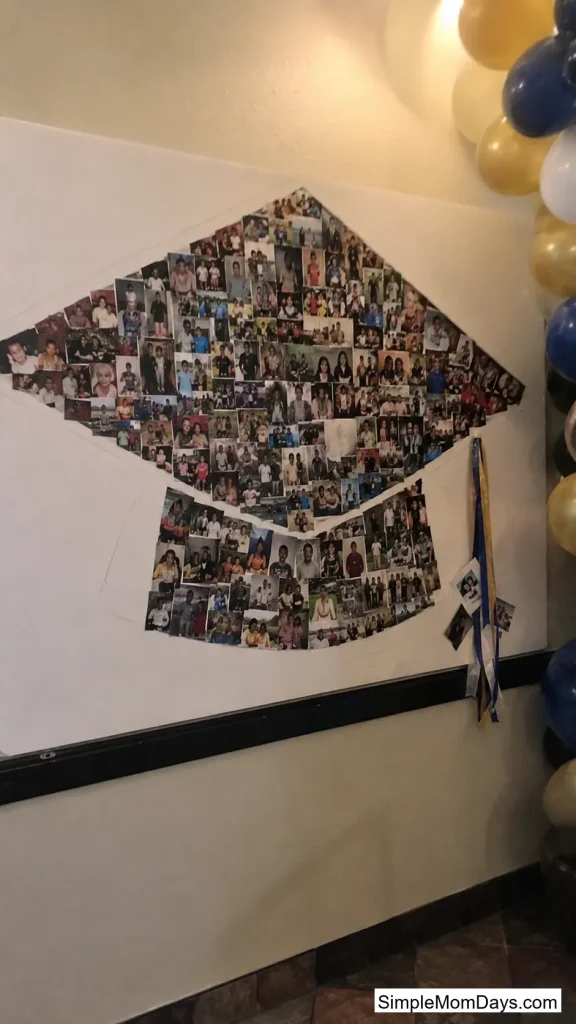
14. A Graduation Cap Shaped Out of Photos
Arrange photos on a foam board or wall in the outline of a graduation cap, using the flat square top and tassel as the shape guide. Fill the square with photos from throughout the grad’s school years.
The shape does the theming for you, so you don’t need extra banners or signage explaining what the display is about. It also photographs well from a distance, which most flat collages don’t.
Sketch the cap outline in pencil on the board first so the photo placement stays even as you fill it in.
Keepsakes That Double as Party Decor
These pull double duty — they look good during the party and stay useful long after it’s over.
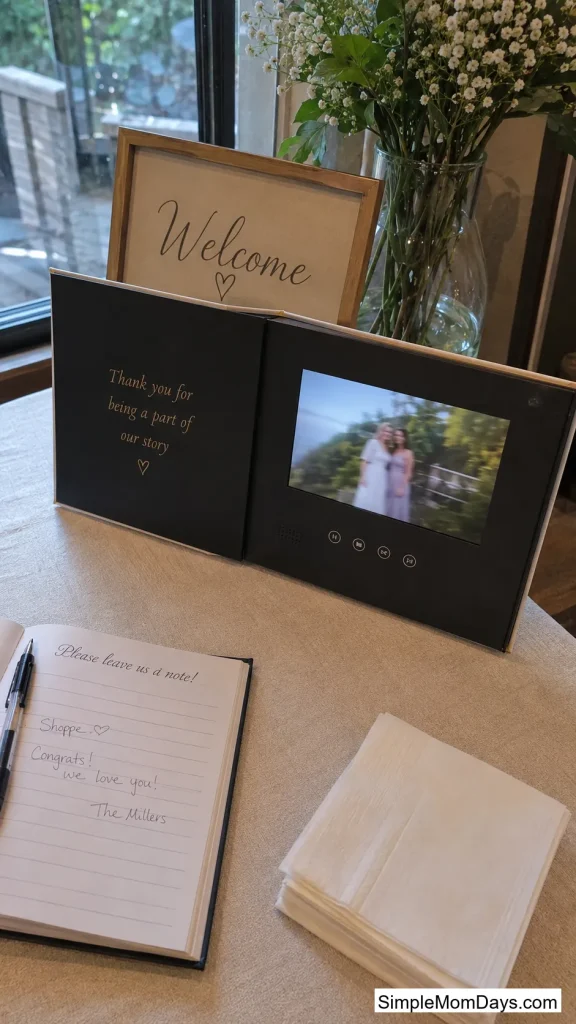
15. A Video Playbook on the Welcome Table
Set out a photo book with a built-in screen that plays a slideshow set to music when opened, positioned on the table guests pass first. It looks like a regular photo book until someone opens the cover.
It draws people in because it’s unexpected. A static photo board is easy to walk past; a book that suddenly plays a moving slideshow makes guests stop and call other people over to see it.
Keep the slideshow under three or four minutes so it loops without dragging for people who linger at the table.
16. A Bound Photo Album on a Memory Table
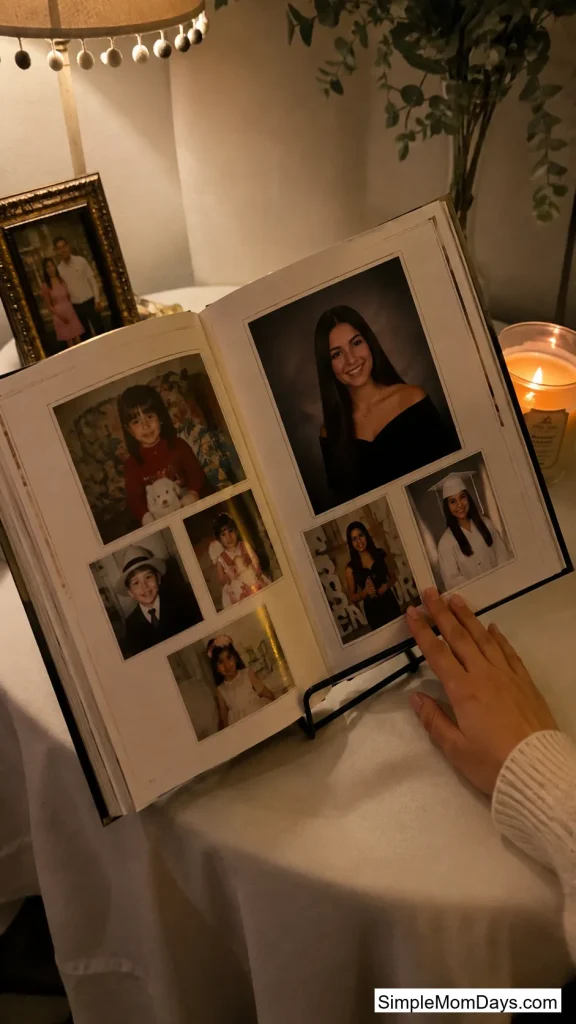
Set out a hardbound album — a plain cover works fine, or go with a printed one if it’s within budget — filled with favorite portraits and candid shots from throughout the grad’s school years. Leave it open on a small dedicated table.
Unlike a board or banner, this becomes something the family keeps using for years after the party, pulled out again at holidays or future milestones.
Add a small stand to prop the album open at an angle, so pages don’t need to lie completely flat to stay visible.
17. Mounted Prints Leaning on Easels
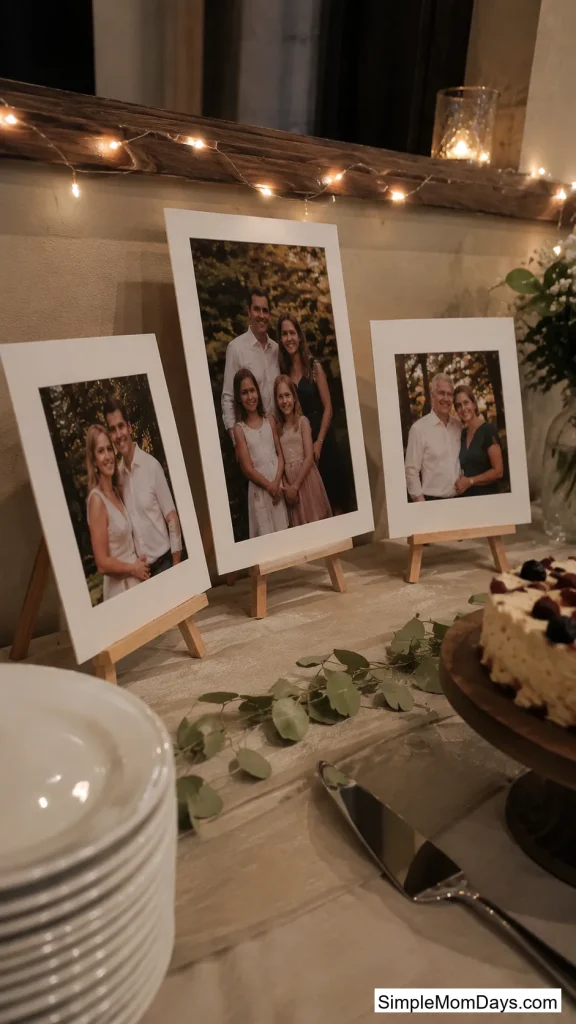
Order a few of the grad’s strongest portraits as mounted prints, then lean them against small tabletop easels near the dessert table, gift table, or entrance instead of laying flat photos out.
Leaning them at an angle instead of pinning them flat gives the display some height and makes it feel more like a gallery moment than a stack of loose pictures.
Three or four well-chosen prints do more here than a dozen small ones crowded together.
Themed Touches for a More Personal Feel
These lean into the grad’s specific interests instead of a generic template.
18. A Skewer Display Themed Around a Sport or Hobby
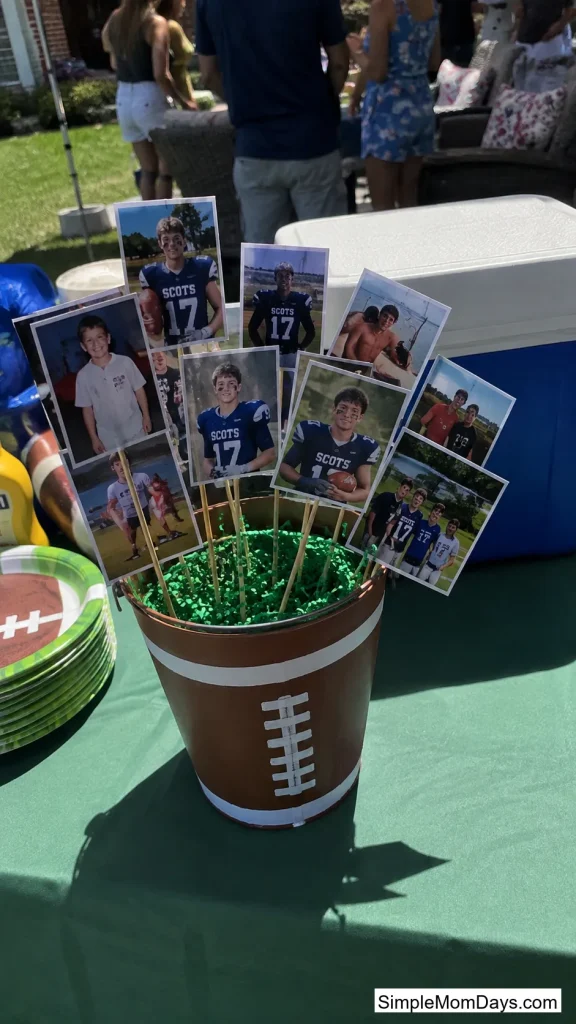
Attach photos to long wooden skewers and stick them into a bucket, planter, or foam base decorated to match the grad’s main activity — a football, a paint palette, a music note cutout, whatever fits. The container becomes part of the story, not just a stand.
It’s the same simple skewer setup used elsewhere on this list, but tying the container to something the grad actually cares about makes it feel built for them specifically instead of copied from a template.
Vary the skewer heights so the display has a natural, staggered shape rather than a flat row.
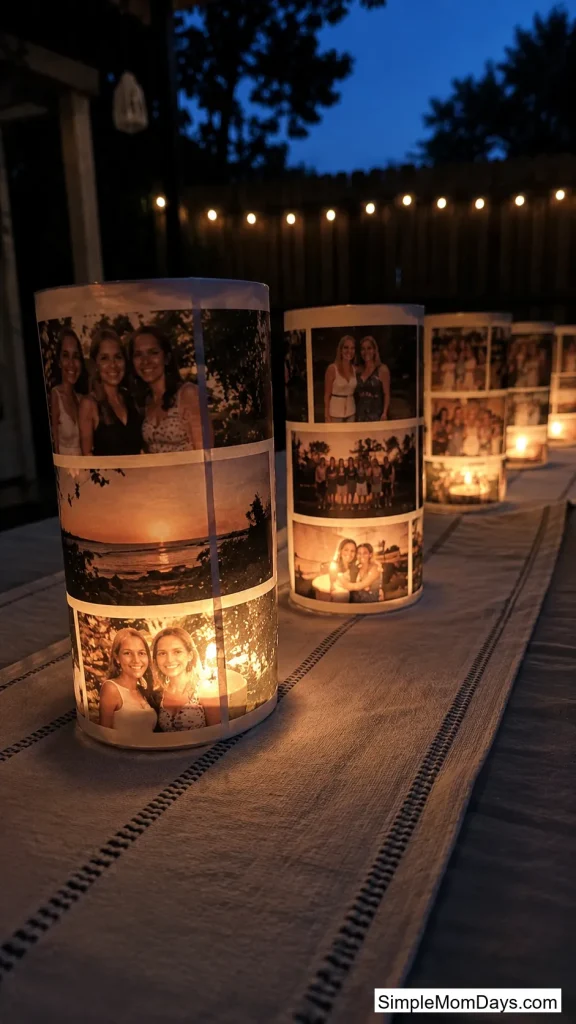
19. Photo Lanterns Lit From Within
Slide printed photos into paper lantern shades, or wrap them around a small lantern frame with a battery tea light inside. Space several of them along a table runner, fence line, or backyard path.
Once it’s dark, the lanterns glow with the photos visible through the paper, which gives the display a second life after sunset instead of fading into the background once the sun goes down.
LED tea lights only, never open flame, especially if the lantern shade is anywhere near a tablecloth or curtain.
Nineteen photos displays sound like a lot until you realize most parties only need four or five of these total — one at the entrance, one or two on tables, one bigger wall piece, and a keepsake for after the party’s over. Pick the ones that fit the space you actually have, and let the graduate’s own photos do the rest of the talking.