Halloween decor season means every craft store aisle looks the same: the same plastic spiders, the same orange garlands, the same fog machine display near the register. If you want your party to actually stand out in photos, the trick isn’t buying more stuff. It’s making a handful of pieces that guests haven’t already seen on ten other porches this month.
These 17 ideas mix cheap materials — dollar store finds, things already in your recycling bin, a hot glue gun you probably own — with a little bit of assembly time. None of them need power tools or a trip to three different stores. Pick a few that fit your space and skip the rest; you don’t need all 17 to pull off a party that feels put-together.
Entryway and Porch Showstoppers
Guests form their first impression before they even ring the doorbell, so this is where a little effort goes the furthest.
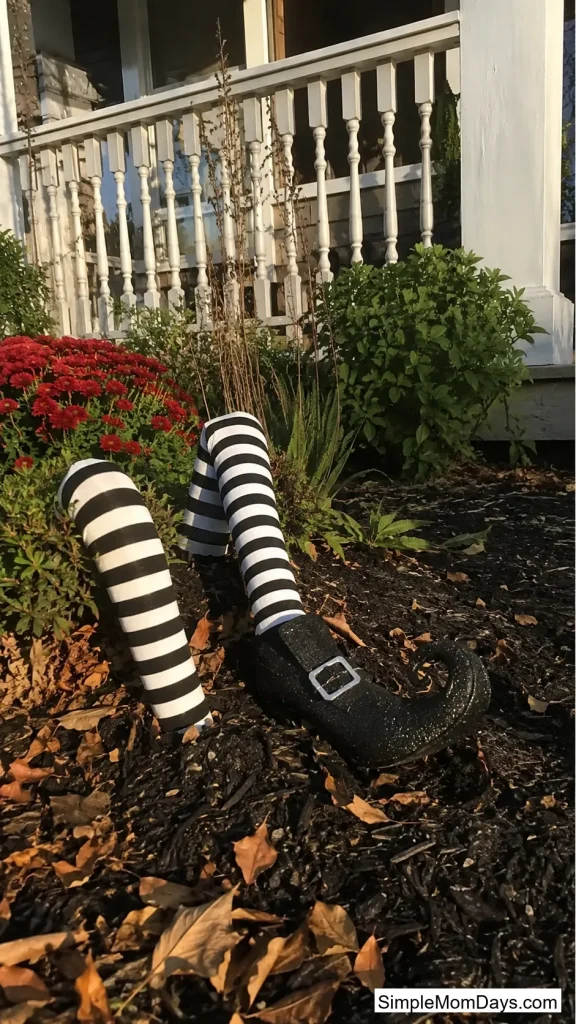
1. Pool Noodle Witch Legs
Slide a pool noodle into a pair of dollar store striped stockings, bend it at the “knee,” and stuff the top with newspaper so it holds its shape. Add a shoe or a curled-toe witch boot at the bottom and you’ve got a pair of legs that look like they crashed straight through your planter or flower bed.
It works because it’s a sight gag more than a scary decoration — people stop, laugh, and take a picture next to it. Kids especially like helping bend the noodle into a pose.
Plan on under $10 per pair if you already own scissors and stuffing material, and give yourself about 20 minutes per set.
2. Painted Baking Tin Tombstones
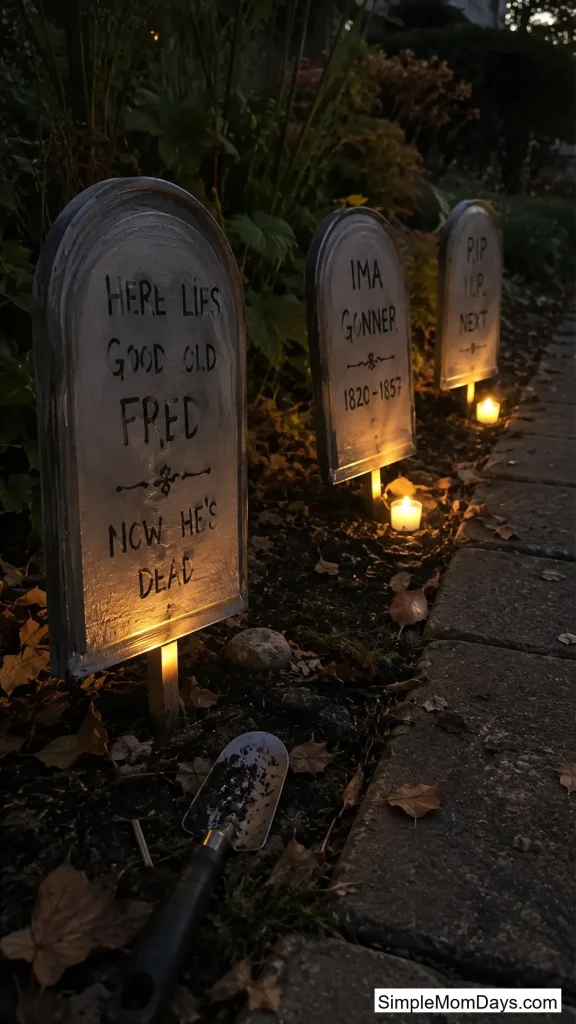
Small aluminum baking tins from the dollar store, turned upside down and glued to a wooden dowel or paint stirrer, make surprisingly convincing mini tombstones once they’re coated in gray craft paint. Write a short, funny epitaph on each one with a paint pen — “Here Lies My Diet” reads better than anything store-bought.
Line four or five of them along a walkway and the scale actually helps; a full graveyard set from the store often looks bulkier than your yard needs, while these stay proportional to a normal front path.
Push the dowels into the ground or a planter and add a battery tea light behind each one once it’s dark out.
3. Glowing Spirit Jugs
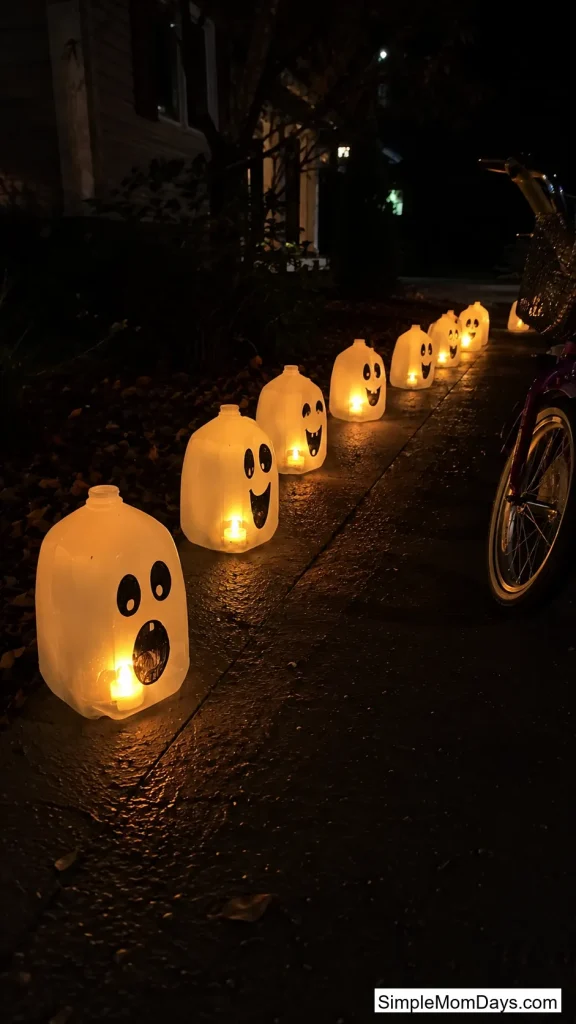
Empty milk or water jugs, drawn on with a black permanent marker for a simple ghost face, turn into glowing pathway lights the second you drop a battery tea light or glow stick inside. The plastic diffuses the light into a soft, even glow instead of one hot spot.
This is one of the few Halloween crafts where “wobbly and uneven” actually looks better than neat — an off-center smile makes the ghost look more alive, not less. Set a row of them along your driveway or front steps for arriving guests.
Tablescape Centerpieces
The main table sets the tone for the whole party, and a good centerpiece doesn’t need to compete with the food for attention.
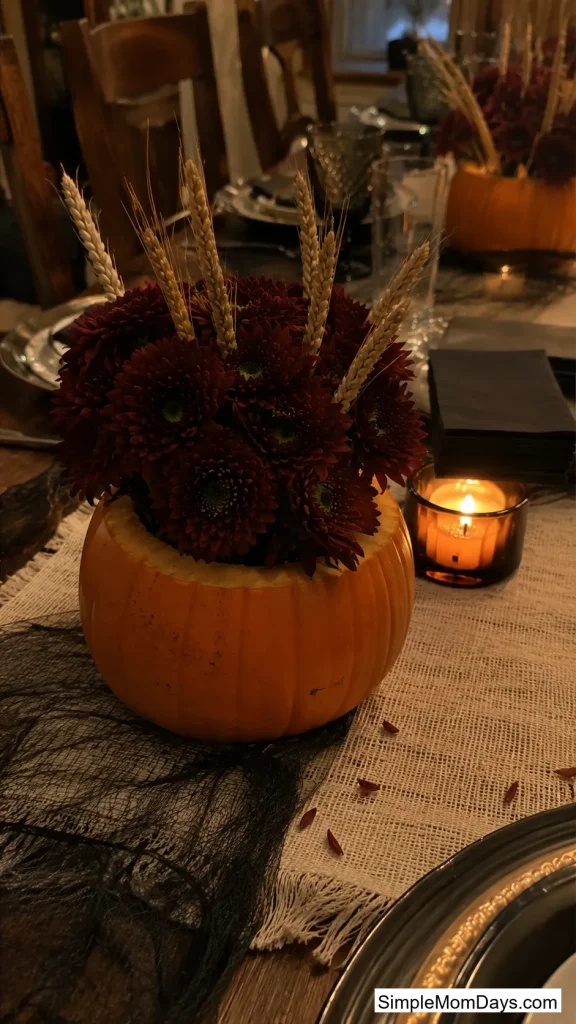
4. Hollowed Pumpkin Flower Vase
Cut the top off a small pumpkin, scoop it out, and drop in a mason jar or plastic cup filled with water before adding stems. Mums, dried wheat, or dark dahlias all hold up well against the orange, and the pumpkin itself does the decorating so you’re not buying a separate vase.
Swap in a few black-painted branches for a moodier look, or keep it bright and use fall-colored blooms if the party skews more harvest-festival than haunted house.
A pumpkin this size runs $3–6 depending on your area, and the flowers last about a week before you’ll want to refresh them.
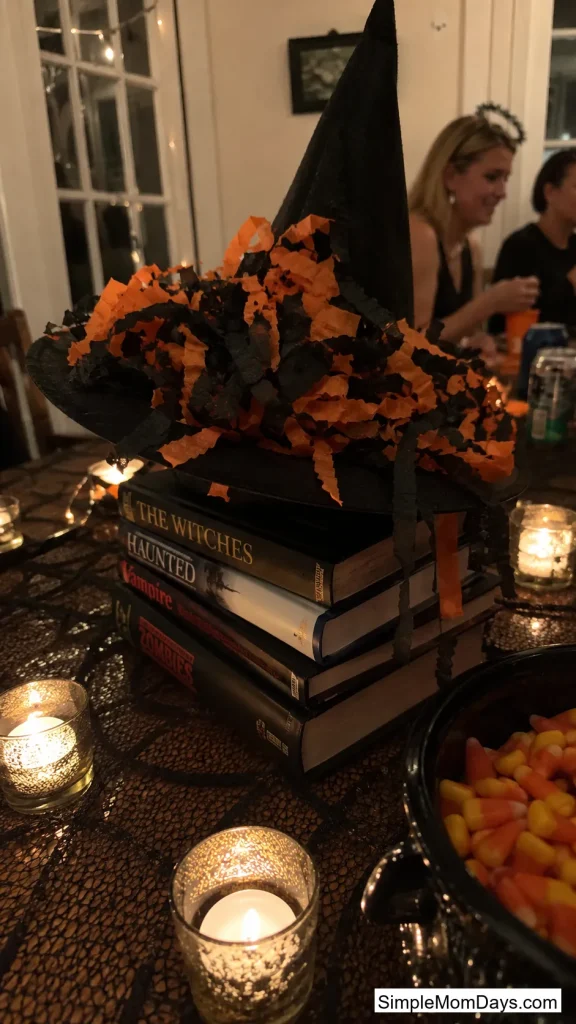
5. Crepe Paper Witch Hat Centerpiece
Take a plain black witch hat — the kind that comes two to a pack for a few dollars — and line the inside brim with shredded orange and black crepe paper so it spills out like it’s overflowing. Set it in the middle of the table on a cake stand or a stack of books for height.
It reads as intentional and a little theatrical without costing more than a normal costume accessory, and it packs flat for storage next year.
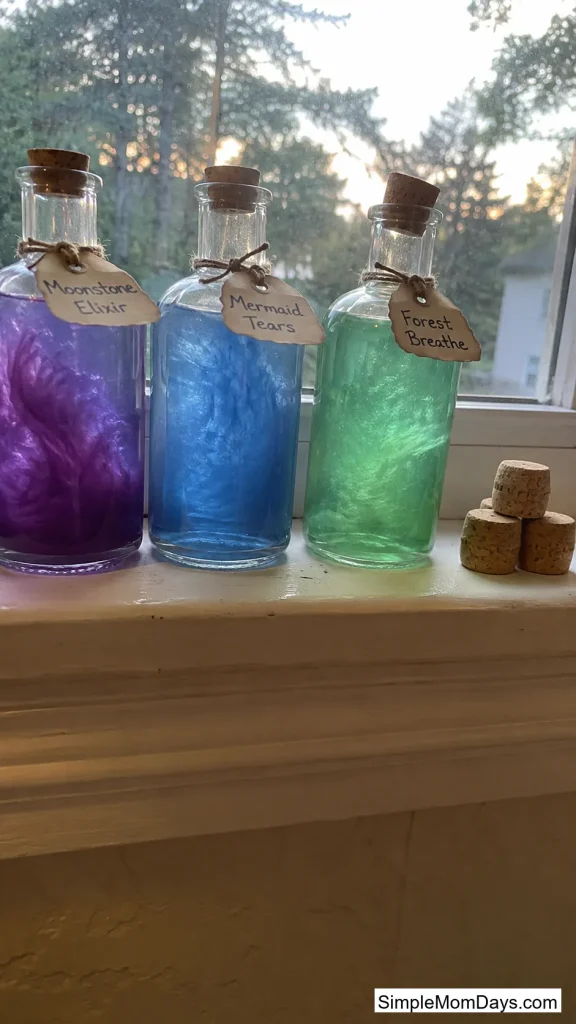
6. Color-Shifting Potion Bottles
Fill clear glass bottles with water tinted with a few drops of food coloring, then add a pinch of loose shimmer eyeshadow or cosmetic-grade mica powder and swirl. The color separates and drifts through the water in slow-moving clouds that look genuinely unsettling under a flashlight.
Cork the bottles, tie on a hand-lettered label like “Nightshade Draught” or “Widow’s Tears,” and cluster three or four different colors together. Because the “magic” comes from mica rather than any alcohol or dye that needs a liquor bottle, any clear glass bottle you already have works fine.
Wall and Window Displays
A blank wall is the easiest square footage in the house to transform, and these three skip the standard cutout-bats approach for something with more texture.
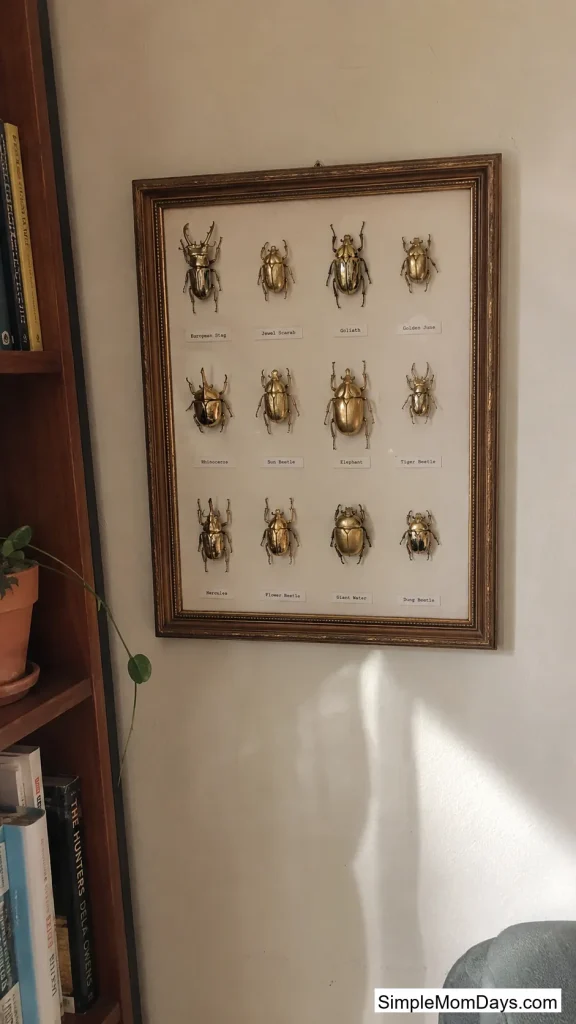
7. Framed “Specimen” Bug Art
Buy a bag of plastic beetles and bugs from the dollar store, spray paint them gold or copper, and glue them inside an empty picture frame in a grid like a museum insect collection. Add small typed labels underneath each one for a natural history feel.
This lands closer to gothic-chic than Halloween-costume, which makes it one of the rare pieces you might genuinely want to keep on the wall past October. It costs about $5 total if the frame comes from a thrift store.
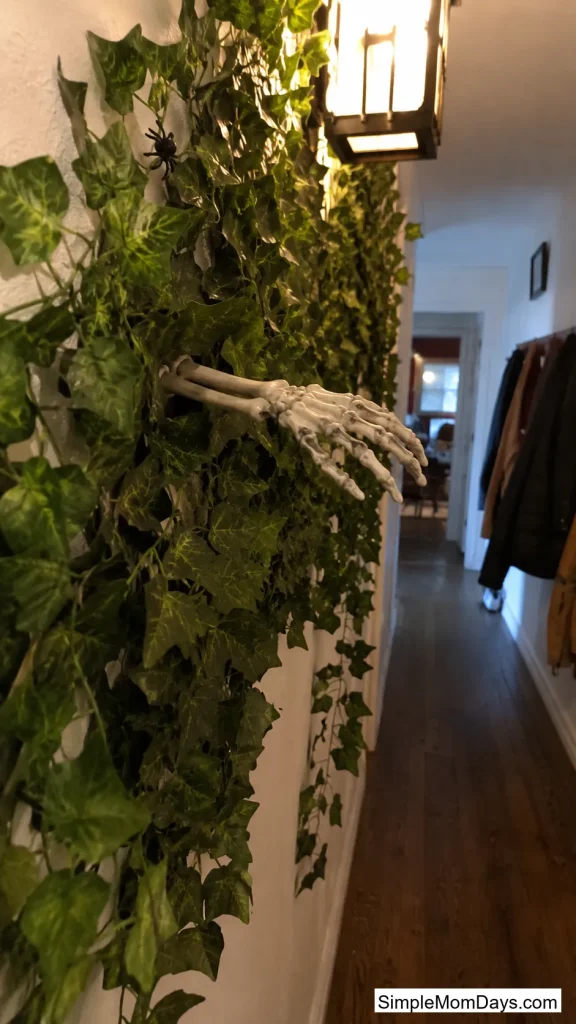
8. Skeleton Hands Emerging From a Vine Wall
Stick a length of faux ivy or vine garland to a bare wall with small removable hooks, then tuck a few plastic skeletal hands and forearms in among the leaves so they look like they’re reaching out of the greenery. Add a couple of plastic spiders in the gaps for extra detail.
The contrast between something growing and something dead is what sells it — a wall of vines alone reads as fall decor, but the hands flip it straight into Halloween. Guests tend to notice it slowly, which gets a better reaction than something obvious from across the room.
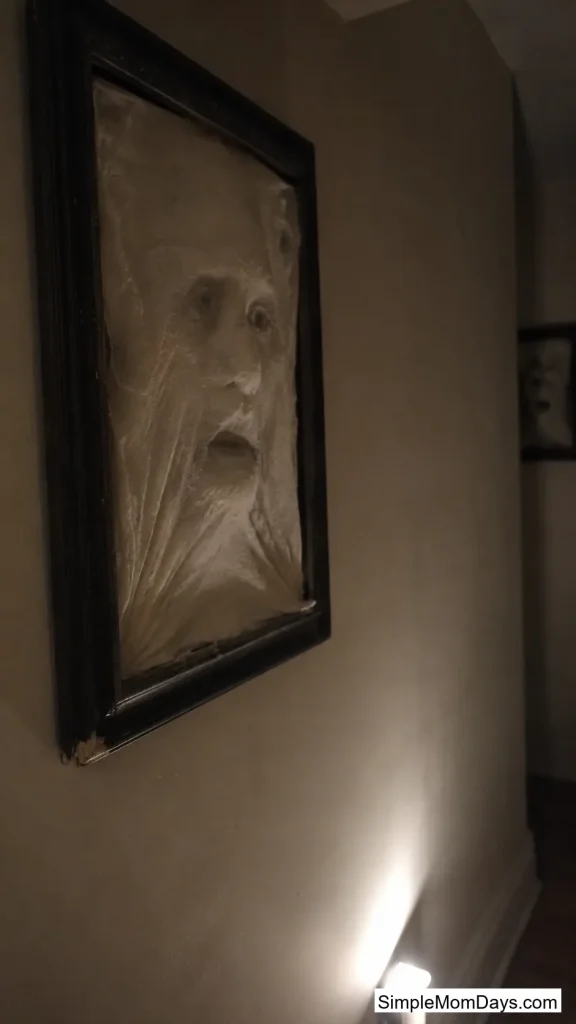
9. Cheesecloth Ghost Portrait
Remove the backing from an old picture frame, cover a doll head or foam head form with a thin layer of petroleum jelly, and drape wet cheesecloth soaked in a glue-and-water mix over the face and into the frame. Once it dries stiff — usually overnight — you’re left with a ghostly face pressing through the frame like it’s trying to get out.
Hang a few at different heights along a hallway for a “wall of watching faces” effect. It’s messier to make than most items on this list, so lay down newspaper first, but the result looks far more expensive than the $2–3 it actually costs.
Party Table and Snack Station Decor
Food tables get touched, refilled, and photographed more than almost anything else at the party, so small functional details here go a long way.
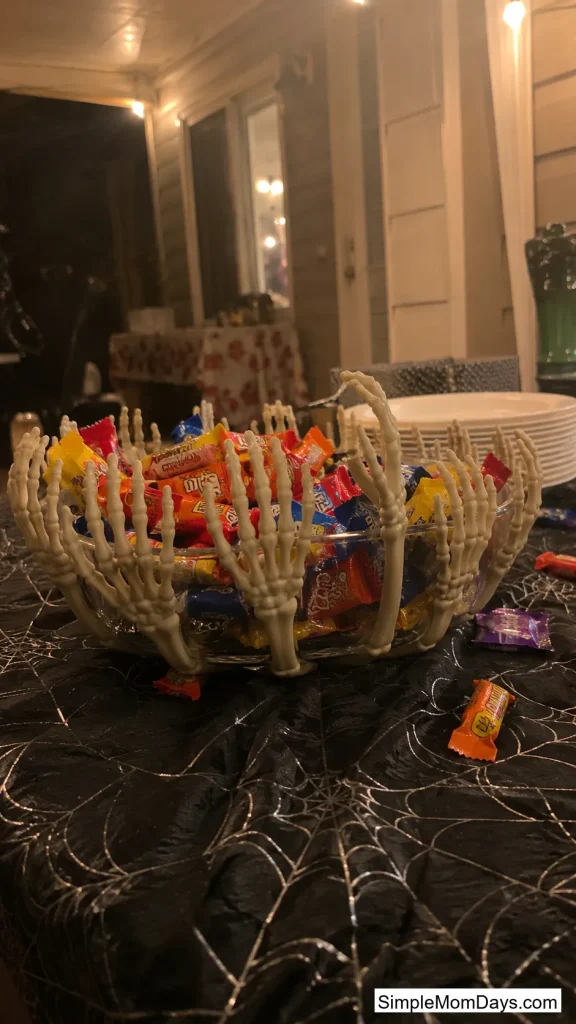
10. Skeleton Hand Candy Bowl
Hot glue a ring of plastic skeleton hands around the outer rim of a plain glass or plastic bowl so they appear to be reaching in from all sides. Fill the bowl with candy, popcorn, or pretzels and set it front and center on the snack table.
It does double duty as a functional serving piece and a conversation starter, which is more than most purely decorative crafts can claim. Kids tend to gravitate toward this one first out of everything on the table.
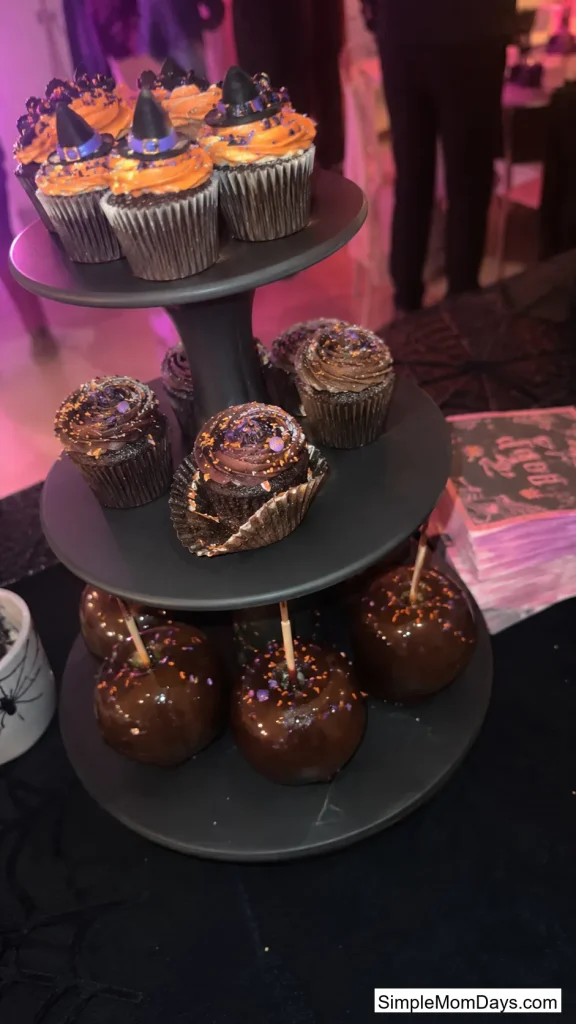
11. Thrifted Tiered Cake Stand
A mismatched cake stand from a thrift store gets a new life with a coat of matte black spray paint. Stack two or three different heights together to display cupcakes, candy apples, or a charcuterie spread with actual visual structure instead of one flat platter.
Since the stands are secondhand, no two parties end up looking identical even if someone copies the idea — the shapes and heights available at any given thrift store change constantly.
12. Mummy Drink Tub
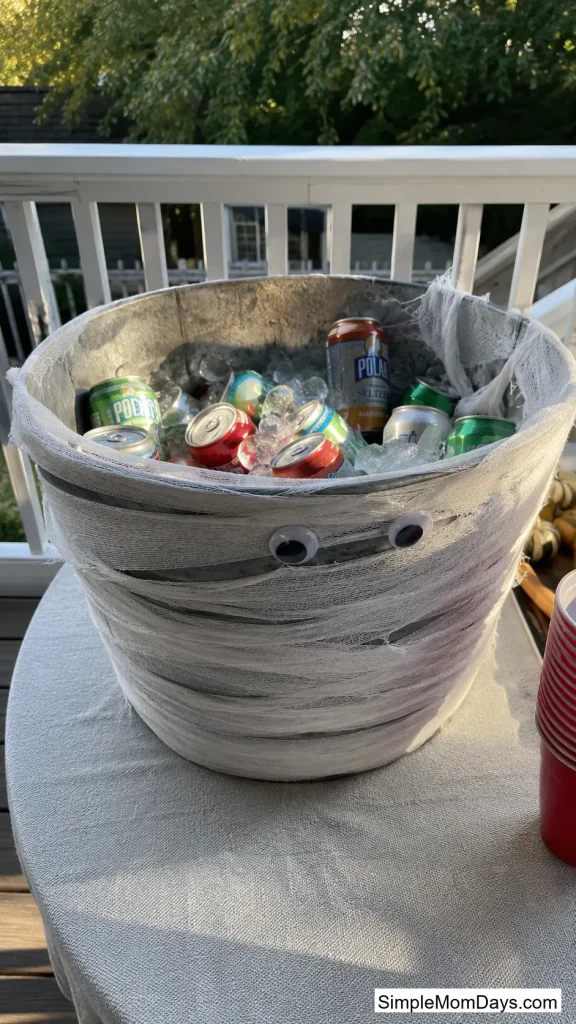
Wrap a galvanized metal tub or large plastic bin in strips of white gauze or torn bedsheet, leaving gaps here and there like unraveling bandages. Glue on two googly eyes near the top and fill the tub with ice and canned drinks.
This solves a real hosting problem — keeping drinks cold — while looking intentional instead of like a cooler someone forgot to hide. It holds up fine outdoors as long as the gauze doesn’t get soaked through.
Kid-Friendly Craft Activities Guests Can Help With
These three work well as pre-party activities if you’ve got kids around who want in on the decorating, not just the eating.
13. Splatter Paint Balloons
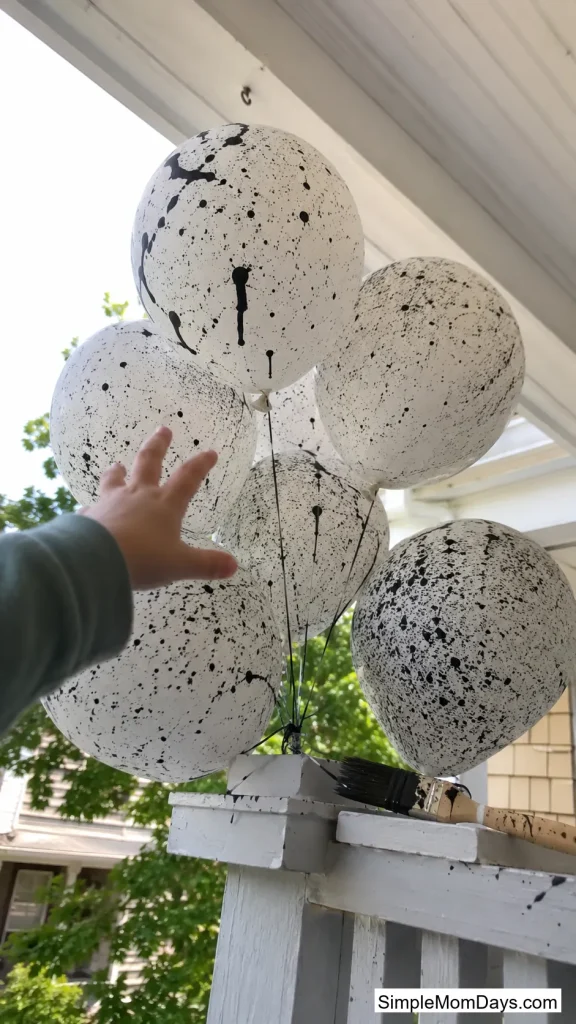
Inflate white balloons, take them outside, and let kids flick black paint at them off the bristles of a wide paintbrush. Once dry, the random speckling looks like a batch of eyeball or cracked-egg balloons depending on how heavy the splatter goes.
Because every balloon comes out different, a whole bunch clustered together at the entrance or over the snack table has more visual texture than a single-color bunch ever would. It’s genuinely mess-contained if you do it on grass rather than pavement.
14. Candy Corn Word Art
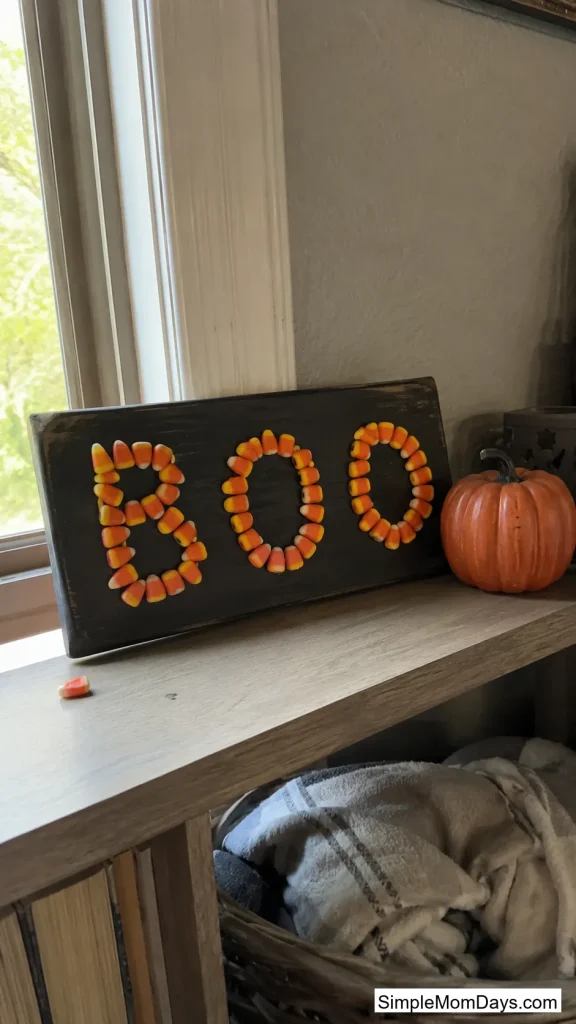
Glue real candy corn pieces onto poster board or a wood plaque in the shape of letters spelling out “BOO” or “TRICK.” Kids can do the gluing themselves with a low-temp glue gun or craft glue, and the finished piece works standing on a shelf or hung on the door.
Because it uses an ingredient nobody’s precious about, there’s no pressure to get it perfect — a slightly crooked letter still reads fine from a few feet away.
15. Picture Frame Cube Lantern
Take four cheap dollar store picture frames, remove the glass, and hot glue the frames together edge to edge to form an open cube. Drop a battery lantern or a cluster of tea lights inside and the light spills out through all four “windows” at once.
Kids can handle the gluing with supervision, and the finished lantern looks like something from a home decor catalog rather than a $4 craft. Paint the frames black first if you want it to disappear into a nighttime yard instead of standing out.
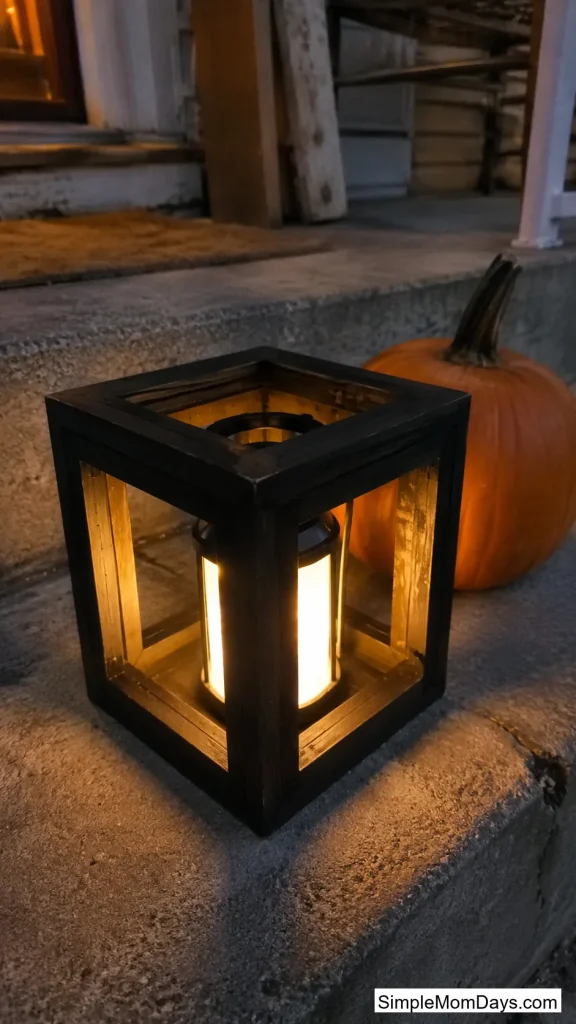
Photo Booth Backdrop Ideas
Every costume deserves somewhere better than a plain wall to be photographed against.
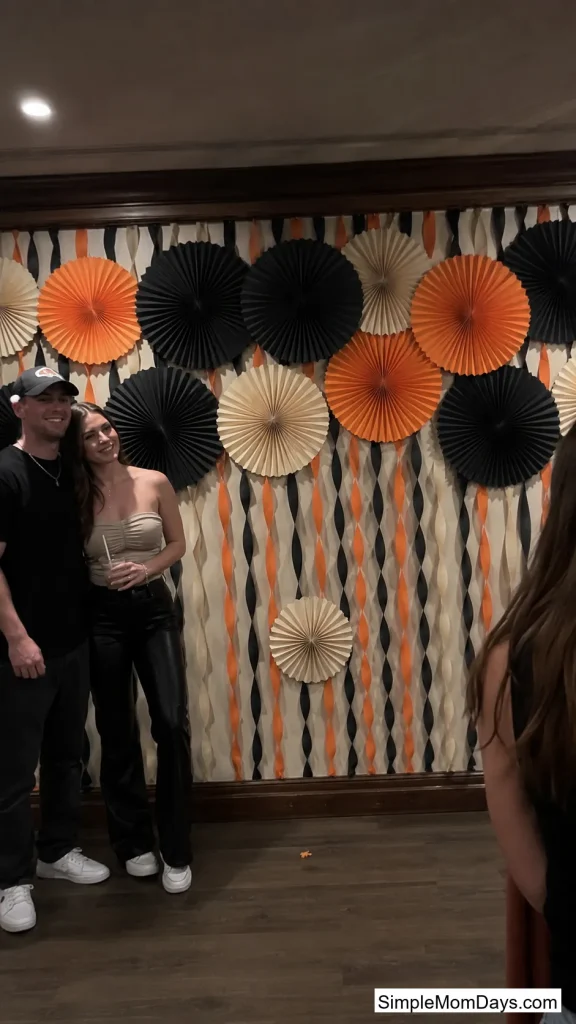
16. Paper Fan and Streamer Wall
Tape a row of folded paper fans in alternating orange, black, and cream across a bare wall, then fill in the gaps with twisted crepe paper streamers hung top to bottom. The layered shapes give the backdrop depth that a single flat banner can’t match.
This costs almost nothing if you already own scissors and cardstock, and it comes down in under five minutes when the party’s over — no patching nail holes or scrubbing paint off drywall.
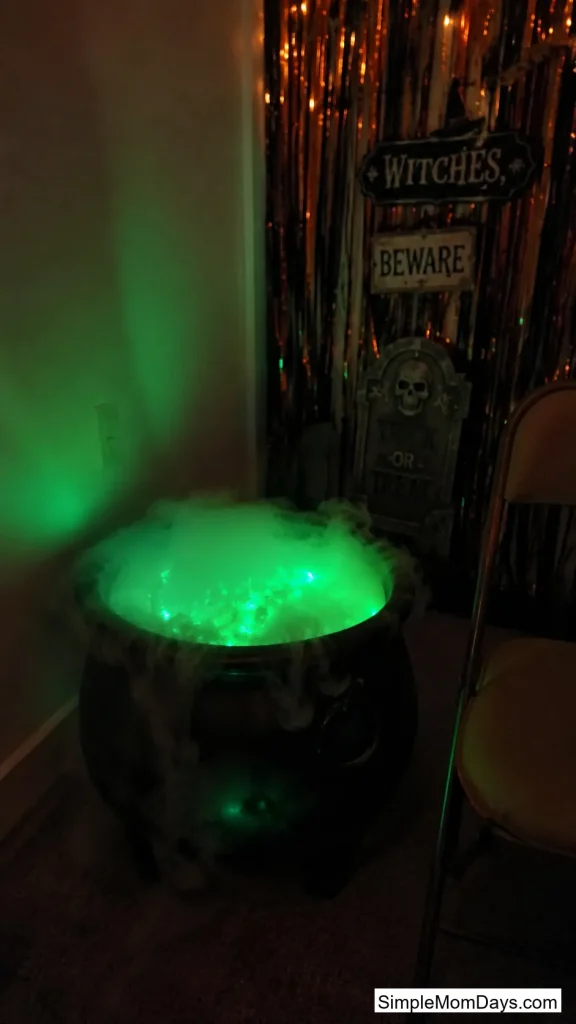
17. Glow Stick Cauldron Corner
Set a plastic cauldron near your photo area, fill it with water, cracked glow sticks, and a few drops of dish soap, then drop in a small chunk of dry ice for a bubbling, glowing fog effect guests can pose next to. Skip the dry ice entirely and it still glows fine on its own if you’d rather not deal with sourcing it.
The moving light and low fog give photos an actual light source to work with instead of a flat flash, which is the difference between a snapshot and a picture people actually want to post.
Start with two or three of these instead of trying to knock out all 17 in one weekend — a photo booth corner and a couple of table pieces already change how a party feels the second guests walk in. Everything else here keeps for years in a bin marked “Halloween,” so next October you’re just refreshing candy and pulling the same box back down.