


A two-year-old has about four minutes of patience for anything involving glue. Maybe five on a good day. That’s the reality most Halloween craft roundups forget when they list projects with fifteen steps and tiny cut-out pieces a toddler will never manage on their own.
Every idea below is built around what toddlers can actually do: squish, dump, dip, press, and stick. Some need a parent to prep pieces ahead of time so the fun part is all that’s left for little hands. Others are pure sensory play that happens to look like a craft when it’s done.
Grab a towel for the table, roll up your sleeves, and pick two or three to start with. You don’t need all nineteen in one afternoon.
Sensory Play That Doubles as a Craft
Toddlers learn with their hands before their eyes, so these lean into texture and squish over precision.
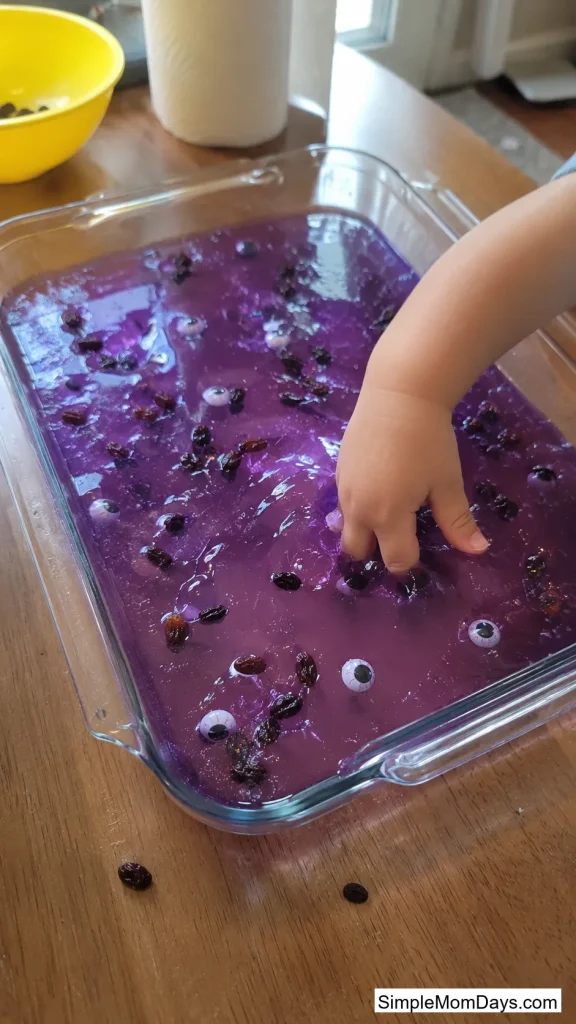
1. Jell-O Monster Eye Dig
Make a batch of purple or green Jell-O in a shallow tray, then push in raisins or small plastic eyeballs before it sets. Toddlers dig, scoop, and squish their way to finding all the “monster eyes” hiding inside.
It works because there’s no wrong way to do it. A toddler who dumps the whole tray on the table is still doing the activity correctly. That’s rare for a craft, and it’s exactly why this one holds attention longer than most.
One batch of Jell-O costs under $2 and keeps a toddler busy for 15-20 minutes, which is a long stretch for this age group.
2. Shaving Cream Marbled Pumpkin Prints
Spray shaving cream into a tray, drop in a few dots of orange and black food coloring, and let your toddler swirl it with their fingers. Press a piece of cardstock flat on top, peel it back, and a marbled pattern shows up underneath.
The swirling is the real activity here. The printed paper is just a bonus souvenir of ten minutes of happy finger-painting in a texture that isn’t sticky the way regular paint gets.
Keep a damp washcloth right at the table edge. Toddlers will want to wipe their hands mid-swirl, not after.

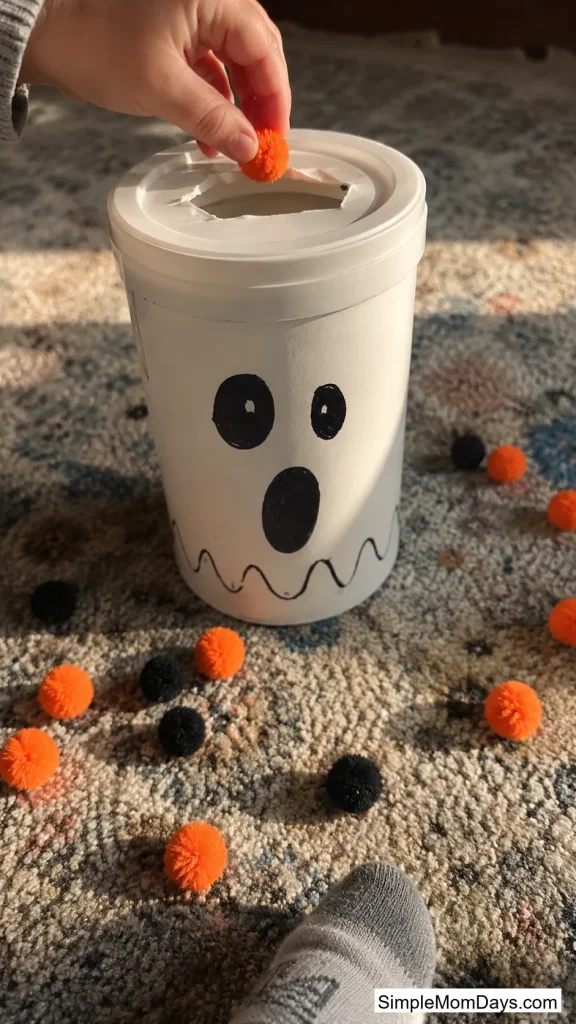
3. Feed-the-Ghost Pom-Pom Drop
Draw a simple ghost face on an empty wipes container or oatmeal canister, then cut a mouth-sized slot in the lid. Hand your toddler a pile of orange and black pom-poms and let them “feed” the ghost by dropping them through the slot.
This one’s less about decorating and more about the drop-and-repeat motion toddlers gravitate toward at this age. It also holds up as a reusable game long after October, since you just pop the lid off to dump the pom-poms back out.
4. Salt-and-Watercolor Spiderweb
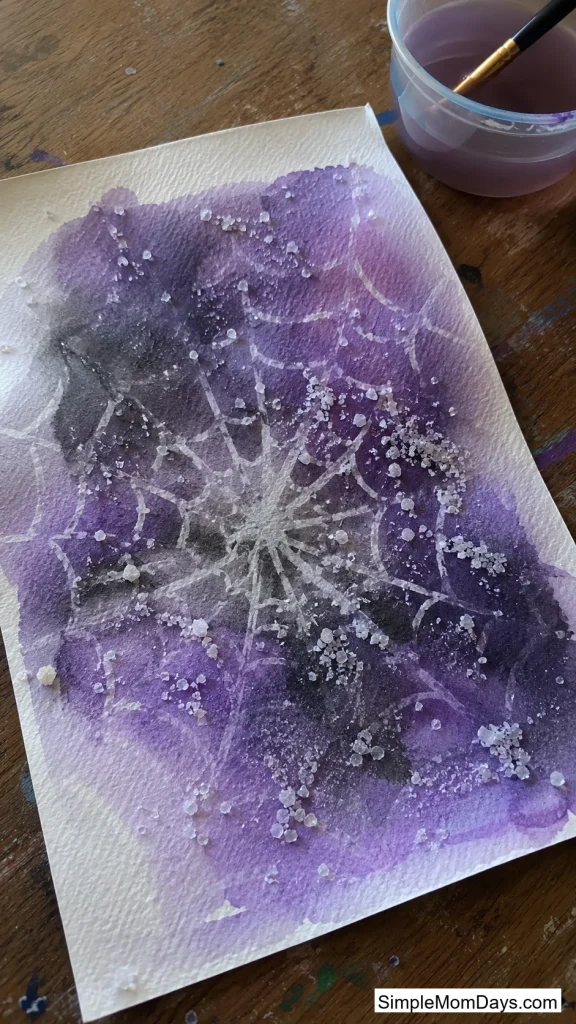
Draw a spiderweb on white paper using a white crayon, pressing hard so the wax lines are visible if you tilt the paper toward the light. Have your toddler paint watercolor over the whole page, then sprinkle table salt on the wet paint while it’s still shiny.
The salt pulls the color into little crystalline bursts as it dries, which turns a plain watercolor wash into something that actually looks spooky. Toddlers who are too young to paint inside the lines still get a great result because the crayon resist does the shape work for them.
Paint and Stamp Projects
These use everyday kitchen items as the “brush,” which keeps the mess more contained than a paintbrush a toddler hasn’t learned to control yet.
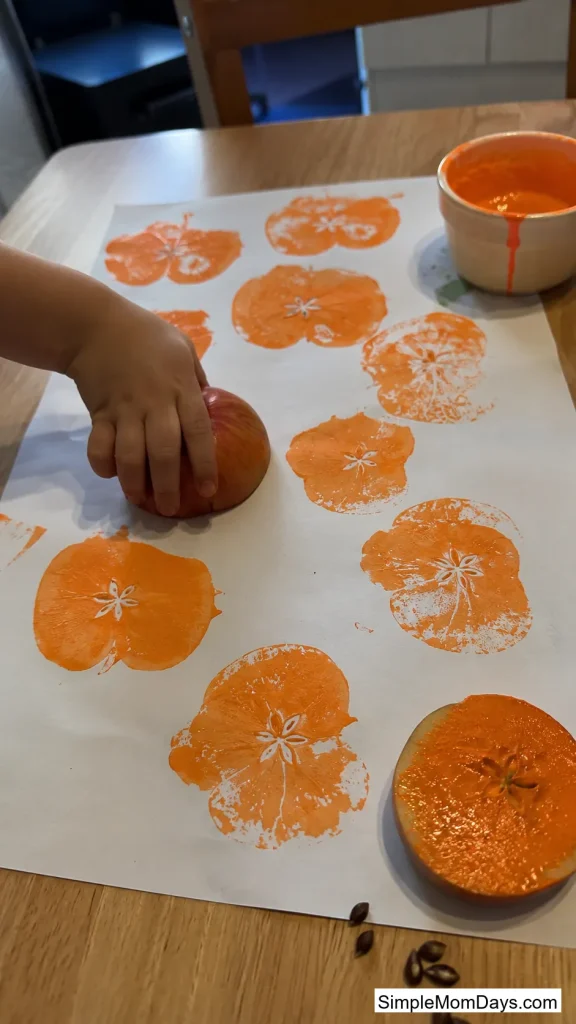
5. Apple Half Pumpkin Stamps
Cut an apple in half around its middle instead of top to bottom, dip the flat side in orange paint, and press it onto paper. The star-shaped seed pattern in the center shows up as a natural pumpkin detail without anyone drawing a thing.
It’s a two-ingredient craft you probably already have in the kitchen, and it doubles as an easy way to introduce the idea that fruit isn’t just for eating.
Add a green stem with a marker once it dries, or skip that step entirely and let the stamped shape stand on its own.
6. Cookie Cutter Stamp Wrapping Paper
Dip Halloween-shaped cookie cutters (pumpkins, bats, ghosts) into washable paint and stamp them across a roll of plain kraft paper. Once it dries, you’ve got custom Halloween wrapping paper your toddler made themselves.
This is a solid fine motor exercise because pressing a cookie cutter down firmly and lifting it straight up is trickier than it sounds for small hands. Expect some smudged, half-formed shapes mixed in with the clean ones, and that’s part of the charm.

7. Splat-Fold Symmetry Pumpkin
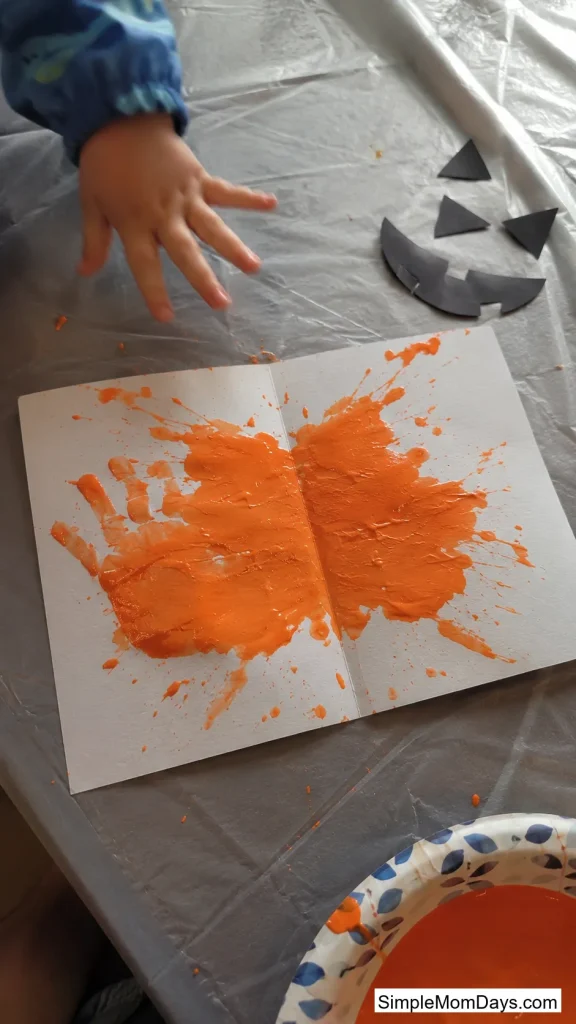
Squeeze a blob of orange paint onto one half of a folded piece of cardstock, then fold the paper closed and press down with flat hands. Open it up to reveal a symmetrical splatter pattern that you trim into a rough pumpkin shape once it’s dry.
Toddlers love the reveal moment when you open the fold, almost more than the painting itself. If the shape doesn’t come out looking pumpkin-like, that’s fine too; a black paper face glued on the wet paint turns almost any blob into a monster.
8. Sponge-Cut Ghost Stamps
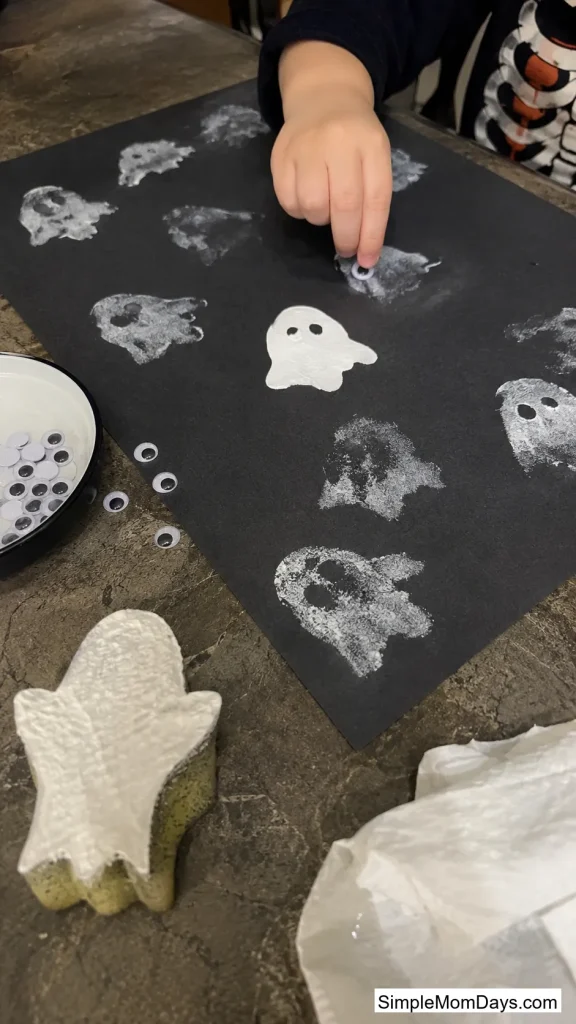
Cut a ghost shape out of a kitchen sponge, dip it lightly in white paint, and stamp it across black construction paper. A light touch matters more than a full soak; too much paint on the sponge just makes a solid blob instead of a ghost shape.
Once the paint dries, let your toddler glue on googly eyes. Adding the eyes as a separate step gives them a second round of hands-on fun instead of finishing the whole thing in one sitting.
No-Carve Pumpkin Decorating
Real pumpkins without a knife anywhere near them. These keep the tradition without the seeds, the mess, or the safety worry.
9. Dot Sticker Pumpkin
Buy a sheet of colorful dot stickers from the office supply aisle and let your toddler peel and stick them all over a real pumpkin. That’s the entire craft.
Peeling a sticker off backing paper is genuinely hard for toddler fingers, which makes this a better fine motor workout than it looks. There’s also no waiting for anything to dry and no cleanup beyond an empty sticker sheet.
A pumpkin covered edge to edge in dots costs about $1 in stickers and takes maybe ten minutes, start to finish.

10. Mini Painted Pumpkins
Set out a handful of the small decorative pumpkins from the grocery store, along with washable paint in a muffin tin, and let your toddler go color by color. Use washable paint if you plan to rinse and repaint them over a few weekends, or acrylic if you want to keep the final design.
The small size matters here. A mini pumpkin fits a toddler’s hand the way a full-sized one doesn’t, and it turns the whole project into something they can hold and rotate themselves instead of leaning over a big pumpkin on the table.

11. Stained Glass Tissue Paper Pumpkin
Cut a pumpkin outline out of black cardstock, leaving the inside hollow like a stencil. Have your toddler glue torn pieces of orange, yellow, and red tissue paper across the back of the opening, then tape a sheet of wax paper over the whole thing to hold it together.
Hung in a window, the light comes through the tissue paper in a way that looks a lot more polished than the process suggests. Tearing tissue paper into rough pieces is well within a toddler’s ability, even if their idea of “pieces” is more like confetti.

Crafts From Things You’re Already Recycling
Toilet paper rolls, tissue boxes, and egg cartons turn into Halloween characters with almost nothing bought new.
12. Toilet Paper Roll Monsters
Paint empty toilet paper rolls in bright colors, then glue on googly eyes, pom-pom noses, and pipe cleaner arms once they’ve dried. Line up a row of finished monsters on a windowsill for an instant decoration that cost you almost nothing.
Because the base shape is already made, your toddler’s job is just painting and sticking, which keeps the whole thing doable in one sitting without losing steam halfway through.

13. Tissue Box Monster
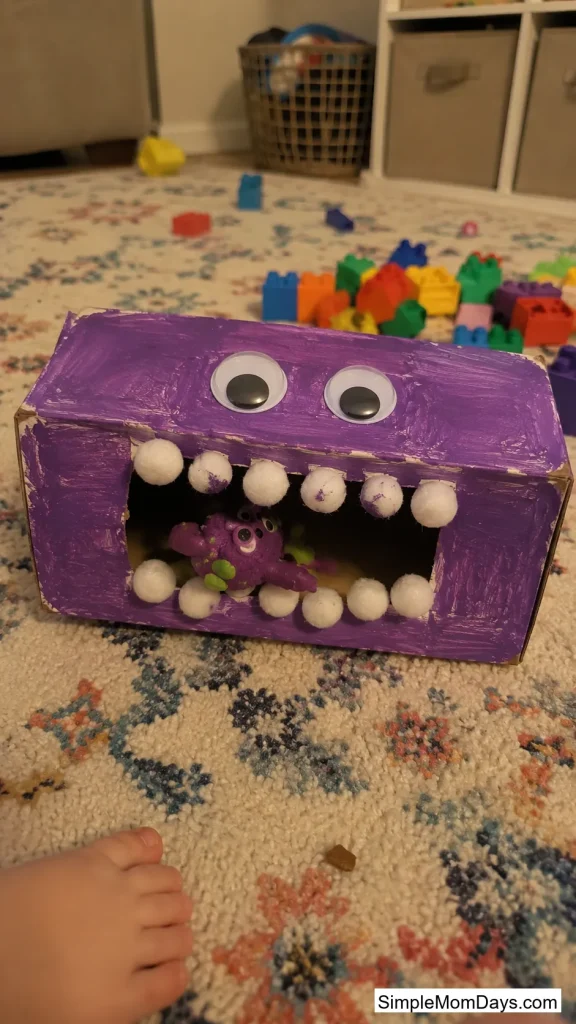
Paint an empty tissue box a bold color, leaving the opening as the monster’s mouth, then glue pom-poms around the opening as teeth and add googly eyes on top. Once it’s dry, the box becomes a real toy your toddler can “feed” small toys or snacks through.
This one earns its spot by staying useful after Halloween ends. Plenty of kids keep feeding random objects into the monster’s mouth well into November, long after the pumpkins are gone.
14. Egg Carton Jack-o’-Lanterns
Cut individual cups from an egg carton, paint them orange, and once dry, add a black marker face to each one. A whole carton turns into a dozen mini jack-o’-lanterns your toddler can line up on a shelf or scatter across a Halloween-themed table.
The small scale means less paint, less drying time, and more finished pieces per session, which for a toddler’s attention span is a real advantage over one bigger project.

15. Milk Jug Ghost Lantern
Draw a ghost face on the side of an empty gallon milk jug with a permanent marker, cut a small slit in the top, and slip in a battery-powered tea light. Set it out on the porch step or a windowsill once the sun goes down.
Your toddler handles the drawing (or scribbling, more accurately, while you fill in the face afterward), and the payoff comes at night when the lit jug glows from the inside. That reveal tends to land harder with toddlers than the daytime crafting part.

Grab-and-Go Party Crafts
Good for a playdate, a classroom Halloween party, or any moment you need a fast activity with minimal setup.
16. Cotton Swab Skeleton
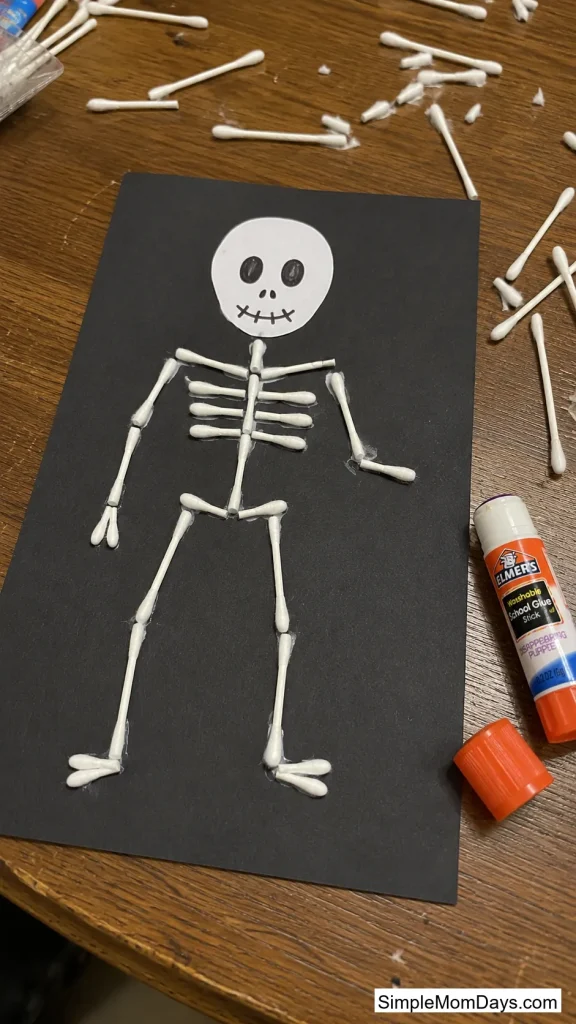
Cut a handful of cotton swabs in half and let your toddler arrange them on black paper into a rough skeleton shape, gluing each piece down as they go. You draw a simple oval head at the top before they start, so they’ve got a shape to build around.
Arranging small pieces on a flat surface is a different skill from painting or stamping, and it’s a good one to rotate in so the same three motions don’t repeat across every craft on this list.
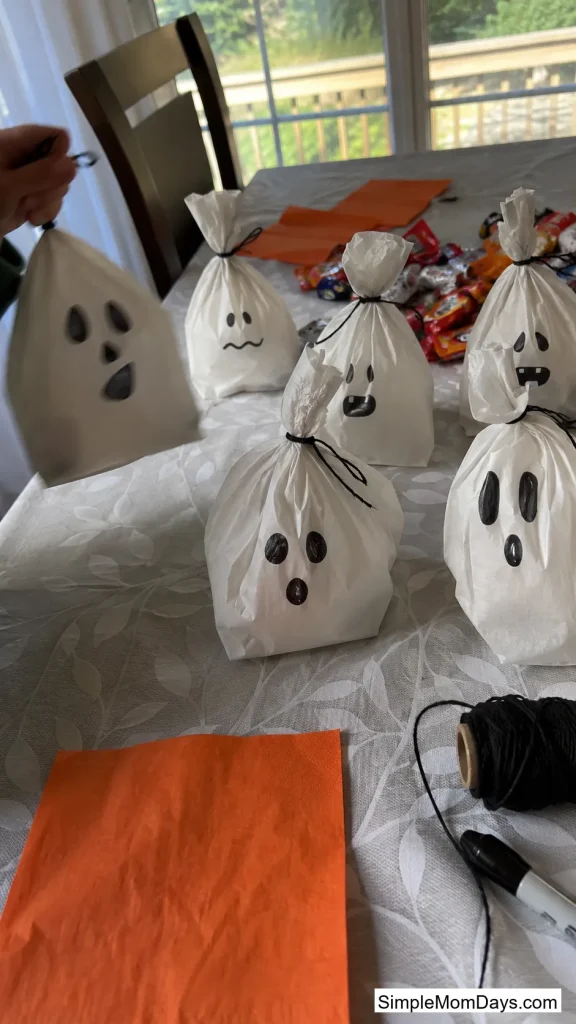
17. Mini Ghost Piñata Bags
Fill a small white paper lunch bag with a few pieces of candy or stickers, twist the top closed, and tie it off with black string. Draw on a simple ghost face with marker, and you’ve got a mini piñata your toddler can shake, toss, or hang from a doorway.
These take about five minutes each to assemble, which makes them realistic to make in bulk for a group of kids instead of just one at home.
Keepsake Crafts Worth the Extra Mess
These two take more parent involvement than anything else on the list, but they’re the ones most families end up keeping for years.
18. Ghost Handprint Banner
Instead of a single handprint on one sheet of paper, string together five or six handprints made across separate pages onto a strip of twine, turning each one into a ghost with googly eyes glued on after it dries. Hang the finished banner across a doorway or mantel.
A single handprint fades into a drawer within a year. A banner of them stays up as actual decor, which is the difference between a craft you display once and one you hang every October going forward.

19. Footprint Bat
Paint your toddler’s foot black and press it sideways onto paper so the heel forms the bat’s body and the toes fan out like wings. Once it dries, add two small white fangs and googly eyes near the heel.
Foot painting takes more patience than a hand does, since toddlers tend to wiggle mid-press. Two adults make this one easier: one to hold the foot steady, one to guide the paper.
Not every craft on this list needs to happen this week. Pick the two or three that match your toddler’s mood right now, save the rest for a rainy Saturday closer to the 31st, and don’t stress about finishing anything perfectly. At this age, the mess is basically the point.
