
This post contains Amazon affiliate links. As an Amazon Associate, I earn from qualifying purchases at no extra cost to you. I only recommend products I'd genuinely suggest to a friend.
Halloween decorating gets expensive fast once you start comparing pop-up store prices to what’s already sitting in your closet or recycling bin. A single foam tombstone can run $15, and by the time you’ve bought six of those plus string lights and a fog machine, you’ve spent more on decor than the party itself will cost.
None of that spending is necessary. The best budget Halloween decor doesn’t announce itself as cheap — it uses the same lighting tricks, secondhand finds, and paint jobs a $200 store display leans on, just assembled by hand for a fraction of the price.
These 29 ideas split into what’s free, what a single dollar store run covers, what a thrift shop upgrade looks like, and how far a few lighting swaps go. Pick a handful from each section and you’ll have a full room decorated for less than the cost of one big-box skeleton.
⚡ IN A HURRY?
Quick Picks for Budget Halloween Decorating
Short on time? These are the supplies that show up again and again in this post — grab these first and you can build most of the list.
- Matte Black Spray Paint — turns thrifted ceramics, foam board, and bare branches into something moody without buying anything Halloween-specific.
- Battery-Operated Flickering Tea Lights — skips the fire risk of real candles inside carved pumpkins and mason jar centerpieces alike.
- Mini Hot Glue Gun with Glue Sticks — the one tool nearly every project here leans on, from witch leg planters to framed spiderwebs.
- Fabric Paint Set — covers the doormat spiderweb, the painted wine glasses, and the felt pumpkin faces without separate paints for each.
- Bulk Glow Sticks — fills mason jars and paper lanterns with an eerie glow that needs no batteries or outlet.
- Orange and Purple LED String Lights — does more to shift a porch or stair rail into Halloween mode than any single prop on this list.
Free Decor Hiding in Your Closet and Recycling Bin
Before buying anything, raid what you already have. Old sheets, cardboard, and yesterday’s newspaper cover more of this list than you’d expect.
1. Black Paper Window Silhouettes
Cut bats, witches, and twisted trees out of black construction paper and tape them flat against your windows. From outside, they read as flat shadow cutouts; from inside at night with a lamp behind them, they throw huge distorted shapes across the yard.
The trick that makes this look intentional instead of like a kindergarten craft project is scale — go bigger than feels natural. A 2-foot witch silhouette in a window reads as spooky. A 6-inch one just looks like a sticker.
This costs whatever’s left in a $1 pack of construction paper, and you can trace free templates instead of freehanding shapes if scissors aren’t your strong suit.

2. Cardboard Box Tombstone Cemetery
Flatten moving boxes, cut them into tombstone shapes, and prop them along the front walk with garden stakes or paint stir sticks taped to the back. Gray or chalkboard spray paint turns cardboard into something that reads as stone from the sidewalk.
Write short epitaphs in white paint pen for the detail that sells it — “Here Lies Ben, He Never Locked His Doors” gets more phone photos than a blank gravestone ever will.
Six or seven of these cost nothing but a can of spray paint, and they pack flat for storage instead of taking up a bin the way foam versions do.

3. Toilet Paper Tube Mini Mummy Favors
Wrap empty toilet paper tubes in strips of white party streamer or gauze, leave a small gap for two googly eyes, and you’ve got mini mummies that double as place-card holders or favor stands.
They’re small enough to line a mantel in a row of ten without crowding it, and unlike most Halloween decor, kids can help make them without supervision or a glue gun.
A roll of streamer costs about $1 and makes a dozen mummies — cheaper than almost any purchased favor, and the tubes were already headed for recycling anyway.

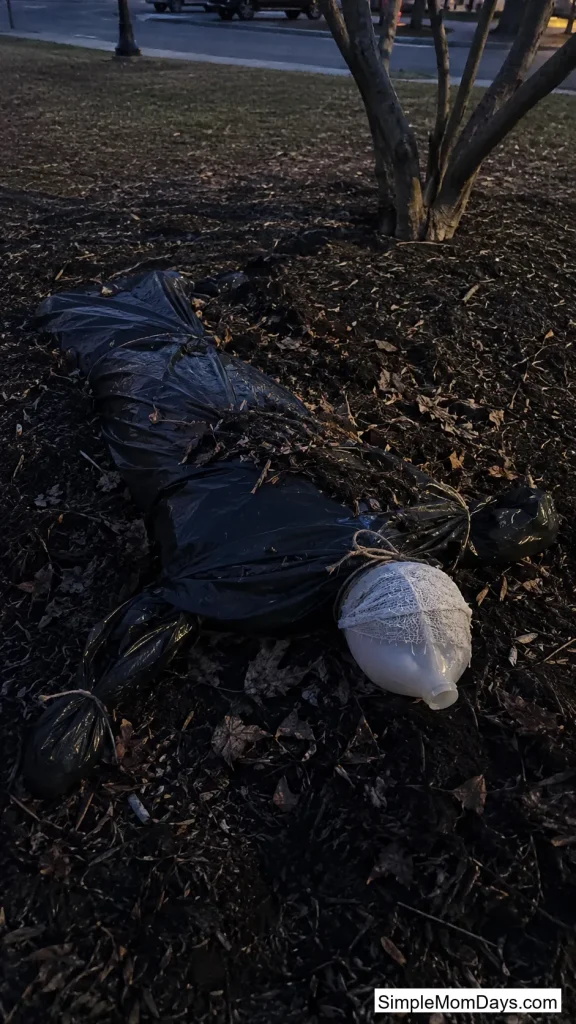
4. Trash-Bag Corpse Body Outline
Stuff a black trash bag with crumpled newspaper to build a rough body shape, tie off the neck and wrists with twine, and top it with a milk jug head wrapped in gauze or an old stocking. Lay it half-buried in mulch or propped against a tree.
It’s unsettling in a way a store skeleton isn’t, because the shape reads as a real body silhouette instead of an obvious plastic prop — most people need a second look to register what they’re seeing.
Everything comes from the recycling bin except maybe the twine, so this is close to a $0 project, and it packs flat when the bag deflates for next year.
Dollar Store Runs Worth the Trip
A single dollar store stop covers most of what’s left on this list — just go in with a plan so you don’t leave with a cart of things that don’t match.
5. Black Trash Bag Porch Spiderweb
Cut a black trash bag into a spiral, snip it into web-like strands, and stretch it across a porch railing or doorway. Pull gently as you hang it so the strands separate into an uneven, wind-torn web instead of a stiff plastic sheet.
This covers more square footage per dollar than any packaged web product — one bag stretches across an entire porch railing, where a store-bought stretch web usually covers about a third of that.
Add one or two plastic spiders for scale reference, and skip the temptation to overload it with a dozen — three is plenty.

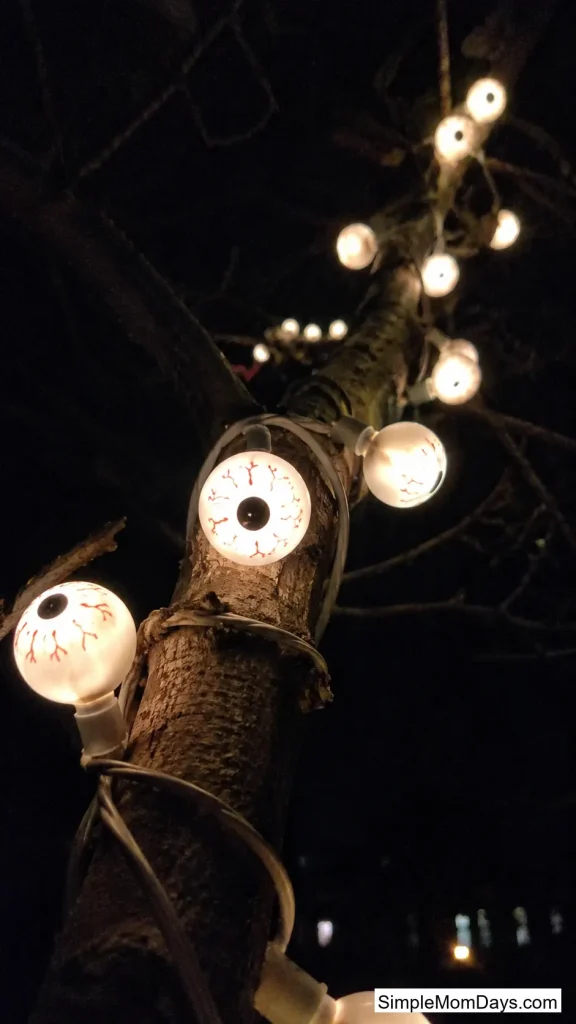
6. Ping-Pong-Ball Bloodshot Eye Lights
Paint red veins and a black pupil on a pack of ping-pong balls with acrylic paint, then poke a small hole and thread them onto an old strand of white Christmas lights so each bulb glows through an eyeball.
Strung along a porch eave or wrapped around a tree, the effect is genuinely unsettling once it’s dark — dozens of glowing eyes tracking anyone who walks up the driveway.
A 30-count bag of ping-pong balls runs about $5 and covers a full strand of lights; reuse a string of white lights you already own instead of buying new ones.
7. Skeleton Garland Draped From the Light Fixture
Loop a dollar store mini skeleton garland from a ceiling light fixture down to a side table or shelf, as if the skeletons are trying to climb out. Two or three garlands crossing at different heights reads as more chaotic and alive than one straight line.
It works because it uses vertical space most people ignore — everyone decorates tables and doorways, almost nobody decorates the space between the ceiling and the furniture.
Garlands run about $1.25 each, and the same strand works just as well wrapped around a stair banister if there’s no exposed light fixture to anchor it to.

8. Image-Transfer Spooky Plates
Print or cut out skull, raven, or vintage apothecary images, then decoupage them face-down onto the back of clear dollar store plates so the image shows through the front once flipped over.
Displayed on a plate stand or propped on a shelf, they look closer to a $30 home-décor store find than a $1.25 dollar store plate, because the transfer hides any visible seams or glue lines.
Budget about $4 for a bottle of decoupage glue to cover 6-8 plates, and swap in a food-safe sealant instead if you want the plates usable for actual serving later.

Thrifted and Secondhand Upgrades
Thrift stores are the most underused Halloween resource there is — most of what’s in this section starts as something completely unrelated to Halloween until a can of black spray paint gets involved.
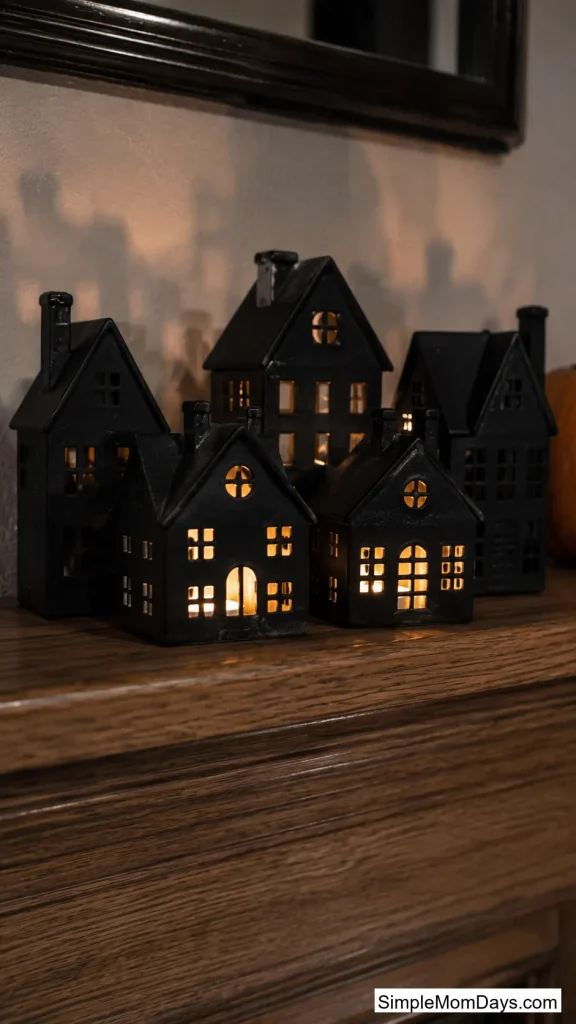
9. Spray-Painted Ceramic Haunted Village
Pick up a few ceramic Christmas village houses at a thrift store — they show up cheap and constantly, since most people only want them in December — and coat them in matte black spray paint. Cluster them on a mantel or windowsill with a battery tea light inside each one.
The pointed rooflines and tiny chimneys that make them look like a cozy village in white suddenly read as a haunted town once the color drops out, without changing anything about the shape itself.
Thrift store ceramic houses run $1-3 each; five or six clustered together makes a convincing haunted village for under $15 total.
10. Framed Yarn Spiderweb
Pull the glass and artwork out of a thrifted picture frame, spray paint the frame itself, and weave speckled or gray yarn across the empty frame in a spiderweb pattern. Hang it on the front door in place of a wreath.
It holds up better outdoors than a fake cobweb bag does — yarn doesn’t sag, fray in wind, or collect dead leaves the way stretched polyester webbing does by day three outside.
A frame from a thrift store runs $2-4, and a single skein of yarn covers several of these if you want more than one size.

11. Witch Leg Garden Planters
Fill a pair of thrifted striped stockings with pool noodle pieces, top them with thrifted heels, and stake them into a planter or garden bed so it looks like a witch crashed headfirst into the flowerbed.
This is one of the few Halloween props that actually improves an existing planter instead of covering it up — the stockings poke out from behind real mums or pumpkins already sitting there for fall.
Thrifted heels run $3-5 a pair and stockings are often $1-2, so a full pair of legs costs under $10 and reuses a planter you’ve already set up.

12. Upcycled Silver Owl Shakers
Find ceramic owl salt-and-pepper shakers at a thrift store — they turn up more often than you’d think — and spray paint them metallic silver or antique bronze. Line a few up on a bookshelf or mantel next to candles.
They read as an expensive vintage decor find instead of a Halloween prop, which makes them one of the only items on this list that can stay out well past November 1st if you like the look.
Thrifted shakers cost $1-2 a pair, and one can of metallic spray paint covers a whole shelf’s worth.

Lighting Tricks That Do the Heavy Lifting
Lighting changes a room faster than any prop does, and it’s the cheapest category on this whole list.
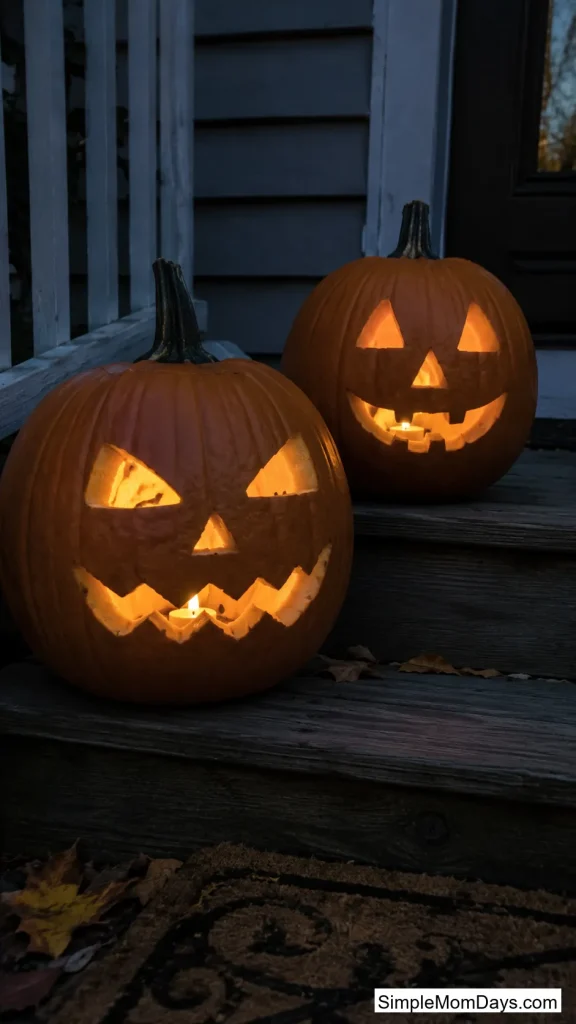
13. Battery Tea Lights Inside Jack-o’-Lanterns
Skip the real candle and drop a battery-operated flickering tea light into each carved pumpkin. They run for hours without a fire risk, which matters if the pumpkins sit near a doormat where trick-or-treaters brush past all night.
The flicker setting on most battery tea lights is close enough to real candlelight that guests won’t clock the difference from a few feet away, and there’s no hot wax dripping into the carved details.
A 12-pack of battery tea lights runs about $8-10 and covers several pumpkins with lights left over for jars and lanterns elsewhere.
14. Orange-and-Purple String Lights on the Stair Rail
Swap your regular porch or stair lights for a strand of orange and purple LED string lights, wound loosely around a railing instead of pulled taut. Loose winding creates shadow and depth; tight winding just looks like Christmas lights in the wrong color.
This is the single fastest way to shift a space from “regular house” to “Halloween house” without adding a single physical prop — color temperature alone does most of the work.
A 20-foot strand runs $10-15 and covers a full stair rail or porch railing with enough slack to loop it twice.

15. Blacklight Pumpkin Display
Paint a few plain pumpkins with fluorescent craft paint — skulls, drips, or simple spirals — then set up a small blacklight bulb nearby once it’s dark out. The painted design glows; the rest of the pumpkin stays dark.
Because only the fluorescent paint reacts to the blacklight, the effect looks more like the pumpkin is glowing from the inside than like a painted pumpkin under a colored bulb, which is a common mix-up.
A blacklight bulb that fits a standard fixture costs $10-12, and fluorescent paint runs $6-8 for enough to cover four or five pumpkins.

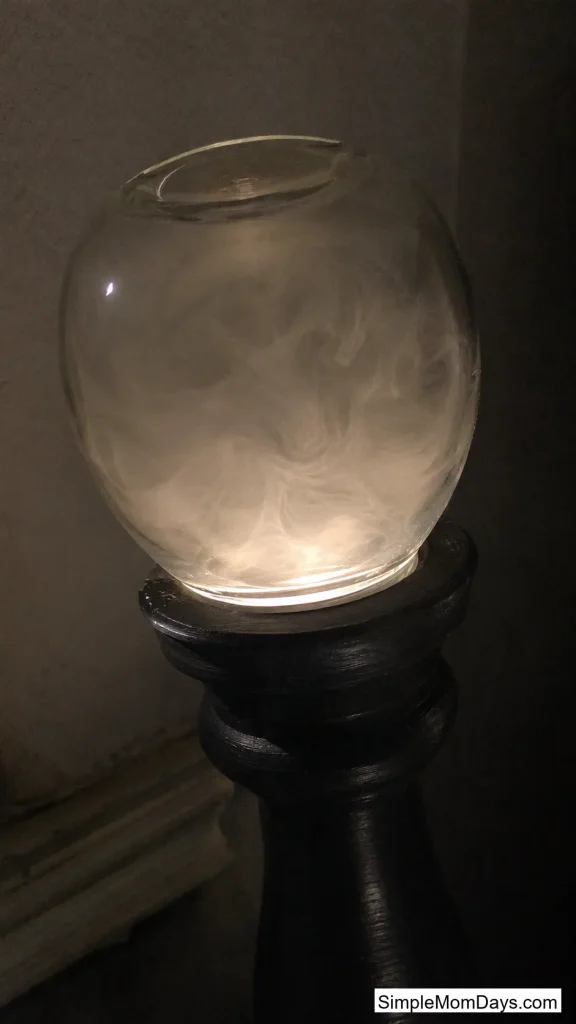
16. Mist-Filled Crystal Ball
Spray paint a candle holder base black, set a small dish of water with a floating mini humidifier disc on top, and place an upside-down clear fishbowl or glass globe over it. Turn on the humidifier and the globe fills with slow-rolling mist.
Set in a dim corner with one small light angled up from below, it looks closer to a movie prop than anything else on this list, and it’s the one item guests consistently stop to ask about.
A floating humidifier disc runs $8-10 and is reusable for years; the fishbowl or glass globe is often a thrift store find for $3-5.
No-Carve Pumpkin and Natural Touches
Not every pumpkin needs a knife. These options survive the whole month without rotting on the porch.
17. Felt Jack-o’-Lantern Face Kit
Trace a jack-o’-lantern face onto black felt with a white colored pencil, cut out the pieces, and stick them onto a faux craft-store pumpkin with removable mounting squares. Swap the face for a new expression whenever you feel like it.
Because nothing gets cut or glued permanently, the same faux pumpkin gets a new face every year, and you can switch a whole porch’s worth of expressions in ten minutes flat without buying new pumpkins.
Felt sheets run about $1 each and cover several faces; faux pumpkins are a one-time cost that pays for itself after the second Halloween.

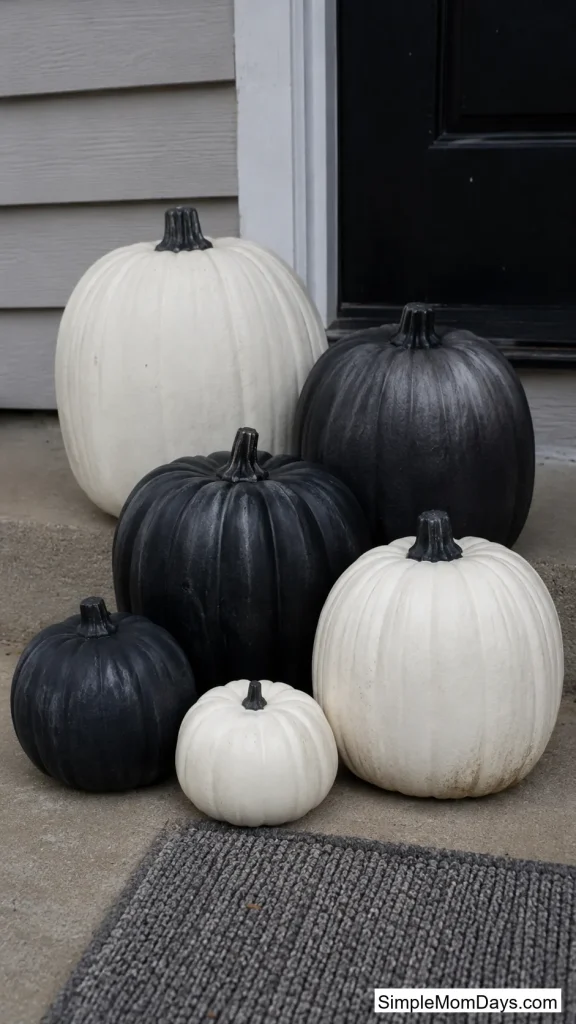
18. Black-and-White Minimalist Pumpkin Cluster
Skip orange entirely and cluster white and charcoal-painted pumpkins of different sizes together on a porch step or entry table, mixing real mini pumpkins with a couple of matte-painted foam ones.
It reads as more grown-up and less like a costume-store display, which makes it a good fit if the rest of your Halloween decor leans elegant instead of cartoonish.
Real mini white pumpkins run $2-4 each at a farm stand or grocery store, and one can of matte black or charcoal spray paint covers several foam pumpkins for the contrast pieces.
19. Blackened Branch Centerpiece
Collect a few bare branches from the yard, spray paint them matte black, and arrange them in a thrifted vase as a centerpiece — no pumpkin, no candy, just stark black branches against whatever tablecloth is underneath.
It’s the lowest-effort item on this entire list and one of the most striking, because the irregular natural shape of real branches looks intentional in a way a store-bought stem arrangement rarely does.
This costs whatever’s already in the yard for branches and one can of spray paint, so it’s close to free if there’s a tree nearby dropping limbs.

Budget Tablescape for the Snack Table
The food table gets the most eyes at any party, so a little effort here goes further than decorating a corner nobody walks past.
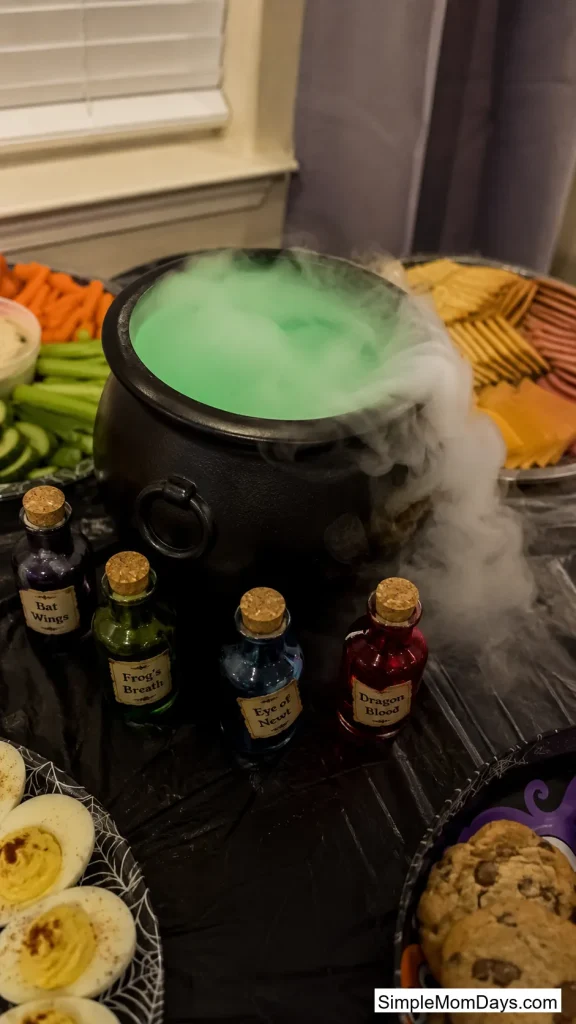
20. Witch’s Brew Cauldron Centerpiece
Set a small black cauldron or pot in the center of the snack table, fill it with green-tinted water, and add a battery-operated fogger disc for a slow bubbling mist. Ring it with a few plastic potion bottles.
It reads as the table’s focal point without competing with the actual food, since the mist stays low and doesn’t drift over nearby plates the way a full-size fog machine would.
A battery fogger disc runs $12-15 and is reusable every year; the cauldron itself is often a Halloween-section find for $5-8.
21. Mismatched Thrifted Place Settings
Layer thrifted plates in different patterns under dollar store skeleton or spider charger plates, so every place setting looks pulled together on purpose instead of matched from a single boxed set.
This works because mismatched thrifted china photographs better than a uniform plastic set — the slight variation in pattern and glaze catches light differently and reads as an actual tablescape instead of a costume-store box.
Thrifted plates run $0.50-2 each, and a stack of six place settings usually costs less than one boxed set of themed paper plates.

22. Yarn-Wrapped Balloon Pumpkin Orbs
Wrap orange yarn around a glue-coated balloon, let it dry completely, then pop the balloon inside to leave a hollow yarn orb behind. Group several different sizes on a tray as a low centerpiece.
They’re lightweight enough to nest inside each other for storage and don’t smash or crush the way foam pumpkins do, so the same set gets reused for years without replacement.
A skein of yarn and a bag of balloons together cost around $6-8 and make eight to ten orbs in an evening.

23. Labeled Witch’s Brew Jars
Fill mason jars with colored water and a glow stick, then label each one with a spooky name in chalk marker — “Toad Sweat,” “Spider Silk,” “Midnight Fog.” Line them along the table edge or a windowsill.
The labels do most of the work here; the same glowing jar reads as generic mood lighting without a name on it, and reads as a whole story once it’s labeled.
A 4-pack of glow sticks costs about $2, and mason jars are often already in the recycling bin or cost $1 each secondhand.

Cheap Curb Appeal for the Porch and Entry
First impressions happen at the door, and this is where trick-or-treaters actually spend their ten seconds looking around.
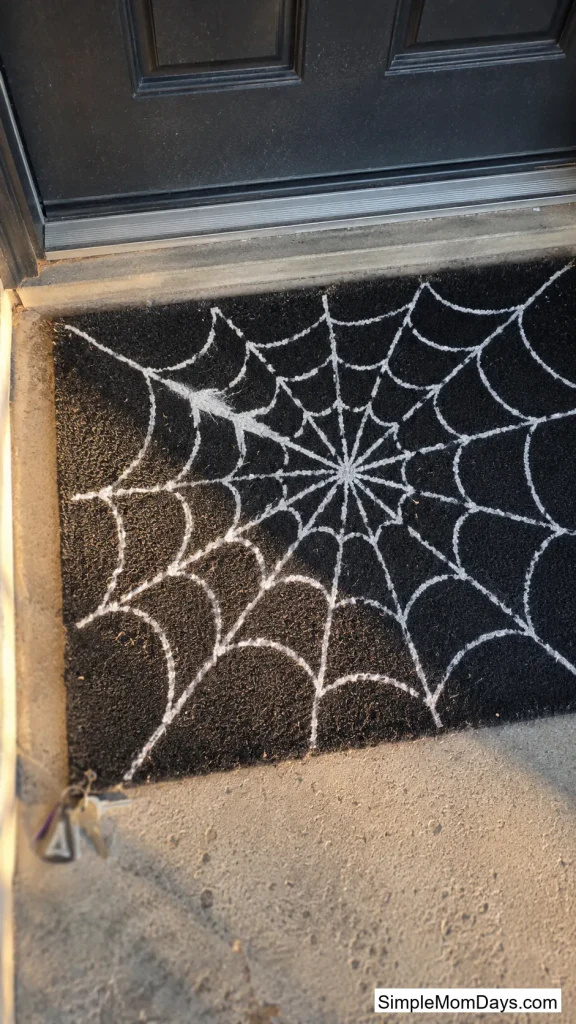
24. Painted Spiderweb Doormat
Paint a spiderweb pattern onto a plain black doormat using white fabric paint and a thin brush, working from the center out in uneven, slightly wobbly lines so it doesn’t look stamped.
A painted mat holds its shape through rain and foot traffic all season in a way a stretched plastic web across the same spot never does, since it’s not fighting wind or getting stepped through.
A plain black doormat runs $5-10 and a small bottle of fabric paint is about $3, so the whole project comes in under $15.
25. Black Plastic Tablecloth Witch Curtain
Cut black plastic tablecloths or sheeting into long strips, leaving a solid strip at the top to hang from a curtain rod or tension rod across a doorway or porch entrance, letting the cut strands hang loose and move in the wind.
Trick-or-treaters have to physically push through it to reach the door, which turns a plain doorway into a small moment of hesitation before anyone even sees the rest of the decor.
Two black plastic tablecloths cost about $2-3 total and cover a standard doorway width with strands to spare.

26. Foam Kickboard Tombstone Cemetery
Cut pool foam kickboards into tombstone shapes with a utility knife, spray paint them gray, and stake them into the front lawn with a garden stake glued to the back of each one.
Foam holds paint better than cardboard and survives light rain without going soft, so this version of a budget tombstone lasts through the whole month instead of collapsing after one wet evening.
A foam kickboard costs $3-5 and yields two or three tombstones each, so a full cemetery of eight or nine runs well under $20.

27. Illuminated Paper Lantern Ghosts
Draw simple ghost faces on white paper lanterns with a black marker, slip a small LED light inside each one, and hang them at different heights from a tree branch, shepherd’s hook, or porch overhang.
Grouped in a cluster of uneven heights, they read as a small floating crowd drifting in the yard, which photographs better after dark than almost anything else on this list.
Paper lanterns run $1-2 each in a multipack, and small LED puck lights or fairy light strands to go inside cost about $6-8 for enough to fill five or six lanterns.

Small Details That Punch Above Their Price
These last two won’t anchor a whole room, but they’re the detail a guest notices on their way to grab a drink.
28. Painted Wine Glass Witch Silhouettes
Paint a witch hat and simple silhouette onto the base of clear glasses with glass paint, using a stencil if freehand feels risky. Set them out at the drink station for guests to grab.
It turns ordinary glassware into something guests remember without any extra setup at pour time — the design is already dry and permanent, so there’s nothing to fuss with once the party starts.
Glass paint runs about $6-8 for a set of colors and covers a dozen glasses easily, especially using glasses already on hand instead of buying new ones.

29. Thrifted Velvet Runner and Vintage Frames
Use a thrifted velvet scarf or fabric remnant as a table runner instead of a paper Halloween tablecloth, and lean a couple of thrifted ornate frames — empty or holding a spooky print — against the wall behind the food table.
The texture shift from flat paper to real velvet is what separates a party-store table from one that looks styled, and it usually costs less than a themed paper tablecloth.
A velvet scarf or remnant runs $2-5 secondhand, and ornate frames are often $2-4 each at a thrift store regardless of the artwork inside them.

Final Thoughts
None of this needs to happen all at once. Pick three or four ideas from the free category to start, add a dollar store run for the small stuff, and save the thrifted upgrades for whenever you happen to pass a Goodwill before Halloween anyway.
The whole point of decorating like this is that nothing has to be perfect — a slightly crooked tombstone or a lopsided paper ghost reads as more Halloween than a store display ever does, and it costs a fraction of what that display charges.